In Lincolnshire in 2015 the local council decided to close down many of the smaller local libraries in the county, which has now meant that many people living in rural locations no longer have access to a library.
I haven’t lived in Lincolnshire for a few years now, but I have watched as this case has gone to court twice in an attempt by a group of gallant supporters to save the libraries. Ultimately the local government won and now it is the communities who are suffering.
I now live in Cornwall, and here we are facing the very same issues. So one of the first things I did when we moved here was to join the library, and I get my regular reading books from them.
What I had forgotten about was the vast array of community things that the library undertakes. Not only do I need to go to them for my recycling bins, but I can talk to them about a variety of local council issues, bus passes, council tax payments, information about the local area, these employees are a wealth of local and county wide knowledge and the best bit is that if they don’t know they find out for you.
But one thing I had completely forgotten about, until last Friday, was the huge range of non fiction books that are available from your local library. In our small library in Redruth we have sections on all manner of non fiction topics, but there are no less than five shelves of craft books, from drawing to home interiors and two more just for dress making and sewing.
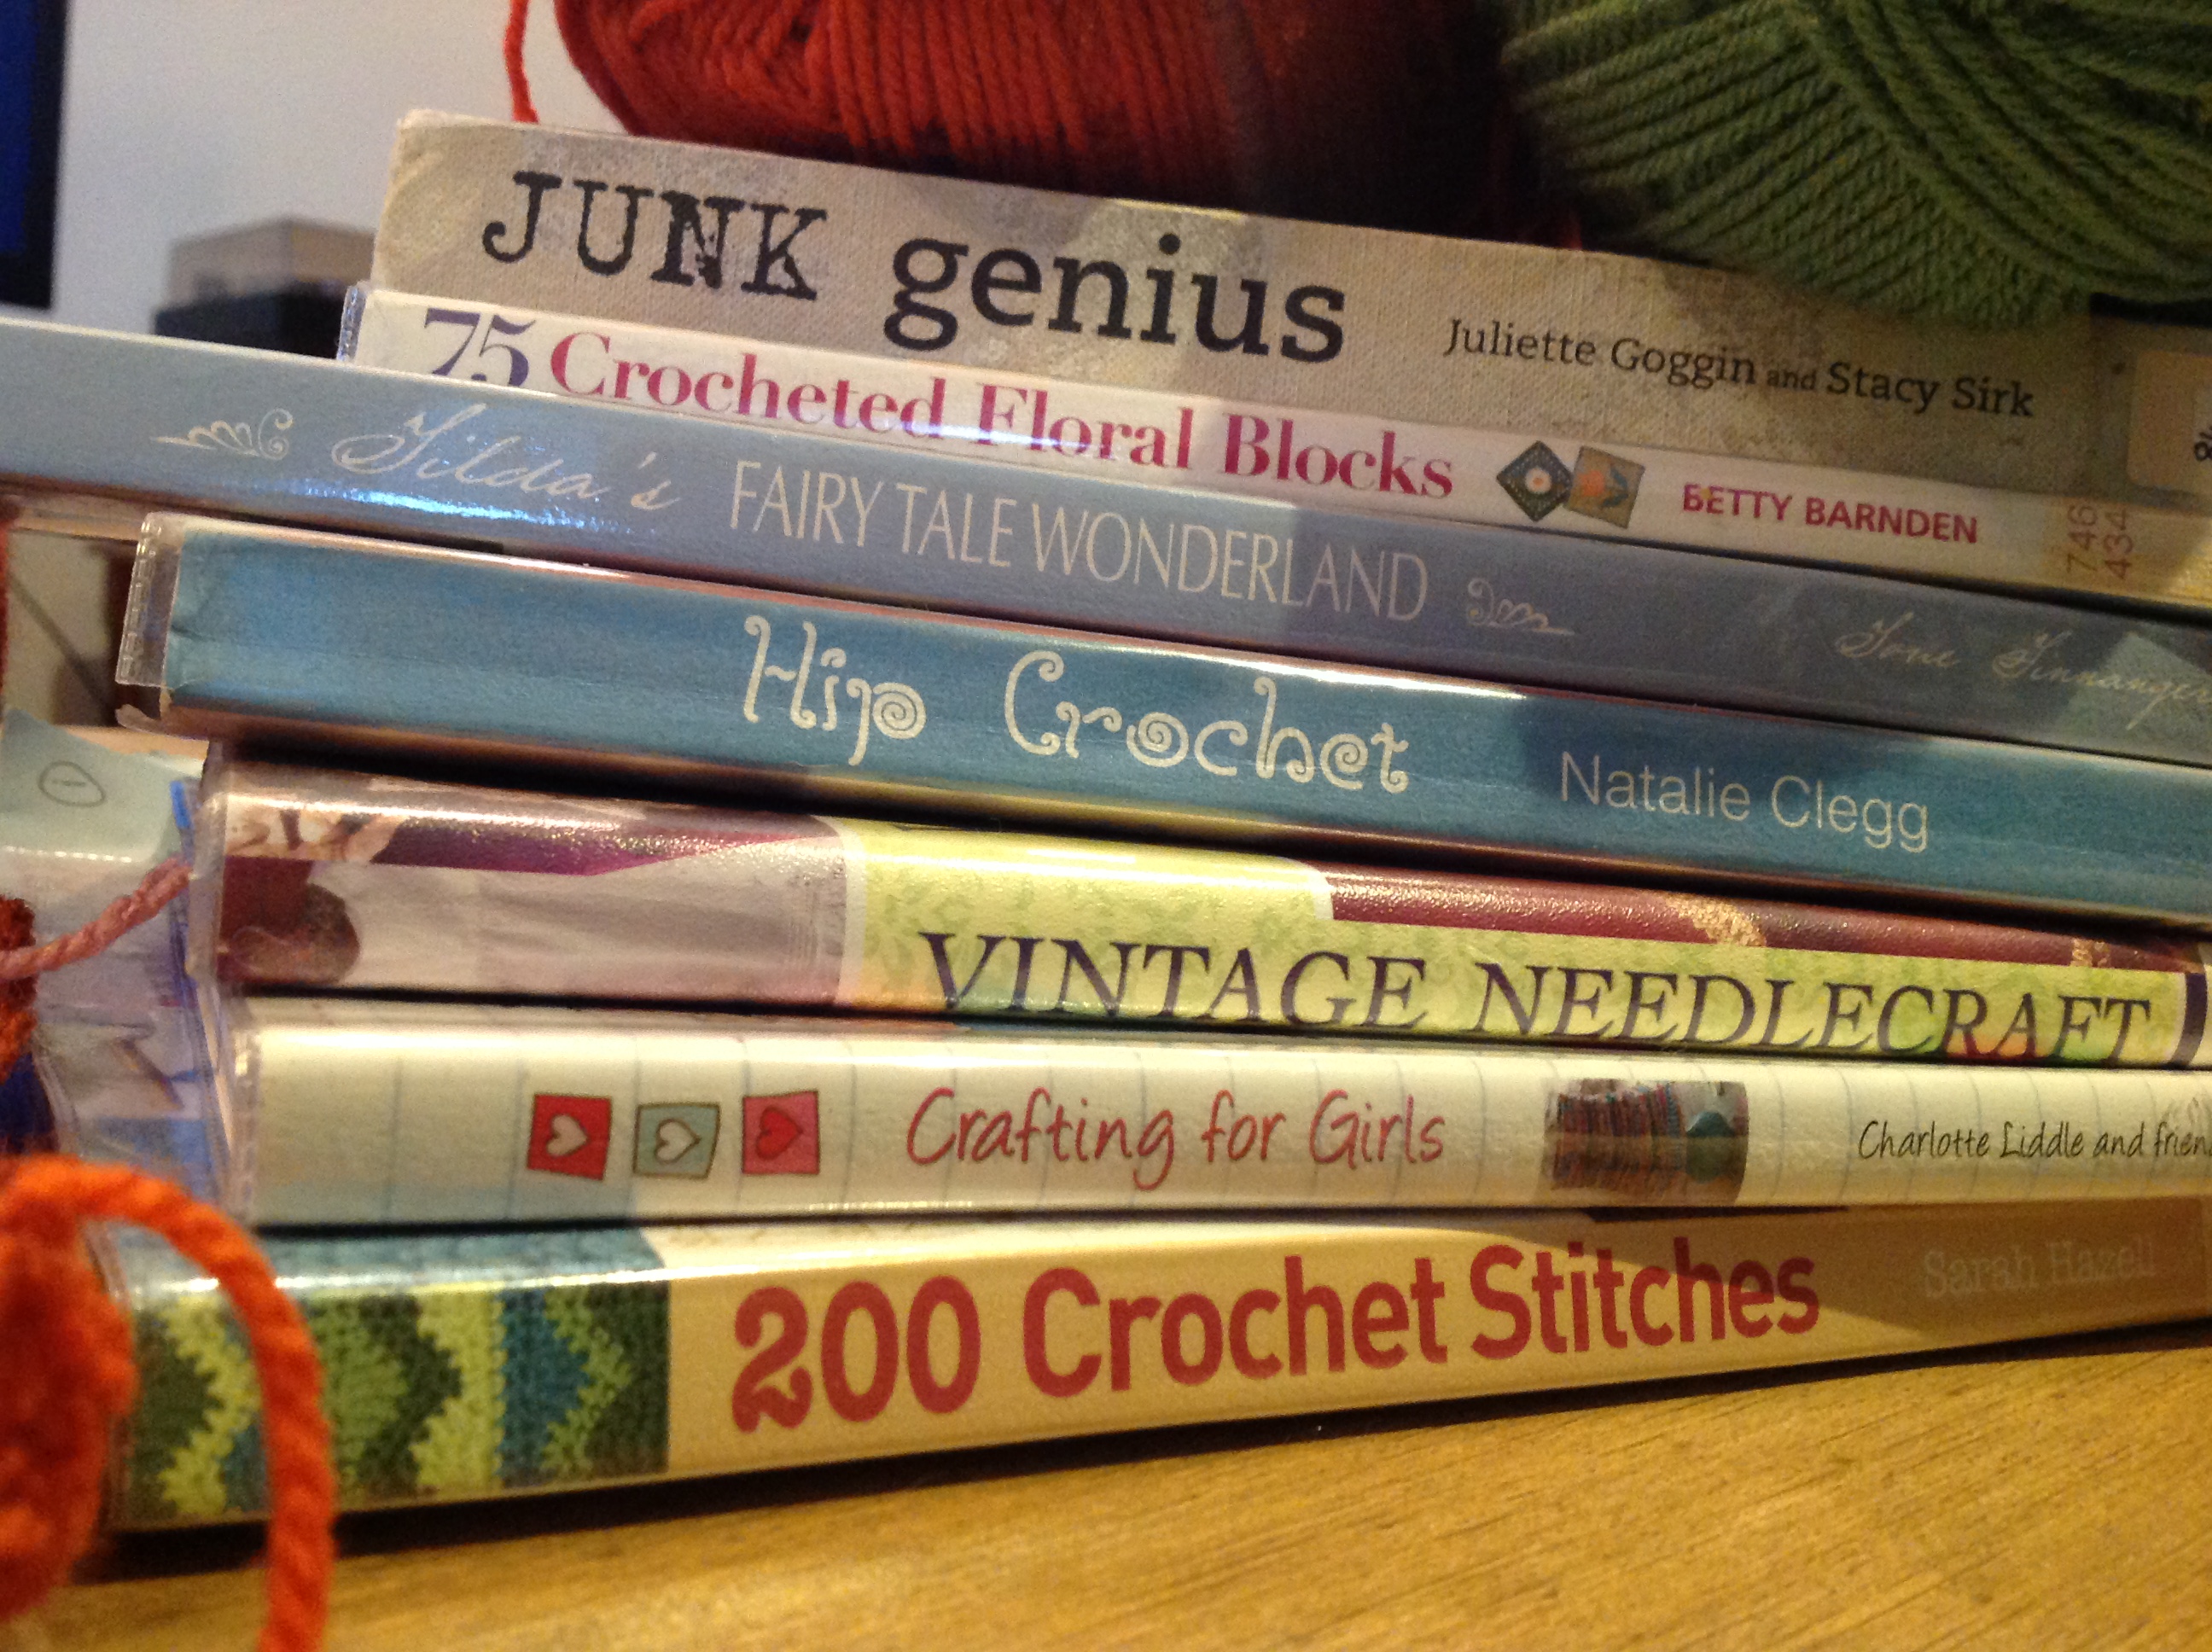
So last Friday I went and picked up seven books that looked fascinating, ranging from different crochet stitches for my current crochet project to a brilliant book about what to do with things that you might have thought of as junk. And if like me you love browsing through craft magazines and reading about new ways of doing things, and coming up with inspired ideas for your next craft project, having seven craft books to read through was the nicest afternoon, for me.
Your local library will also enable you to request books that are in other branches. All you need to do is hop online and search for a topic, book title or an author and that brings up a list for you to work from. You then select to request the book and once its arrived in your local branch you get an email to tell you.
Remember if in doubt ask the employees in the library for assistance and they will be more than happy to help.
The figures that were reported in one of the reasons for closing down the local libraries in Lincolnshire was based on the number of actual books that are borrowed from the libraries. Which is low, of course it is, with the invention of the internet you can get all you need there, and their is a decline in people reading for pleasure as our lives get busier and busier.
But how much did you spend on the last book or magazine you bought? For me I spent at least £4.99 on a magazine each month, and before I moved I would buy kindle books for about £2 or £3 a time, and I would hardly think anything of it. At the library, the books are free!! You might have to pay a small fee for reserving a book or if you don’t return your books on time, but its free to borrow books.
So if you have a library local to you, try it out, see what they have. The books might be old fashioned, but they will still have an amazing wealth of ideas inside them. If we support our libraries then maybe we can preserve them for others.
Category: Uncategorized
Marketing Your Product
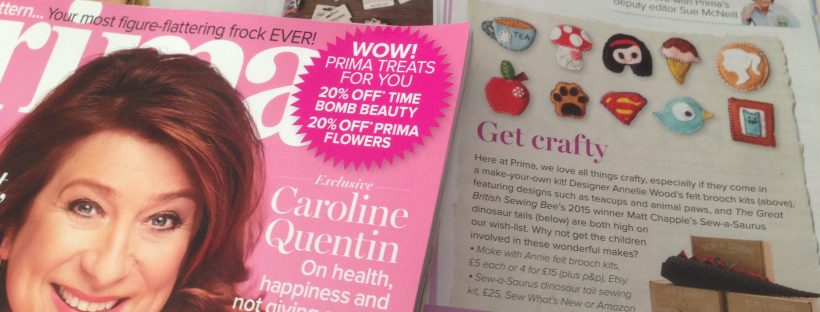
This week Make with Annie was featured in Prima Magazine. Prima Magazine is a national publication which has a readership of around 263,893 (this is taken from the sales for the first half of 2014). Which means that my product has now reached a quarter of a million people and that is more than I would ever reach through social media at this point in my business.

The Feature is seen on page 139 of the February 2016t issue
As you can imagine I am overjoyed with the feature and even after only a few days I have made four sales and gained hundreds of views, and new follows on my Etsy shop and Facebook page.
You may be wondering how I managed to get my products featured in such a well known magazine, and I am going to show you just how I did it.

Make with Annie Felt Brooch Craft Kit
Back in September 2015 I started my craft business Make with Annie, creating felt brooch kits for young and old alike to make their own brooches and have fun too. I love crafting and I thought how great would a kit be for others to have a go at making felt brooches. Once I had created my kits, and worked on my packaging I set up my etsy shop and social media pages and then I sat down and created a press release.
It was the first time I had ever attempted such a thing, so I googled it and one of the key things I found on all the different sites was this;
- Who are you
- What are you doing
- Why should they be interested
- When are you doing it
- Where can they find more information
These are really basic but you can find lots more on the different sites which I will add at the end of the article.
Once you start thinking about the answers to these questions you are starting to build your press release.
I’m going to answer them on behalf of Buster the Cat, CEO of Meow (you may remember him from an earlier post on his business logo), to show you what kind of information you want to think about putting in.
- Who: Meow! is a new small craft business making handmade bow ties for cats and dogs
- What are you doing: We are designing and creating bespoke bow ties for the animals in your life
- Why should they be interested: Not only do the bowties make your animal look stylish and cool they are also functioning as a collar for you to add their ID tags
- When are you doing it: Meow! is launching its online store on Saturday 9th January 2016 at 9am
- Where can they find more information: Links to the website, etsy store, Facebook page, instagram, twitter etc…….
Now you have your outline its time to start making it stand out.
You want to make sure that your press release matches your business and your products, so if your making and selling handbags, make sure that the theme reflects this. If you google Press Release, you will see lots of images of wordy documents, and that is fine. This is what is expected of a press release and if thats your style then go for it. But don’t be afraid to make your press release stand out, be colourful and bright, add lots of pictures of your products and designs and it can be more than one page if you want it to be.
Here is a sample of the press release for Make with Annie and for Meow!;
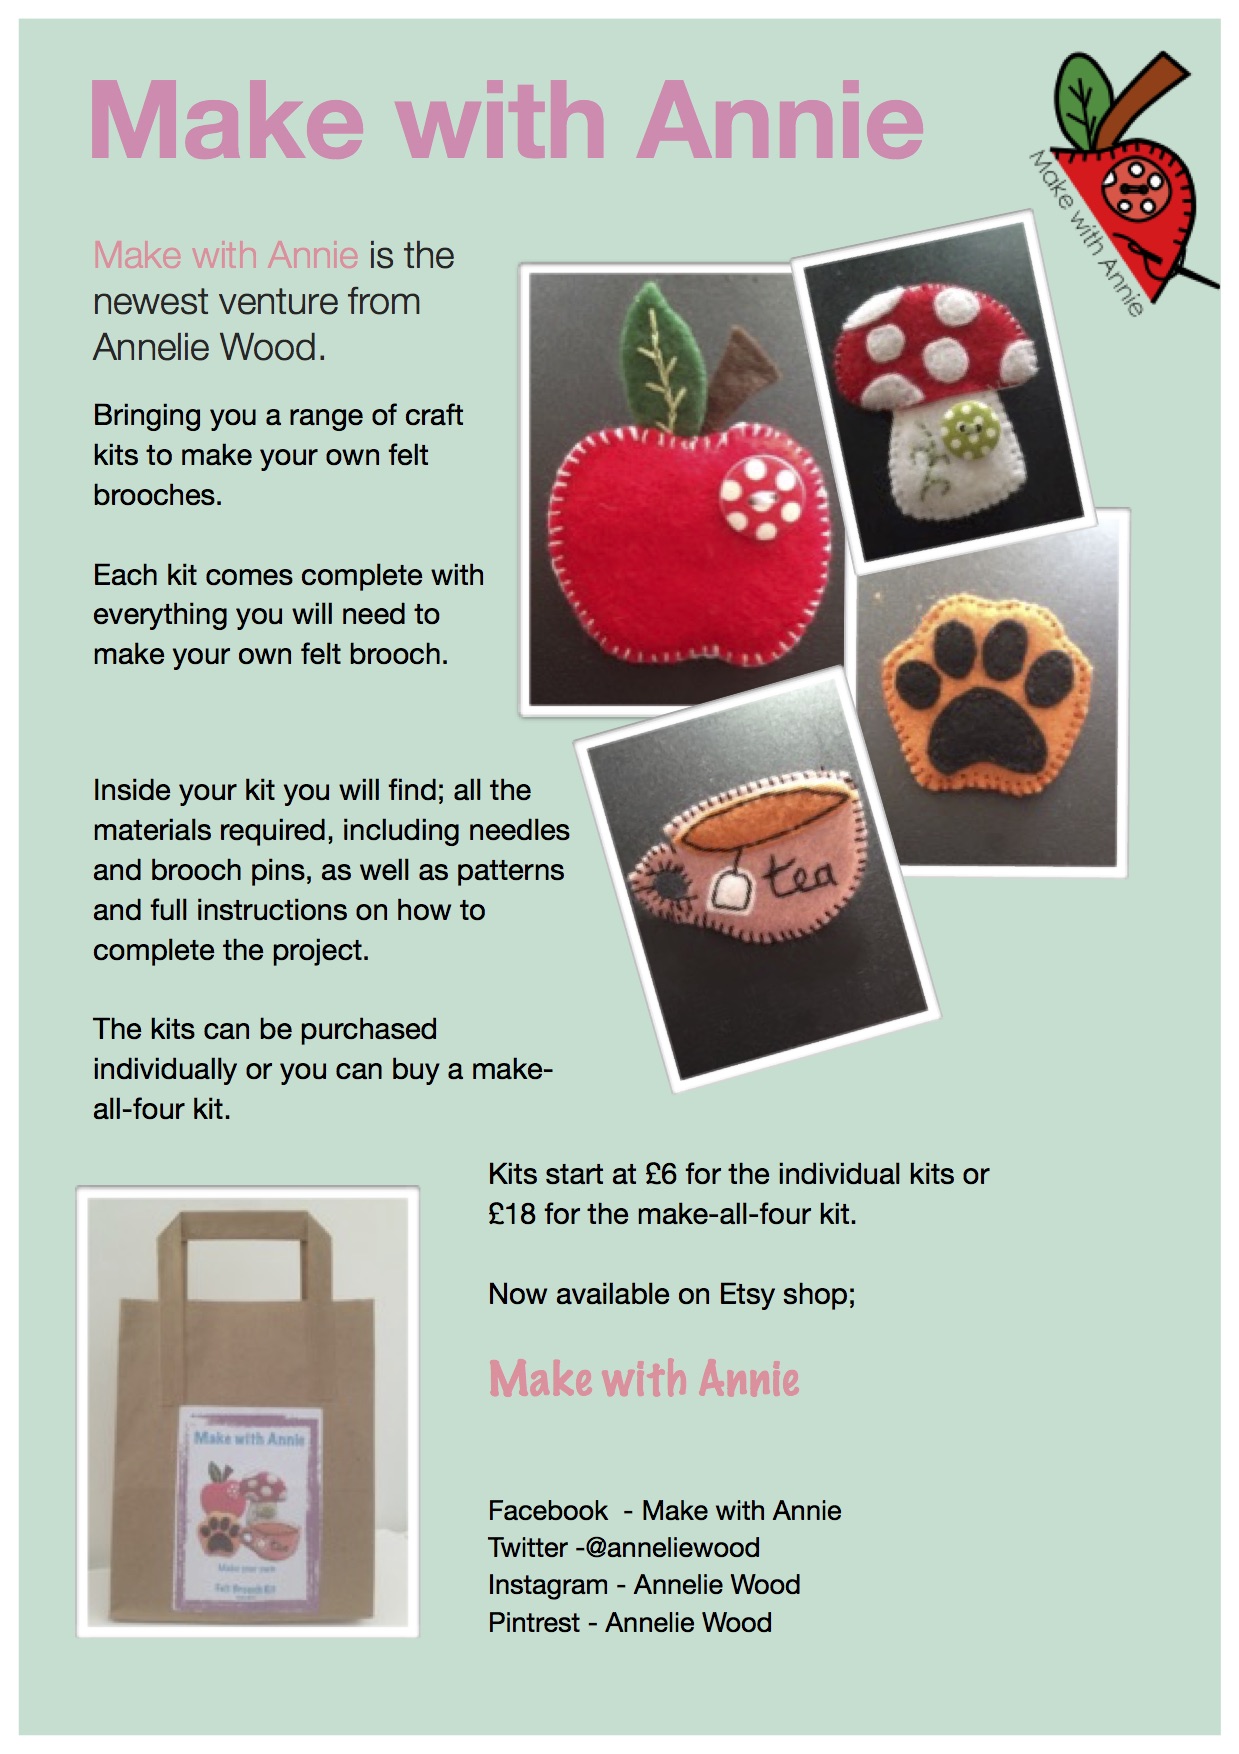
Make with Annie Press Release
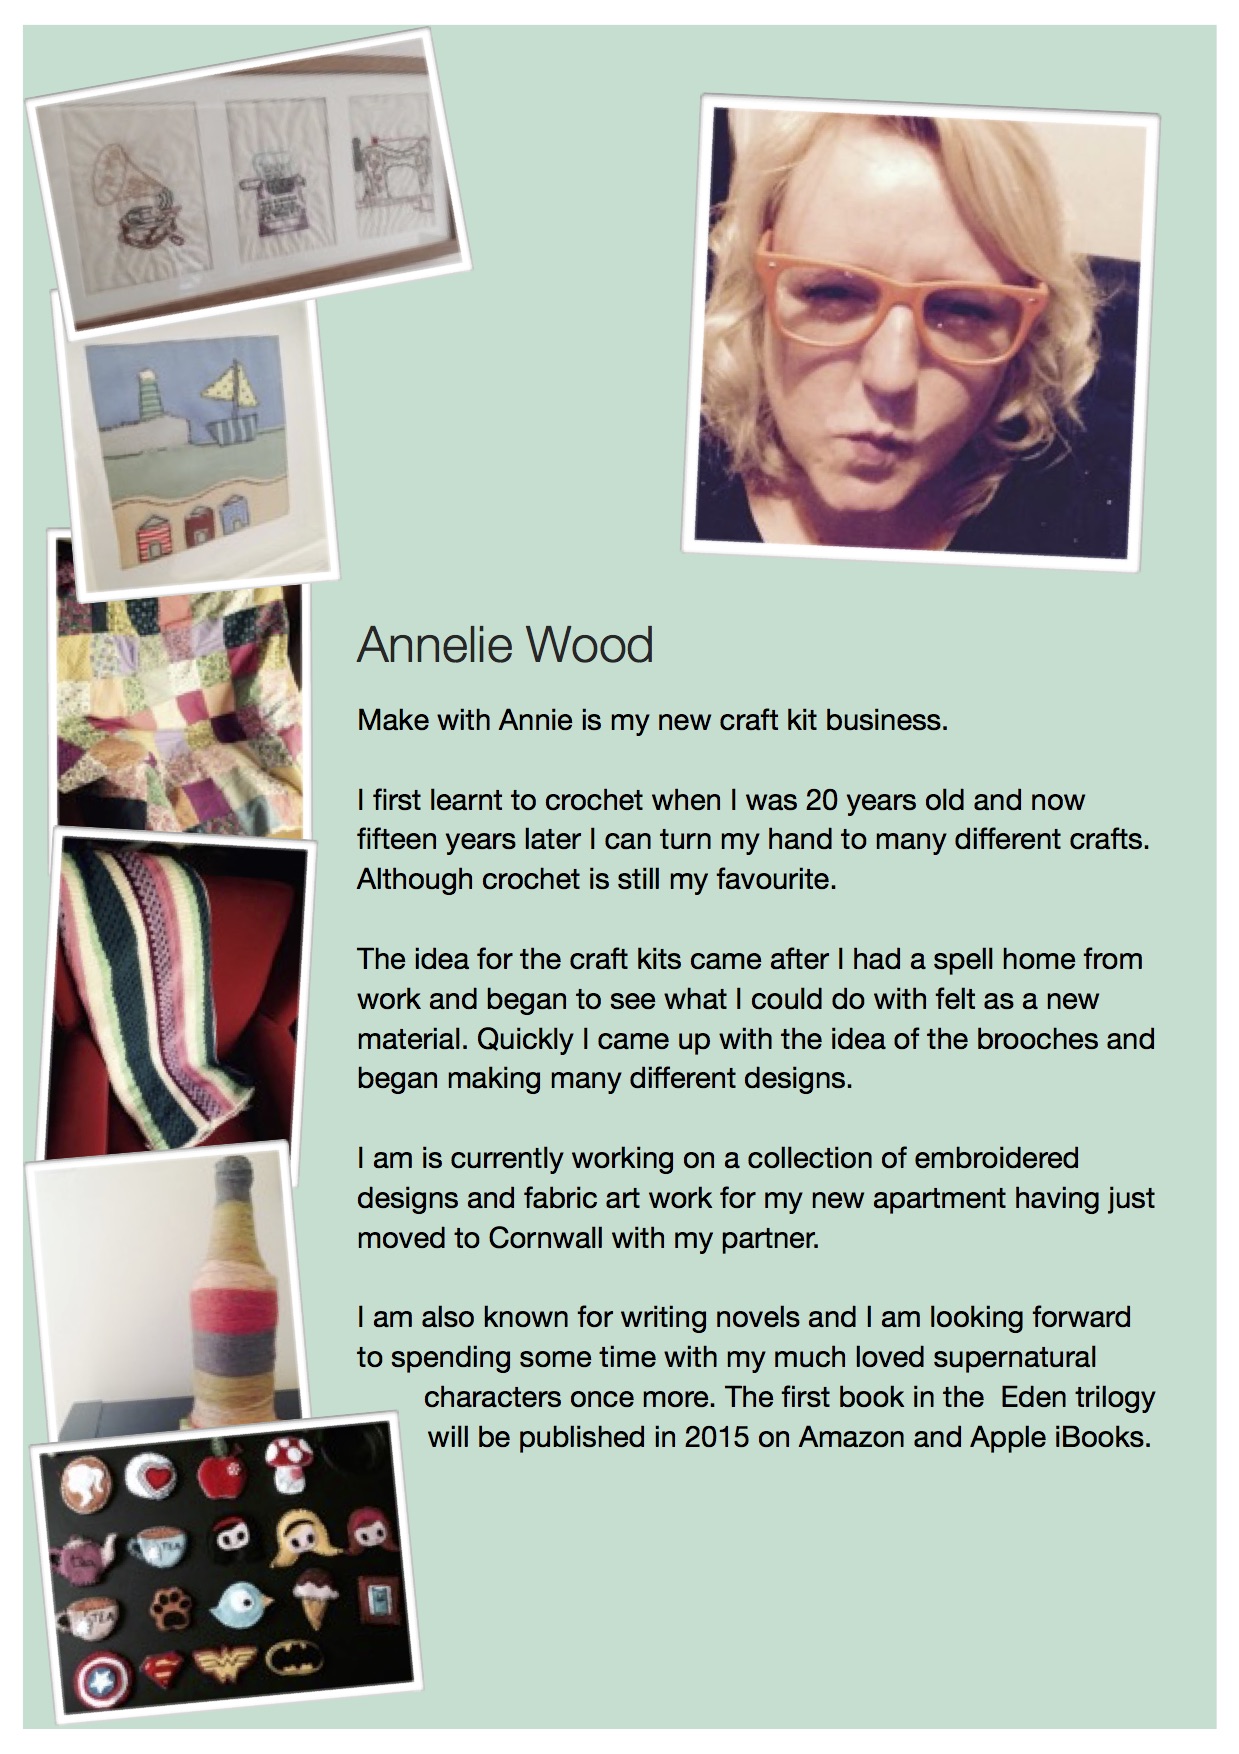
Make with Annie Press Release P2
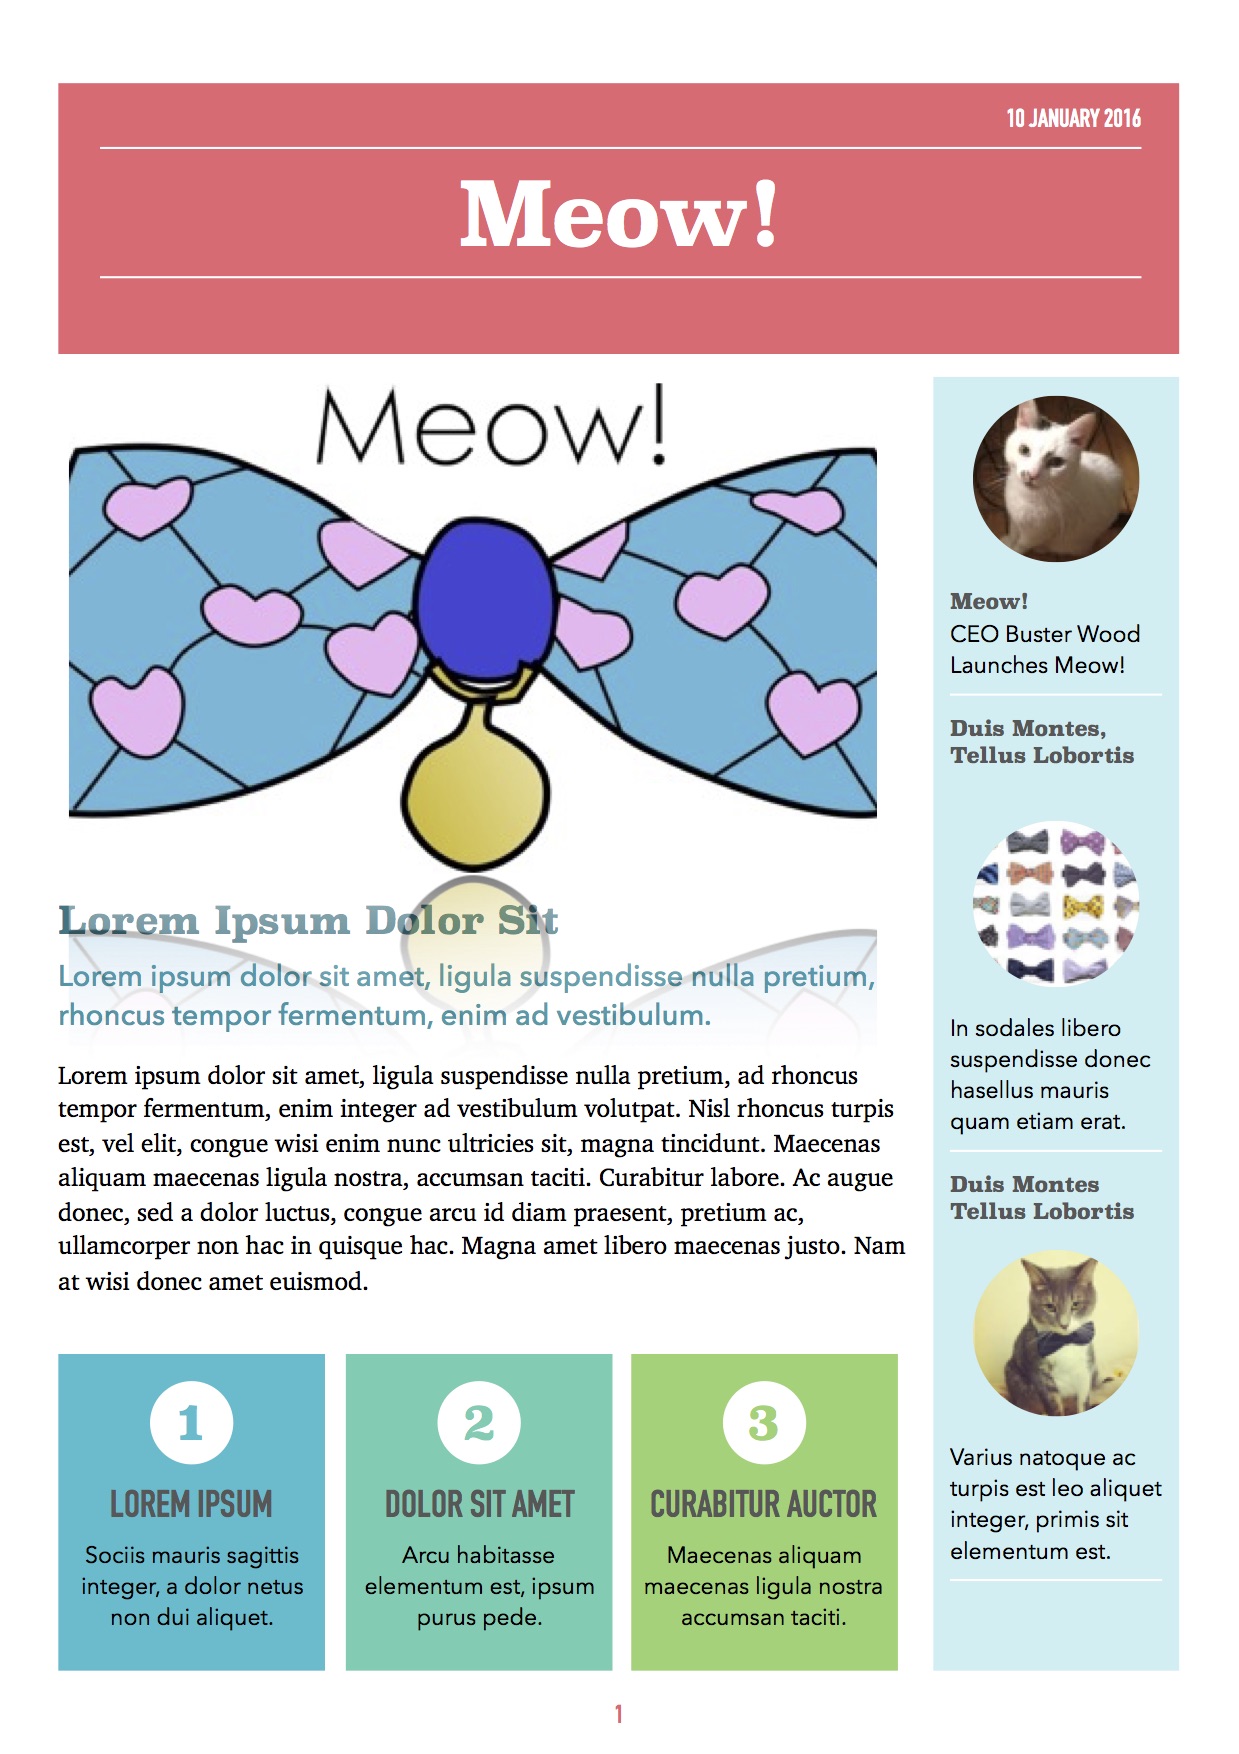
Meow! Sample Press Release
You can see that I have added extra pictures of craft products I make as well as a picture of myself from my Etsy store and my business logo. I have tried to ensure that I caught the eye of the person opening the attachment.
Buster has created an informative but yet fun looking press release for Mewo! in the style of a newsletter.
Play around with your press release but make sure that it shows the reader who you are as a business.
Once you have your press release and your pleased with it, you need to find as many different publications as you can to send it to. Make sure that the publications are relevant, for example if you make bow ties for cats and dogs you would do well to send it to animal lover magazines, but perhaps not to tool buying magazines. You do need to send it to a lot of different people, I sent mine out to over fifty different publications, bloggers and writers and so far have only been featured in Prima Magazine, because your product might not be what they are looking for, or they might miss your email believing it to be spam, but you just never know what might come from it.
Give it a go! But one thing to remember is that if you do get a little success to ensure that you make the most of it. Since the feature has been published I have thanked the magazine publicly through my Instagram, Facebook and twitter account, I have shared my own posts on social media and tried to use the momentum to carry the feature through to my etsy shop and convert it into a sale. It takes some time to market your product, but if you want to make your business and products a success then you have to put that time in, as nothing happens all by itself
Links to useful resources:
Crochet Blankets: the January Craft-Along
Over the next twelve months we are going to start a crafting journey together and each month will cover a different theme.
To kick off the new year we are starting with Crochet Blankets, the perfect task to not only keep you occupied on dark nights but also keeps you warm while to make them.
I first learned to crochet when I was seventeen years old. My mother taught me a basic granny square pattern and then left me alone with a bag of bits of wool and I made my first granny square crochet blanket. I remember laying out the hundreds of squares on the floor and arranging them in a pattern before i sewed them together. It was the first time I hand crafted anything. And I donated this blanket to Oxfam. Since that first blanket I must have crochet at least thirty more blankets. Some still using the simple granny square technique, others in stripes or large squares, circles and zig zag stripes to name just a few. And of all the blankets I have made I have only kept one (because my boyfriend likes it) I don’t need to have lots of blankets in my house to keep me warm I make them because its relaxing.
Throughout this article I am going to explore some of the crochet techniques I have used in the past and show you some of my favourite crocheters Facebook or Instagram pages, and there are some fabulous people working out there to inspire you.
Before we get started if you are not familiar with crochet this is a great link to help teach yourself the basics.
Granny Squares
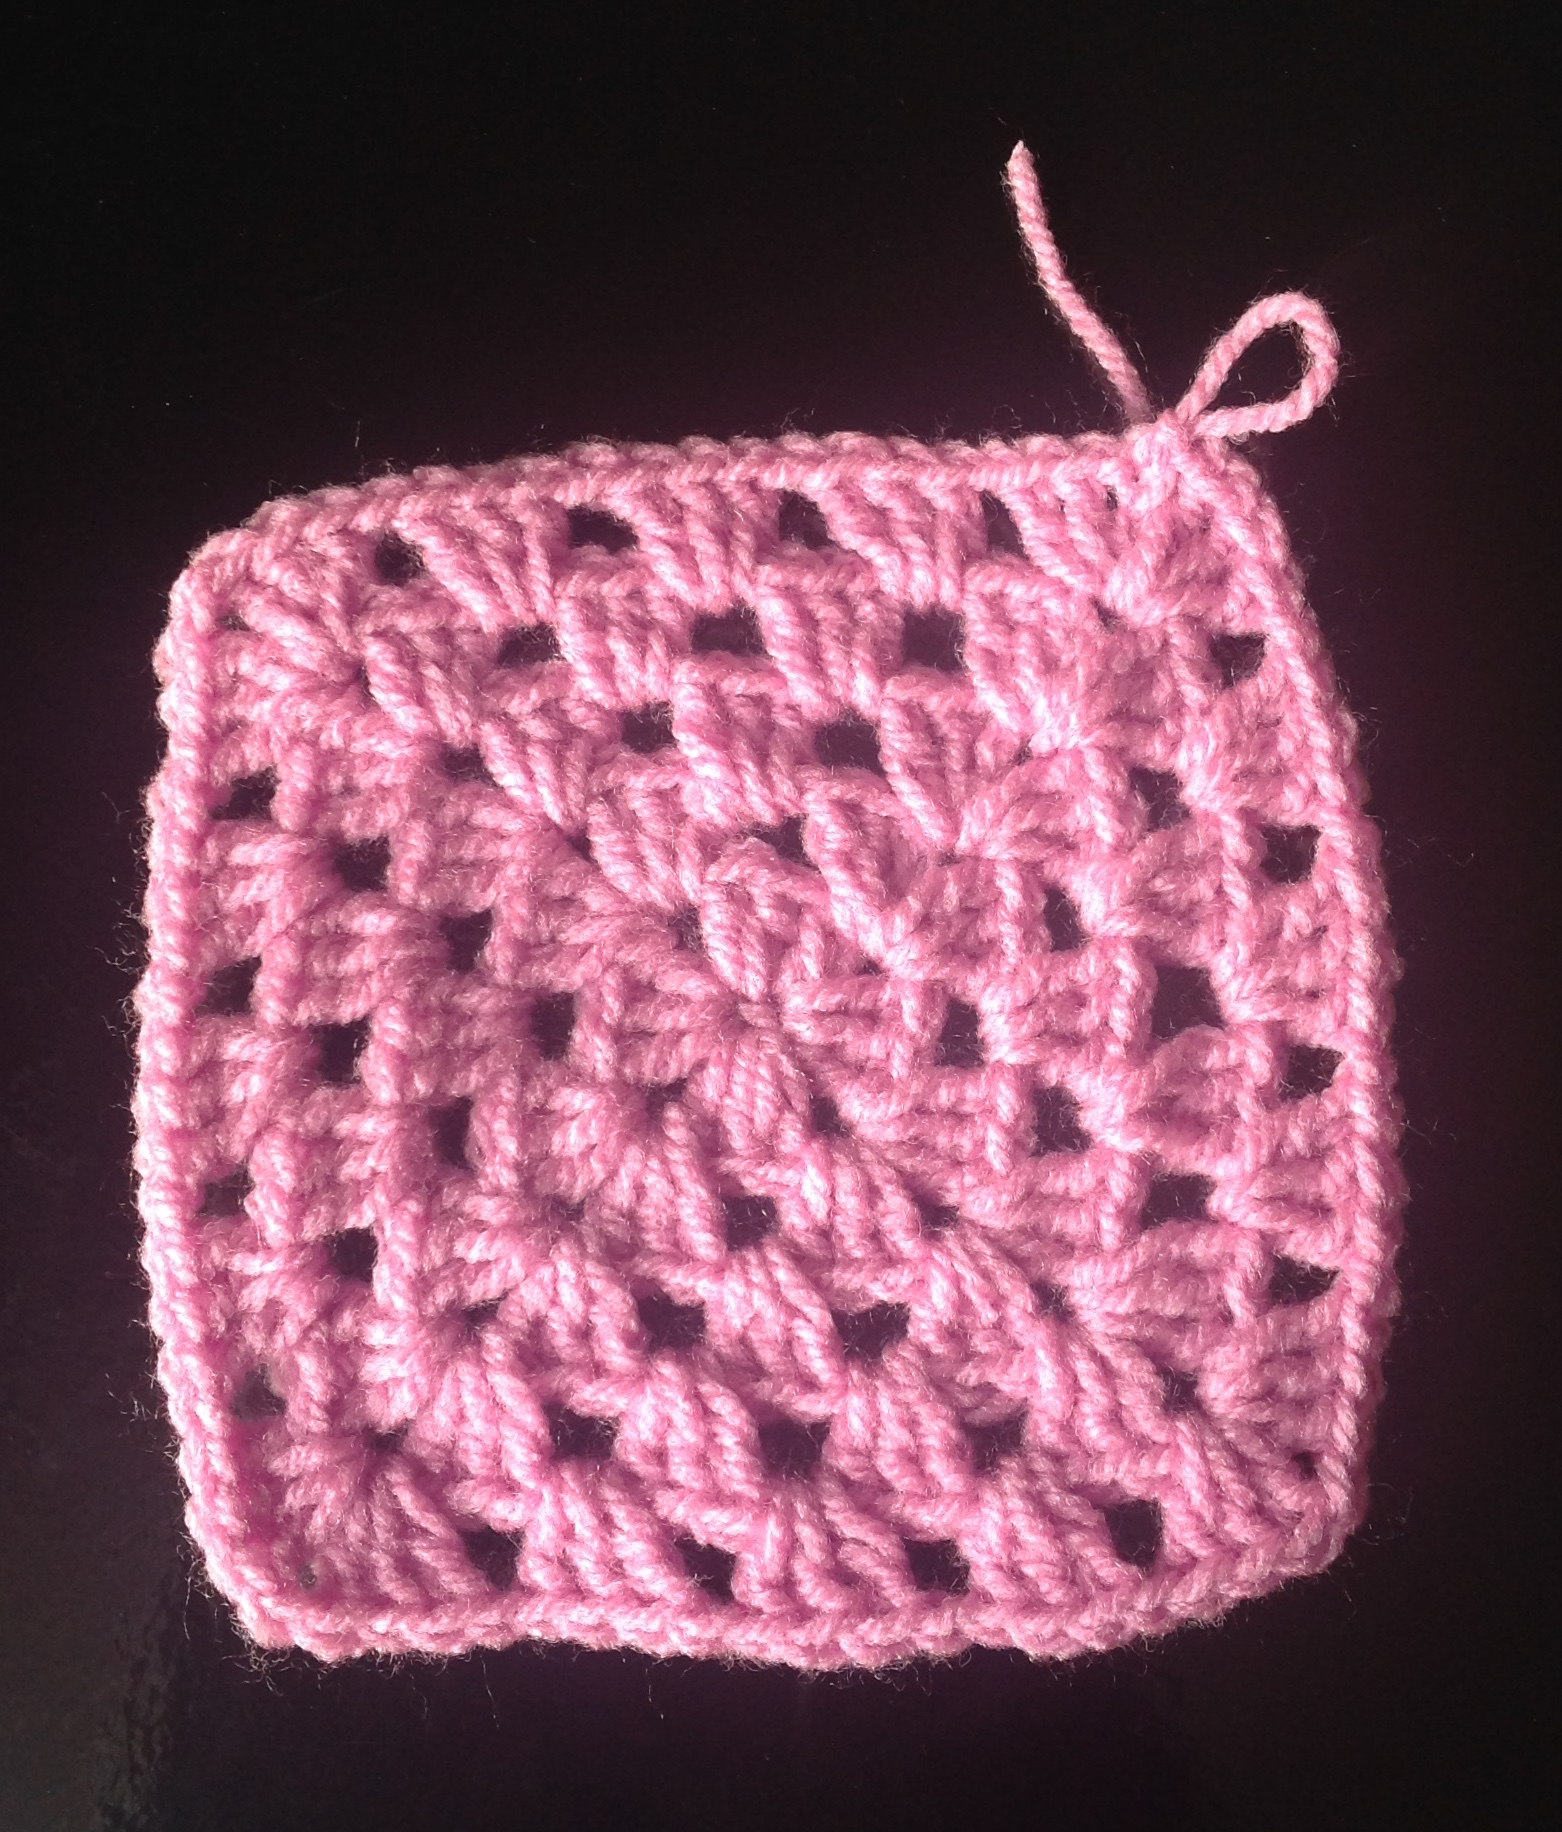
Granny Square
This is the pattern that most people will learn first, its worked in the round and contains a simple repetition of three trbl and a slst, (thats abbreviation of treble and slip stitch). The pattern can be worked in one colour or you can change colour as many times as you wish and the size of your granny square is totally up to you. For a gage though, if I was making a blanket from squares crochet in 5 rounds I would need at least a 12 x 12 blanket to make it a large size which is 124 squares.
The Blogger Little Tin Bird has a wonderful pattern on her Blog which not only can you use to teach yourself crochet, but she has created a wonderfully bright a sunny granny square blanket.
Once you have master the granny square you can do large granny squares or use different stitches to create different looks for your granny squares. One popular technique is to create block colour by using single trbl stitches, as seen in Attic 24‘s work.
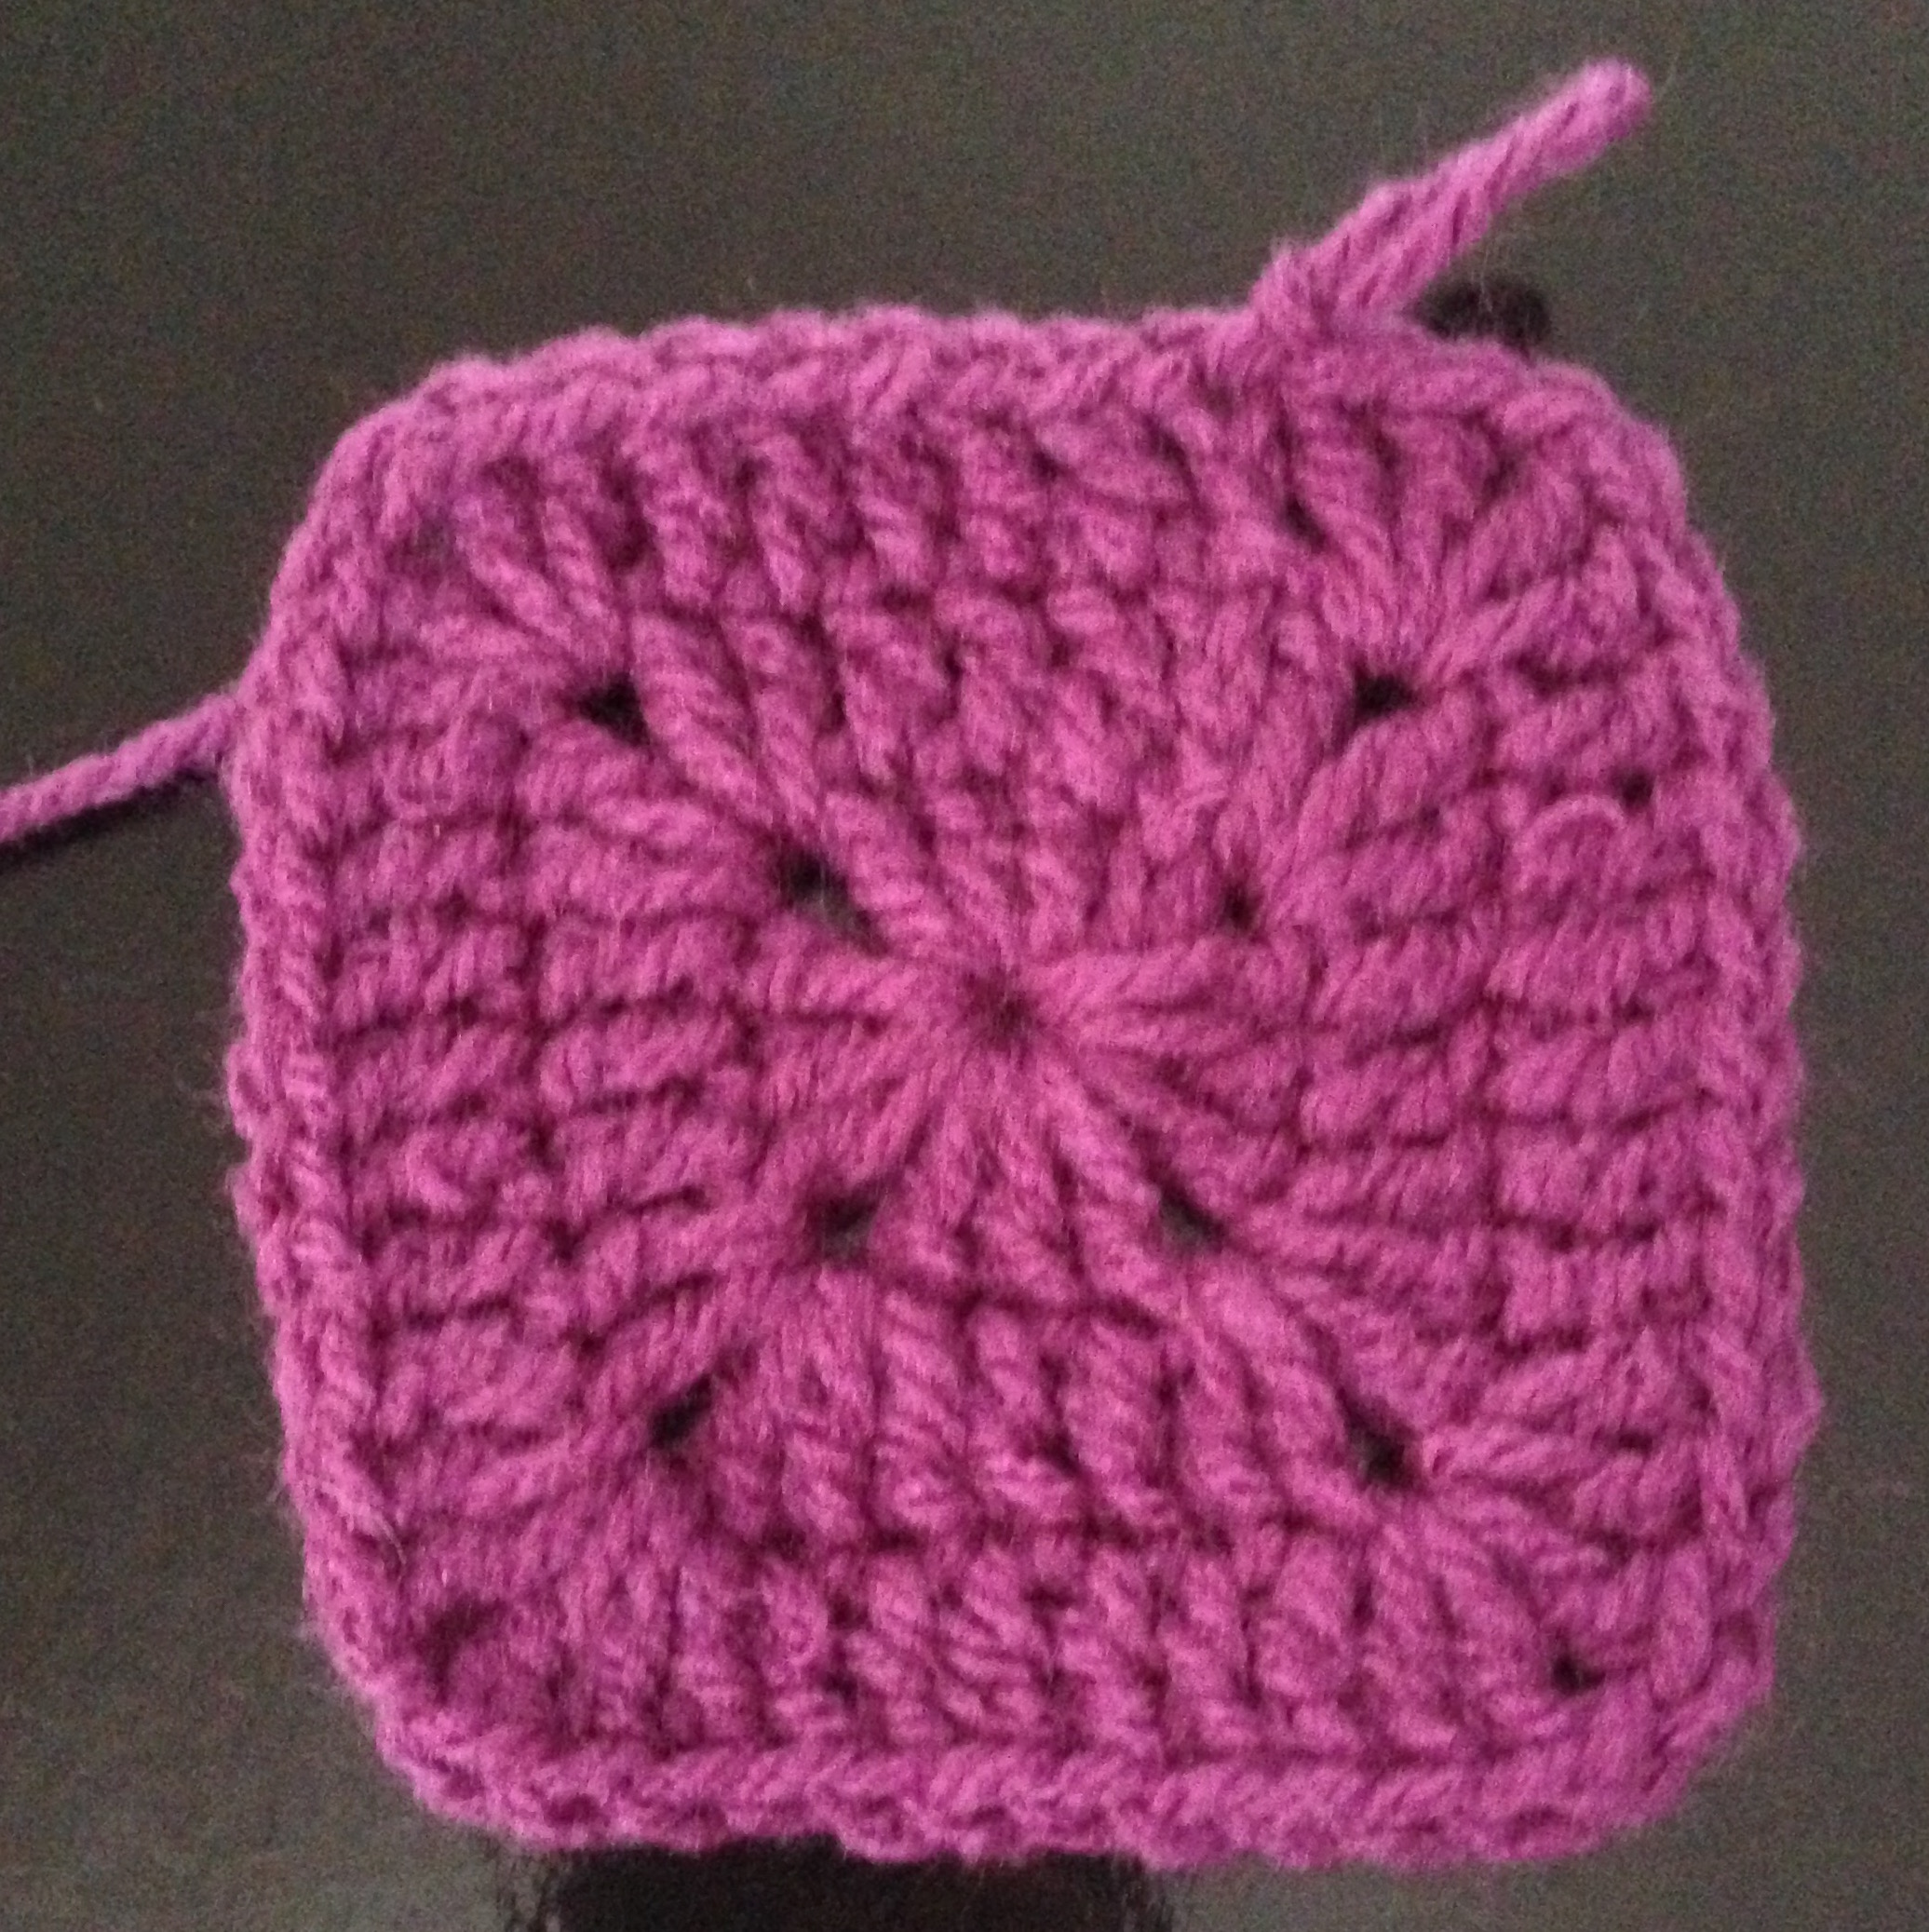
Single trbl granny square
Once you have made your square you can attach them to one another either by sewing them with a wool darning needle and using an invisible stitch or by crocheting them together with single crochet stitches. Either way works, its just about which look you prefer. The crochet method leaves a raised bump on one side of your blanket, this is the method I use for all my blankets and I think it adds to the charm.
Stripes

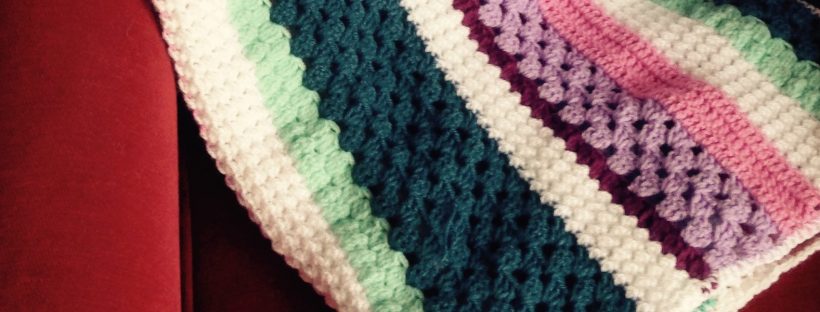
Straight stitch row blanket sample
Crochet in rows is even more simple than creating squares, once you know how to create a trbl stitch you can create this blanket. You start by creating many chains on your hook. For a gage if you were using a six 4mm hook and some basic double knit wool you might want to do anywhere between 150 and 200 ch. Each ch will become a stitch and bear in mind when deciding on how wide to create your blanket that the size become slightly wider as you work due to the tension you work with.
Once you have created your chains you then start working your trbl stitches into each of the ch, starting with the third ch from the hook, work along the row of stitches and when you get to your las stitch, make a little ch and turn your work.
Attic 24 has some inspired crochet ideas, and one project she has undertaken on her blog is to create a crochet-along blog, where she has made a striped blanked using the granny square technique in stripes. Her blog and Instagram account it a treasure of yummyness.
Zig Zag/Ripple

The cat wrapped up in a zig zag blanket
Once you have mastered making blankets in rows rather than squares you can have a look at zig zag patterns.
There are two different way to create a zig zag blanket, but bother are created with rows rather than squares. You can either create the blanket using the straight stitch or the granny stitch. There are patterns for both and both look equally effective.The fabulous The Stitching Mommy has a wonderful pattern on her blog for creating the straight stitch blanket, but if you want to make the granny version, then check out this brilliant and easy to follow you tube video from Bella Coco below.
[youtube https://www.youtube.com/watch?v=8k5evNaAjSE]
Crochet Blanket Inspiration
Some of my favourite places to go to gather inspiration for new projects is other crafters websites or their Instagram accounts. So here is a list and links to a few of my favourite;
- Lazy Daisy Jones : check out the fabulous Pic and Mix blanket.
- redagape_styleanddesign: Creator Mandy O’Sullivan has some wonderful creations.
- Poppyandbliss: Michelle Robinson delights with her Instagram account
- Crochetgirl99: One of my first crochet crushes on Instagram
- Attic 24: Not only does she make the most wonderful sunshine blankets but the wreaths are pieces of artwork.
- Mollie Makes: For more inspiration on what to do with those granny squares.
Enjoy making your blankets and share your designs with us on our Facebook page.
Creating a Logo for Your Business
How to create a logo for your small business
When I first looked at using a piece of graphics software to create a logo I was filled with that feeling of not having any form of a clue what I was doing. I am not a graphic designer, and I do not have the ability to draw. But with a little patience (mostly from my wonderful other half) I managed to create the logo for my craft business.
Make with Annie’s logo
I want to share with you how I did it and in the process guide you through how to create your very own simple logo.
For the purposes of this article my cat Buster has created a brand new craft business called Meow! Where he is selling bowties for cats and dogs.

Buster: CEO at Meow!
In order to create a logo that looks professional you will need to be able to use an easy and free graphics package such as Inkscape. Although initially to the untrained this looks really complicated I am going to show you how to you use it.
Firstly make sure that you download the correct version for the computer you are using, I have a mac book so I downloaded the MacOS version. Then follow their instructions until the package is downloaded onto your computer.
Inkscape logo
Once download is complete you can open up inkscape and you will be shown your first blank project. The first thing I do now is to name my project, so I shall ‘save as’ the file and call it Meow logo and click save.

A blank workbook in Inkscape
On the right of the screen you will see a tab which says Layers, click on this. Layers enables you to import a photo, or a picture and create a virtual layer over the top that you can draw on, a bit like tracing paper, and then when you are done with your drawing you can export only the new drawing and leave the old picture behind.
So you are going to add another layer by clicking on the plus sign.
You can at any time rename the layers as you would rename a file by double clicking on the words Layer 1.
Now its time to think about what image you want to use to create your logo. Buster the cat thinks that his logo should be of a bowtie, as that is what he is making. So you can either take a picture of one of your bow ties or you can take a drawing of a bow tie and scan it into your computer. For Meow! we are going to take one of Busters photos of the bowties and use that to create the logo.
Once your picture is saved into your computer you are ready to import it into inkscape. You must ensure that you are still in the first layer so just click onto Layer 1 and then click on File and then Import and then you will be asked to select your file. Once you have selected your picture double click on it and respond with Ok to the dialogue box that will appear.
Your image will appear on your inkscape page. The page you can see on inkscape is A4 sized which can help to scale your work. But for now your just looking at your picture. You will that there are lots of arrows around the image which you can use to re size it, however ensure that you lock the image before you do this by clicking on the lock symbol in the tool bar. Otherwise your image may change shape. Often when importing things into Inkscape they are imported very large and you might want to make them a little smaller to get your scale right.
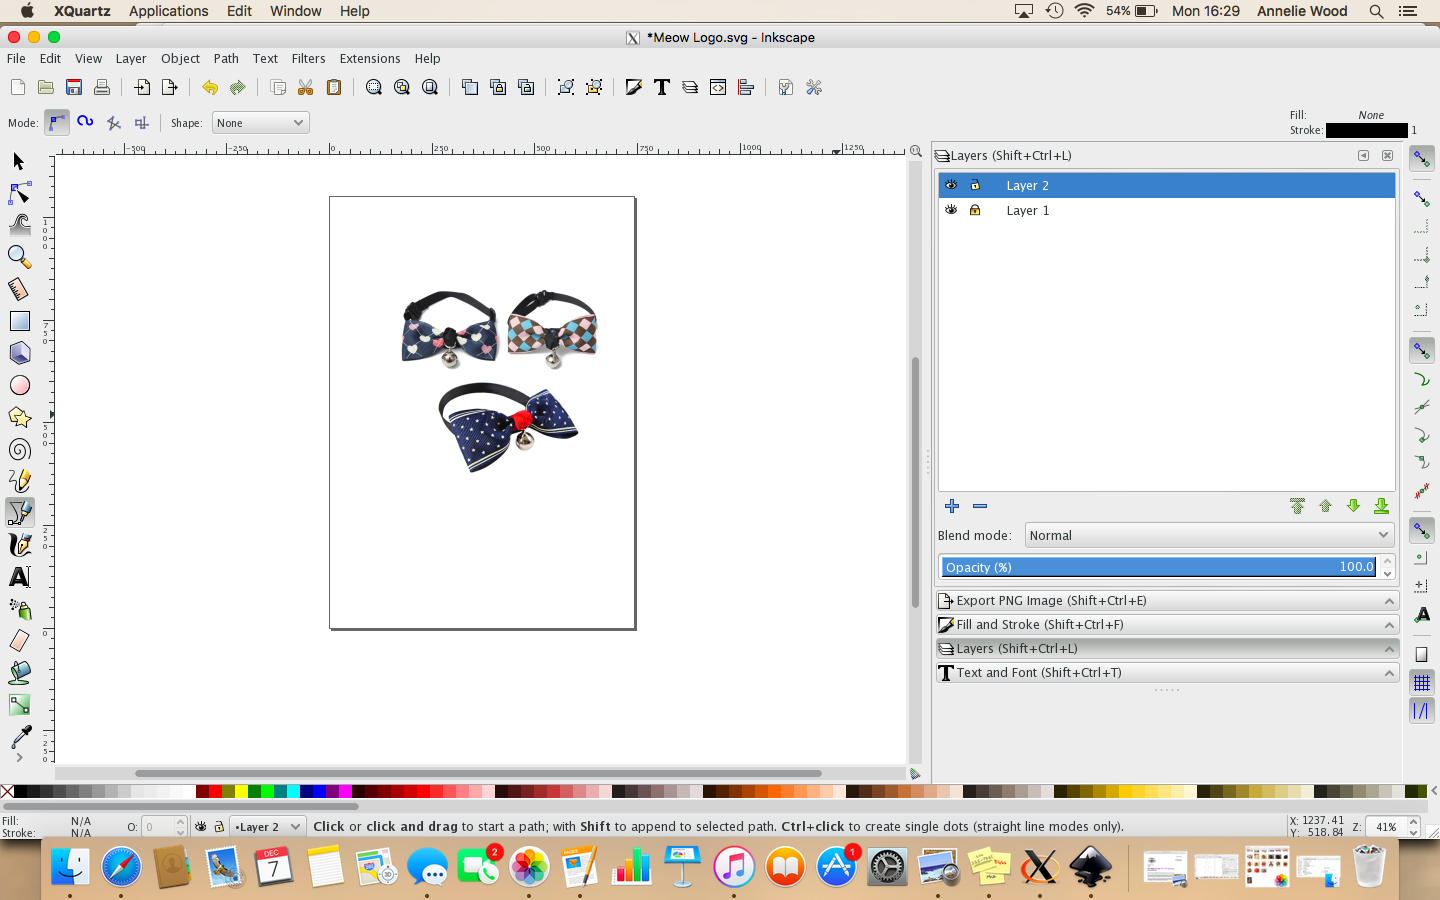
Your original image imported into Inkscape
To Draw over the top of your picture and create the professional look you are after you need to click onto Layer 2 and lock Layer 1 with by clicking on the padlock next to the words in the layers tab on the right.
Now your in Layer 2 you can use the tools on the left to drawer over the top and create an entirely new picture.
To make this logo I am going to draw over the top of one of the facing bowties, and to do this I shall use the tool which comes up with “Draw Bezier curves and straight lines” when you hover over it. It looks like a fine nib pen drawing a curve with a straight line at the top.
What this tool does is allow you to create a group of straight lines with points in between, so you click on your picture where you wish to start and then click again where you want the curve to be and then again at the next curve and so on until you have traced around the whole picture. Once you meet your first click the sequence is complete. Try it and play around until you find your feet with this.
What you end up with looks something like this;
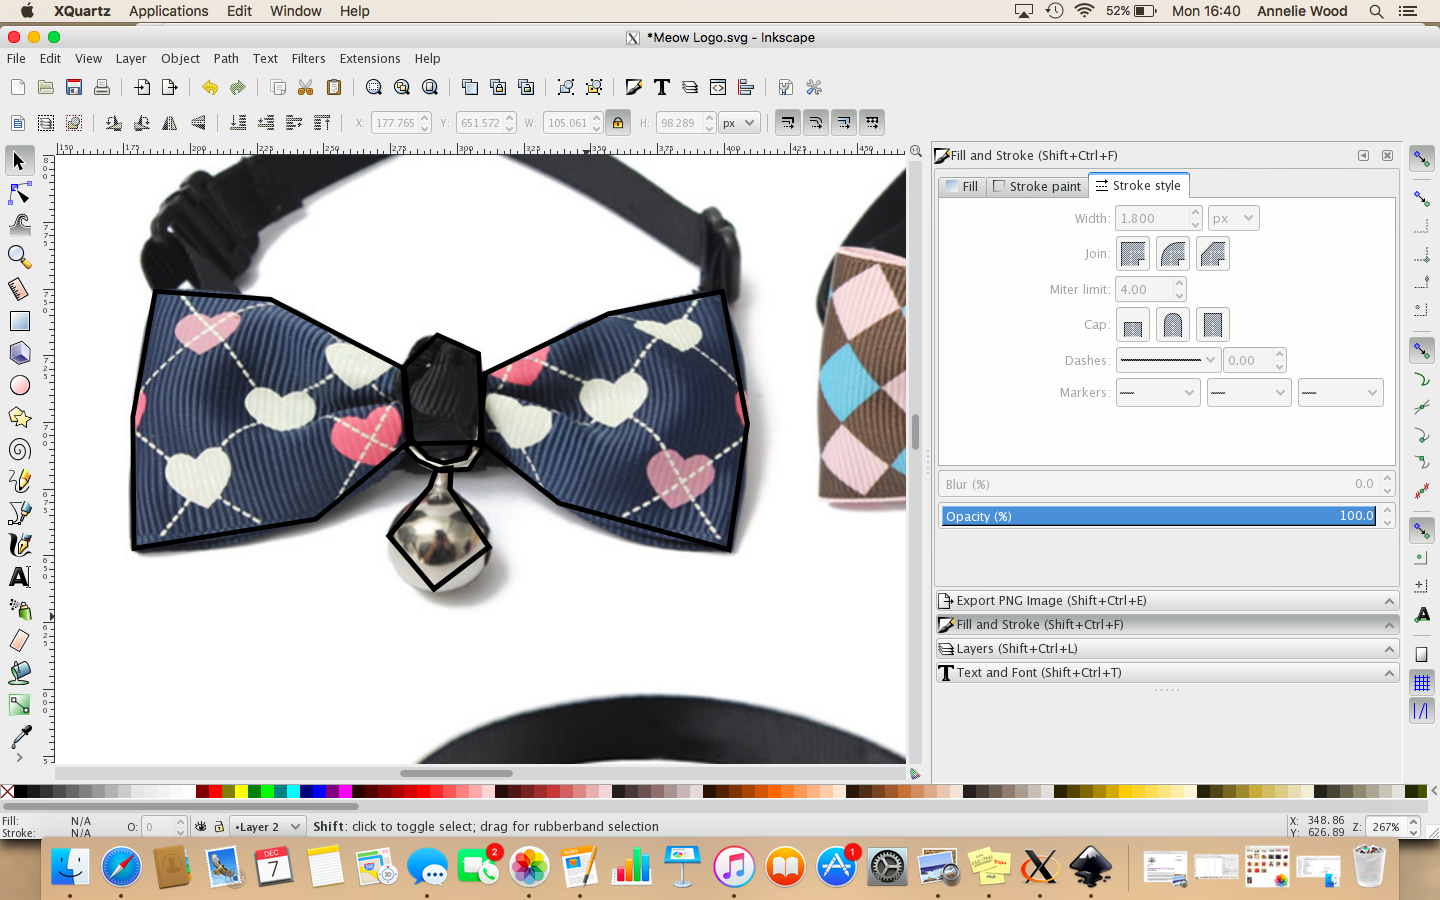
Drawing over the original image in Inkscape
You can see in the screen shot about the zoomed in image with dark black lines. These are the lines I have drawn. If you click onto the Edit button (the second icon down on the left) you and then click onto the lines you will see a selection of little boxes appear at the points of the lines. This gives you the opportunity to curve the lines using the tools at the top of the picture.
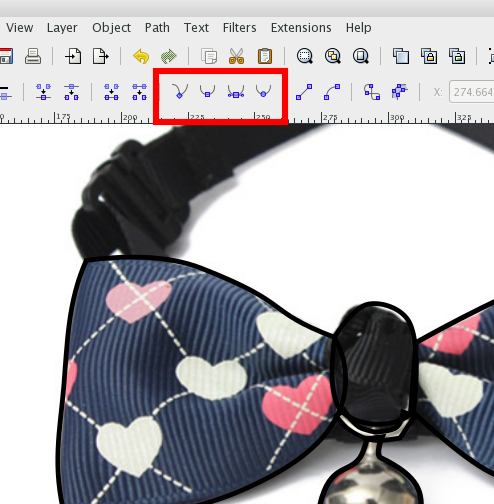
Making your lines fit, using curves
Once you have smoothed your edges you can turn off Layer 1 by clicking on the eye next to it. This now means that you can no longer see the original picture and you can work on your new project.
Now you have your bow tie image, and you can see it without the original picture you can play with it to make it look how you want to. So play around with Inkscape and see what you can do.
Once your pleased with the image, you can add colour and design to it.
To use colour you are going to start using the Fill and Stroke tab on the right hand side. Click on the lines of the space you want to fill and then in this tab select the fill colour, the stroke colour, the thickness of your stoke much more. Play around with this until you have the pattern you want. This part takes some time so don’t rush it.
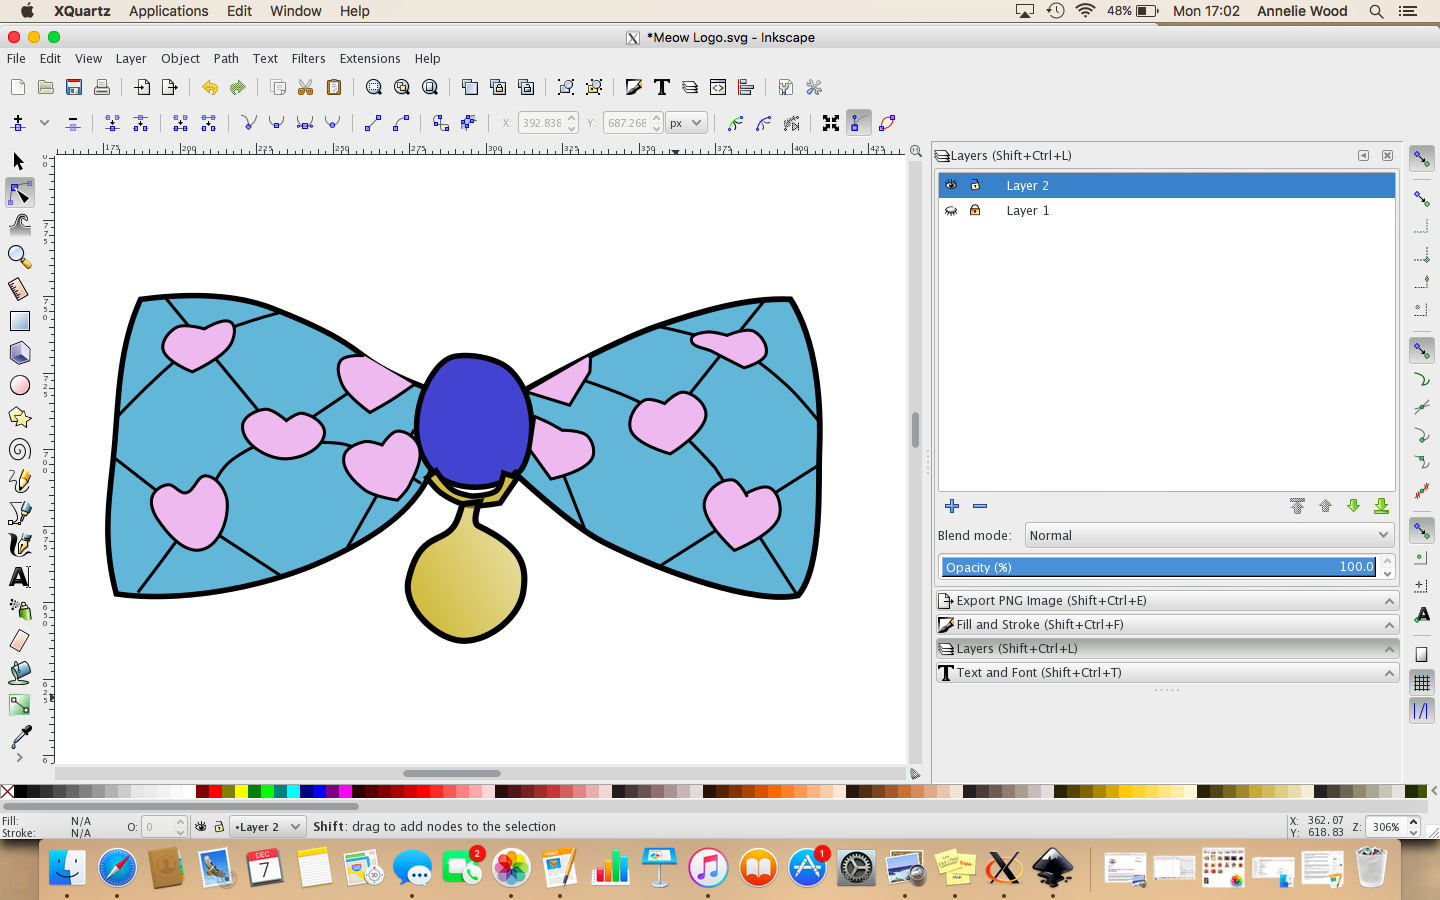
Colouring in and making patterns on your image
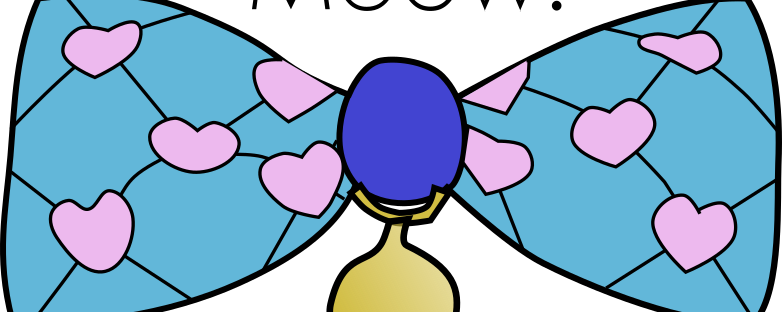
Ta Da!
The next thing you need to do is to add your business name to the logo.
In the left hand tool column you will find a text tool. It’s a Capital A with a line. Click on the tool and then draw a text box onto your work page. Then type in the name of your business. You can then click on the Text and Font tab on the right and select a font type and size and in the Fill tab the colour. Once you are happy with your text you can click onto the dark black cursor tool (top of the left hand tool bar) and you can select your text and move it about to wherever you want it.
Once its in place you are done. Your logo is complete and now its time to export it as a .png file which will enable you to upload it to your Facebook page, twitter use it on merchandise and business cards and much more.
To export you need to click File and Export, this will open the export tab on the right hand side. You then need to select all the object you wish to export. So click your mouse and drag your cursor across your design and the words and release your mouse. You will then see dotted select lines appear across your selected items.
On the right hand tab Export will have appeared and you need to click onto the ‘Export As’ button. This enables you to give your work a file name. And once you have click Save. If you add ‘.png’ at the end of the file name it ensures that all other software will recognise the download as a png file. Once you have done this you click on the export button and your work will be exported into a file on your computer.
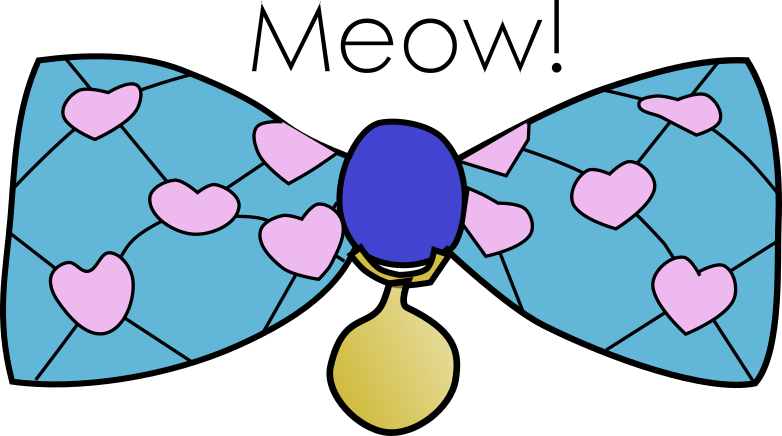
Your Logo is complete and ready for use.
And Buster the Cat can carry on promoting his bowtie craft business.
