March Craft Along – Easter Cross Stitch Cards

Welcome to the March Craft Along where this month we are going to look at cross stitch and I will be showing you how to create some lovely easter cards.
I never really got cross stitch, my Aunt and my older sister both used to love doing these large old fashioned designs that once completed they framed and hung in their houses.
Then one day I bought some tiny cross stitch kits from Hobbycraft. They were christmas themed ones and I was hooked.
Cross stitch has come a long way since the old victorian dolls houses or christmas scenes, and modern cross stitch is easy to get your hands on. It even looks brilliant as art work in your home.
stitchrovia
Easter is just around the corner and I have a couple of family members who send easter cards so this year I am sending them a handmade one back.
I picked up these patterns from Hobbycraft last year but they are good sellers and can still be found online and in store if you want to buy the kit.
Bunny PatternChick PatternDaffofil Pattern
 
Once you have picked your design we can get started.

What you will need;

Cross stitch fabric
Cross stitch needle
Hoop (you can do these small designs without one but if you do something bigger then a hoop is advisable)
Embroidery threads (you can buy a reem for around 90p from shops or markets)
Pieces of card or ready made cross stitch cards

Always start in the middle

It doesn’t matter which cross stitch pattern you buy or download they will always tell you to start in the middle and work from their. So take you piece of cross stitch fabric and fold it in four to create a centre.


The centre of your pattern will be marked, usually with a large cross in a circle.
Closeup Chick Pattern
This is the colour you will start with.

A Colour at a time

I know that each person needs to find their own way of working. But on a small piece of work like these I like to complete a colour in one go. It can mean a lot of counting squares and making sure things are in the right place, but it feels like the work is easier and more fluid this way.

Cross left or Right

When you begin you will create all the first line of your crosses in one direction before going back on yourself to complete the cross stitch. Or in Hobbycrafts words;

“Make sure you always sew the cross stitches so that the top stitch always slopes the same way…”

Closep of instructions

Attaching to your card

If you have bought some of the ready made cards to insert your cross stitch then all you need to do is secure your work in place with glue or tape.
In a card
Alternatively you could buy some A4 or A5 card and pretty scrap book paper and follow the easy steps below;

  1. Fold your card in half
  2. Cut around the cross stitch work removing any access fabric
  3. Glue the cross stitch to the front of the card
  4. Using pretty paper create a boarder for the work and glue it over the top of the cross stitch leaving a window to see the work.
  5. Allow to dry

 
Finshed products

Using Pinterest to help your creative business

Most people have Facebook in todays technological world, and when it comes to social media most people think of Facebook and perhaps twitter before any other platforms, especially when they are thinking of social media in terms of their creative businesses.
Facebook is great for sharing with an audience you have already built up, sharing photos and events and other little peeks into your creative life. It isn’t always good at gaining you new followers, making you seen and making you sales.
Pinterest is the top rated social media for feeding traffic to your shop and turning that traffic into sales, and is one of the biggest online referral platforms after Google and Facebook. In fact according to Melanie Duncan from the Power of Pinning Pinterest can generate twice as much revenue as twitter and Facebook.
On top of that amazing and rather enlightening piece of information Pinterest’s demographic user is women with cash! Which is most crafters dream client.
So why aren’t we using it for ur business? Because we don’t really know how? At least that was how I felt. But now I have done a little experimentation and playing with my own Pinterest account and think that I have some tips and hints that will help you to use Pinterest for your business.

Step 1 : Create or convert your Pinterest account into a Business account

If you don’t already have a Pinterest account then thats easy you can just create one for business. Just head to Pinterests register/log in page and here you can see that it gives you a couple of options.

Sign in with Facebook or create a user!

Log in page

If you create a user or sign in with Facebook you will be creating a personal account, which is fine. And means that you can link it to your Facebook account, but once you have created the account you need to make it a business account.
To make an account a business account; just log into your Pinterest account and then when you click on the little menu on the right of the search box you will see in tiny letters at the very bottom the word businesses. If you click on this it will take you to the business page.
Access to the Business pages
 
 
Here you can see in a big bright box you can join as a business, or just underneath it asks if you already have an account and you can Convert now.
Business Page
So this is the choice.
Create two Pinterest accounts keeping your personal and business separate (you will need a separate business email address for this), but often increasing your work load by pinning to two accounts or convert your account.
I personally created a brand new Make with Annie Pinterest account as I love my Pinterest acoount. And I think that it is ok to have two and make the distinguish between business life and personal life. But you need to make your own choice here.

Step 2: Complete all your personal details

Edit Profile
Its not a lot of information to complete but its important that its right for your business. Your Business name should match as much as you can – if your business name is taken don’t completely change it just tweet it a little to ensure that your fans and clients can still find you.
Pop a little picture in there or your logo or a product you love and make sure to add a link to your website or online shop, otherwise they will never find you!

Step 3 : Creating Boards

Weather you are already familiar with creating boards or brand new to Pinterest it is easy peasy to create them.
But before you start creating your boards have a think about what you want to say about your business.
Make with Annie is a quirky and bright and colourful craft kit business where we make craft kits for children (or adults they can make them too). So I created some fun serious boards about Make with Annie, a board about Craft Kits (which includes my own and other peoples), a Sneaky Peak Board with Pictures behind the scenes, A Craft Collective Blog page (of course) A Felt Brooches page (to share those that I love and inspire me) and a Childrens birthday Party ideas board.
Now the reasoning behind the Childrens Birthday Party board is simple.
The kits I make are great gifts for children, perhaps for a gift for the birthday girl or boy, or maybe as an activity for the party. So if someone is looking for ideas for their childs birthday party they might head to Pinterest and they might see my products and they might head to my Etsy shop and they might buy them!
So spend a little time thinking about what your clients are looking for when they find you. If you create crochet blankets, they might be looking for baby blankets or picnic blankets! Or if you create lampshades, they might be redecorating a room in their house.
Once you have some ideas go crazy and start pinning your own things and other peoples two.

Step 4 : Pinning

If your pinning your own work its a little time consuming as there is no bulk upload facility that i can find! and you are uploading a pin at a time.
Add a pin
So click on your board and within that board click Add a Pin, it then asks you where your pinning from, and you will most likely be pinning from your own device, and then it will bring up you images available to upload. Chose your image and then it will invite you to pick a board.


At this stage you will also get the option to Add a description under the Image. Its so Important that you do this as this will tell people more about the product and who you are. Its up to you how much detail you put in there but more is better.
Pick a board
Then select the board from the list on the right and this will pin the image.

Step 5: Don’t Mix Business and Pleasure

Its really important to keep your personal and business pins seperate. If you have created two different accounts then thats not too tricky but make sure that you don’t accidentally add pins for your wedding dress to your business page! Its great to show the clients who you are but they don’t need to know about your obsession with Care Bears (this may just be me!!!)
If you have converted your account do not fear for that is what a secret board is for. You can make any of your personal boards a secret but clicking on Edit within the board and selecting that as an option. Then only you can see the pictures there! Brilliant for secret presents boards.

Step 6: Add the Pin it button to your PC

The idea behind the Pin button is that once its installed onto your PC you can pin anything from the internet!
To get the button on your PC just head to the Help section on Pinterest and follow the instructing from their website.
Once it appears on your web browser your set to go.
When your browsing the internet and see something you want to Pin click on the button. This will then bring up a selection of images that are available for Pinning along with the description below it and the location URL. Click on the Image you wish to pin and another pox up box will appear asking you to select the board you want to pin it to.

Step 7 : Keep on pinning

The key to making Pinterest work is making sure that you are a regular user. Ideally you want to be looking at creating or pinning about 2 or 3 a day to get your account noticed. Create new boards depending on the seasons or cultural events and share your Pinterest account with your customers on your other social media or your website or shop. Invite your clients to follow your Pinterest account using the Find Friends element of the Settings and follow other Pinterest users that you like and admire.
Happy Pinning.

Becky Mclean – Bumblebee Home Treasures

Featured Crafter Becky Mclean is the designer and creator of Bumblebee Home Treasures, making beautifully crafted cushions and decorations for your home.
IMG_5582
As a child Becky was taught to sew by her mother and has always been creative since being a child. The owl was the first creation she made as an adult and it was the one that made her business soar
Becky began making soft owl decorations for her own entertainment, and when family and friends saw her creations they all began asking for one. Soon she was inundated with orders for her creations and pushed and backed by family members and friends she started her Facebook page and opened her self for business.
Almost two years later Becky has over 3000 Facebook fans and has created hundreds of orders and when you look at her products its really easy to see why.

Best Seller


Owls are and Becky guess always will be her best seller, she makes them in all sorts of styles and some of her custom orders have been brilliant fun to recreate. She was once asked to make a Police Owl for a Police Officer, including full replica police uniform and police ID number.
12087075_1675563045993786_5602842888172413896_o

“This one as you can see is personalised on the back. Custom made as a super special gift.
I am really proud of this one, mostly because I know how much it means to not only the lady who ordered it but also the person who it was for loves it too!
I have been making lots of officer owls lately. Its so nice to think that all these owls are going to the actual police force! They work tirelessly for us all. The least I can do is make sure when I make these owls I get the uniforms right lol!”

Favorite Make

Becky’s favourite make was a customer order for some Gothic Foxes
12187777_1678439162372841_7610097405734060706_n

“A customer asked me to make these for her and I just really wasn’t sure I could pull it off!
I have to say I love these and I really wanted to keep them for myself, especially the girl fox!
A ton of detail in these an out of both of them the girl took me the longest with all the masses of layers in her skirt!
Lots of lace and lots of black on these two!
Oh and tons and tons of fun designing them!”

Our Favourite Make


Here at The Craft Collective we adore Becky’s Penguins; here she has made some for mothers days with a little hat and hand bag.
Becky told me that the inspiration for the Penguins came after a day out at Longleaf Safari where she had the most wonderful experience of walking with the Penguins.
We most like the Mother’s day Penguin with her little hat and handbag!

“This little lady is rather special! She’s ready for summer with her beautiful hat on with that all important flower with the pearl in the centre! What lady wouldn’t be complete without a stunning handbag?”

To find out more about Becky and her brilliant products head to her Facebook Page.

Top Ten Crafts for 2016

 
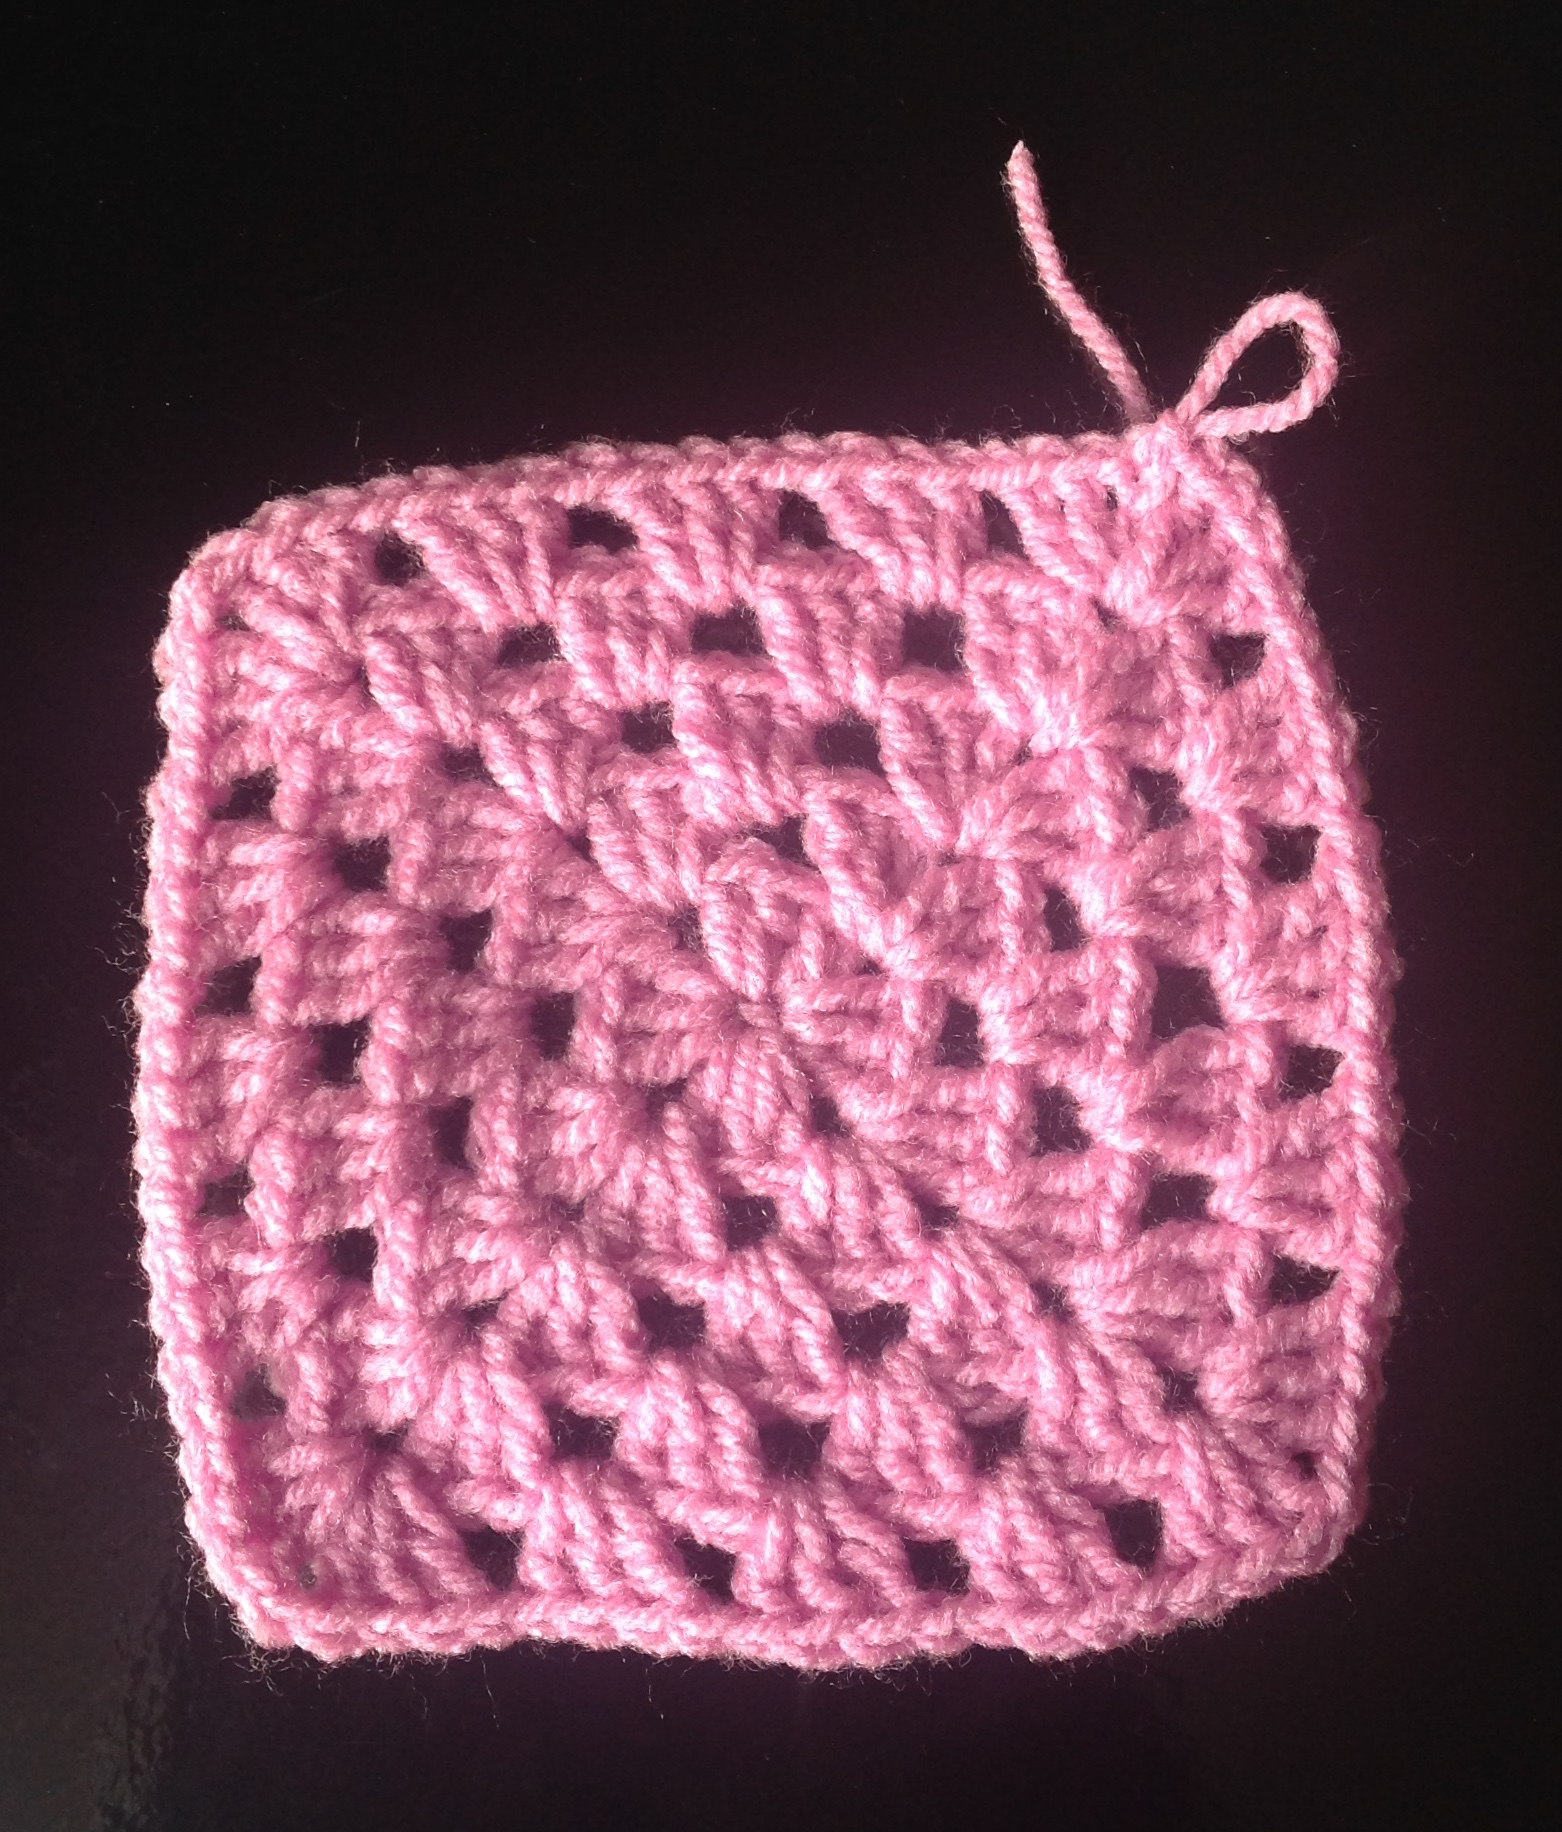
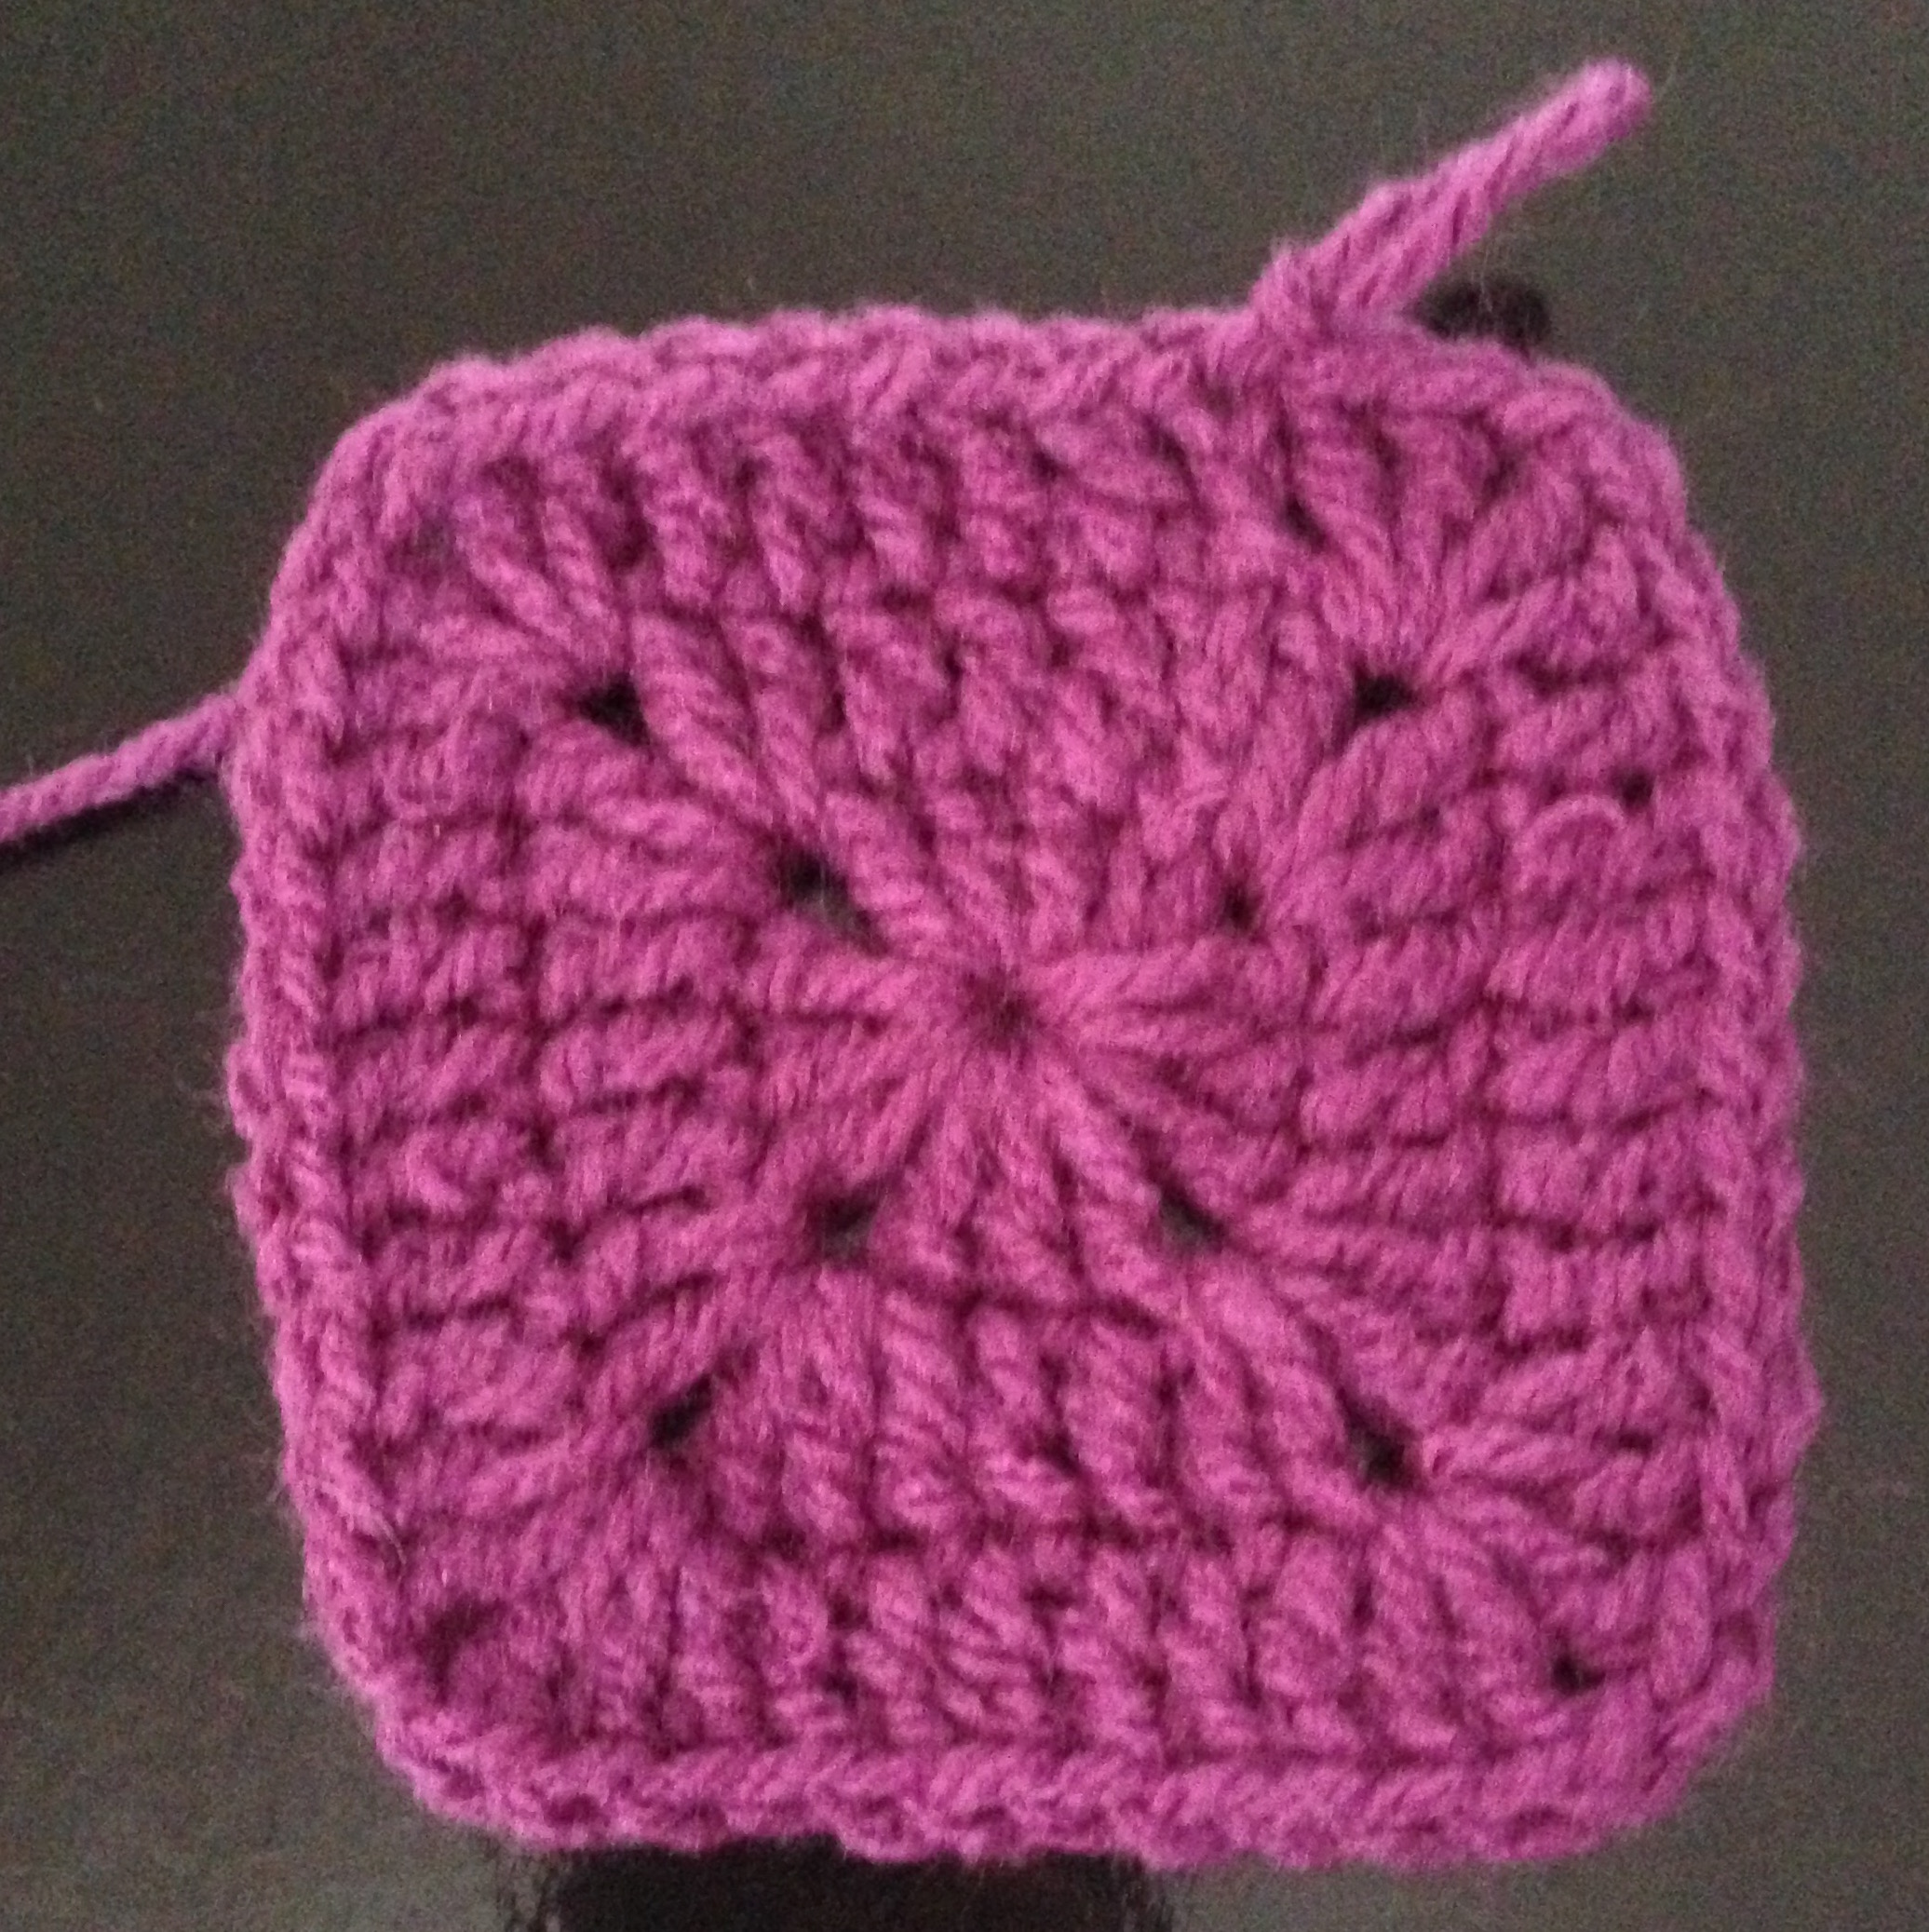
I spend a lot of time getting lost on Pinterest and Instagram looking for new crafts to learn or new techniques for current crafts and I love all the beautiful fun things there are out there. I recently taught myself (with the assistance of You Tube videos) Tunisian Crochet and loved the whole experience of learning something new.
So if your looking for a new craft then why not have a read of my top ten trending crafts for 2016.
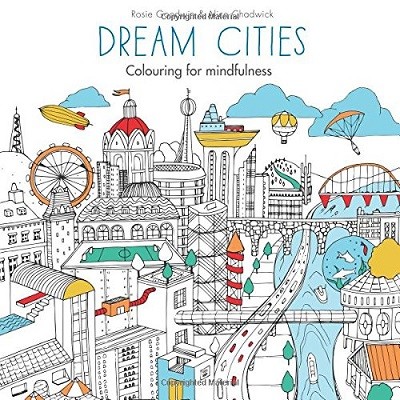
1. Adult Colouring

The rage the seemed to massively take off in 2015 is growing, and developing. Not only can you get the standard books in all major book retailers but now you can get something a little more unique. Check out what Etsy has on offer because here you can find the recognisable titles along side the unique, Pin up girls or tattoos or perhaps something a little more risqué!
I’ve checked out whats on offer and have found three of my favourites;

Dream Cities by Rosie Goodwin and Alice Chadwick

dream cities

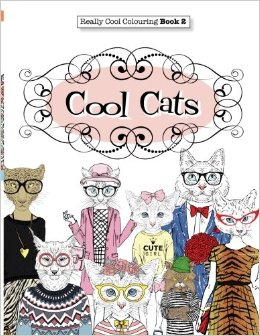
Cool Cats by Elizabeth James

cool cats

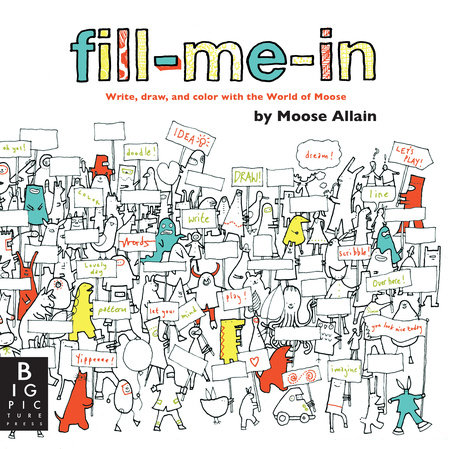
Fill me in by Moose Allain

fill me in

My sister bought me a garden colouring book for my 35th Birthday, along with some really good quality pencils and I spent a lovely weekend away colouring in while we watched tv, or sat on the beach.
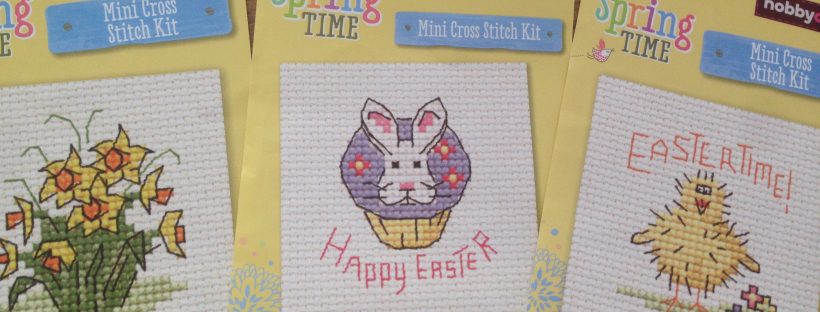
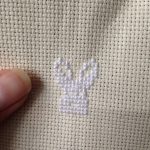
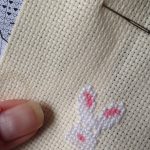
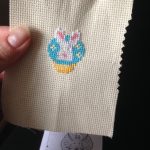
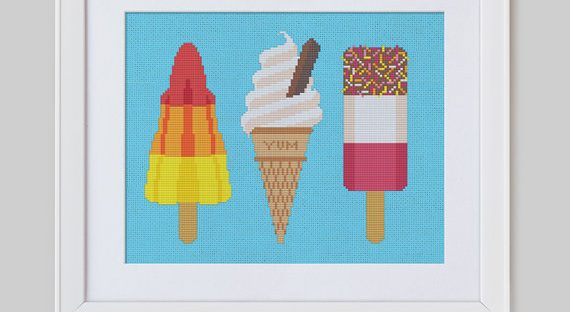
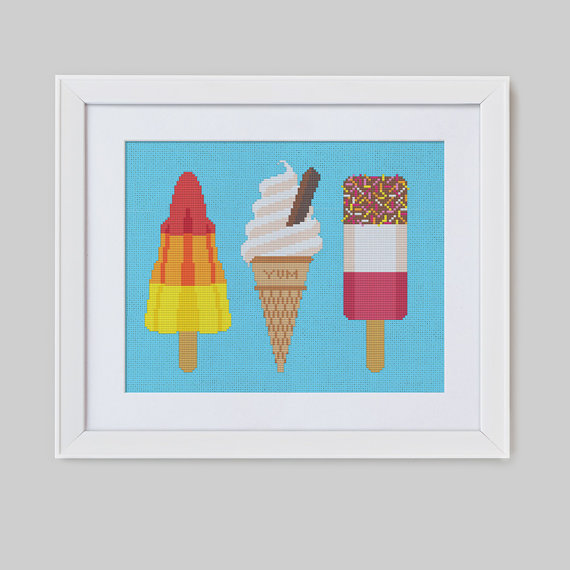
2. Cross Stitch

When I was a little girl I had an aunt who loved to create large cross stitches, she had a contraption that sat over her knee to assist her in the creation of her work. My older sister always loved them too and I remember when her children where young her whole staircase was filled with her completed and framed cross stitches.
Maybe as you read my little story you pictured the cross stitches that I was talking about, maybe they were dolls houses, or Country Scenes. Well they were what we might now consider as old fashioned and Cross Stitch has come a long way since women spent hours creating a horse.
Check out Mr X Stitch, – especially on Instagram. He showcases some of the best and modern cross stitch designers there are, from pop art to sexually liberating he is bringing cross stitch right up to date.
mr x stitch
And he is not the only one, there are hundreds of modern cross stitchers who are ignoring the elegant house designs for something more unique Check out GeckoRouge and Stitchrovia on Etsy.

stitchrovia

Stitchrovia on Etsy

3. Mixed Media Art

What is Mixed Media Art? I have spent the best part of eight months listening to the term being banded around and not really knowing what it meant. But I kind of thought that it sounded quite cool.

“Mixed media tends to refer to a work of visual art that combines various traditionally distinct visual art media. For example, a work on canvas that combines paint, ink, and collage could properly be called a “mixed media” work, but not a work of “multimedia art.” -Wikipedia

“Mixed media is a term used to describe artworks composed from a combination of different media or materials” – The Tate

Basically art can be made of anything or a combination of things!
Now that we both know what the term means we can see that there are 267,056 pieces of Mixed Media Art just on Etsy and one of my favourites is Charliemabi, who creates art work on top of the printed word, taking iconic images and turning them into something knew and something rather aesthetically pleasing.

superman

Charliemabi mixed media artwork


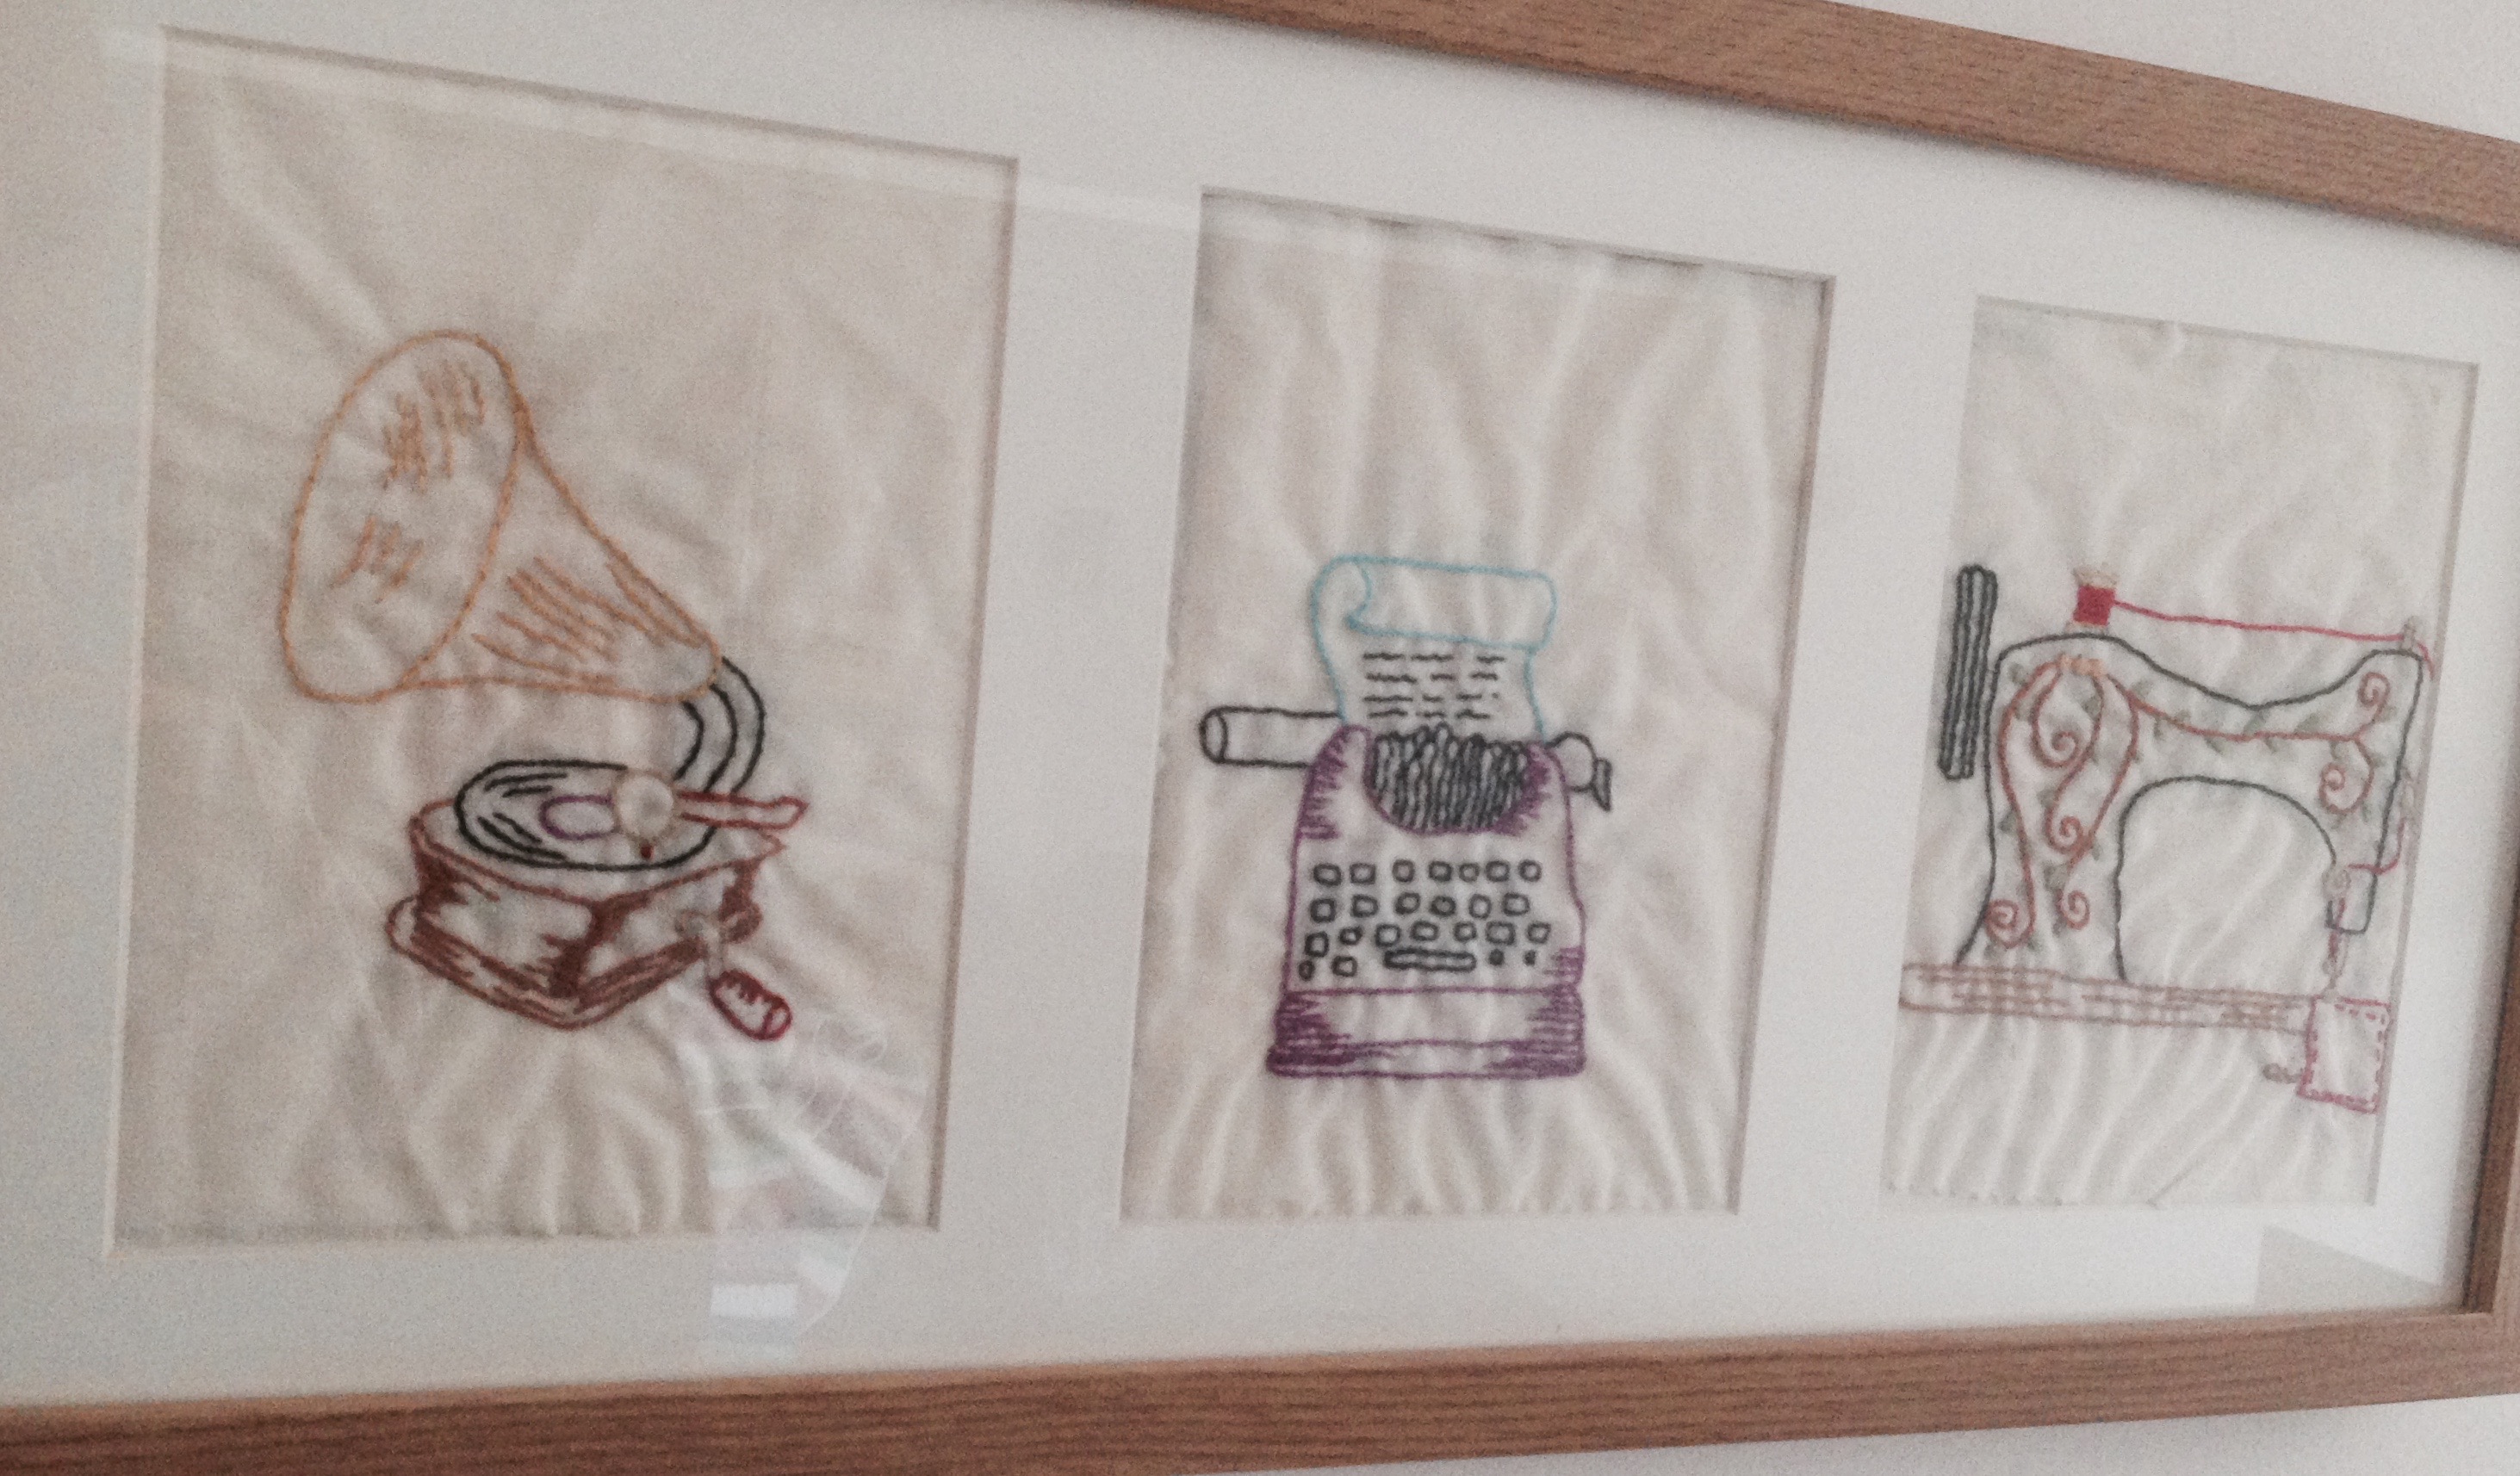
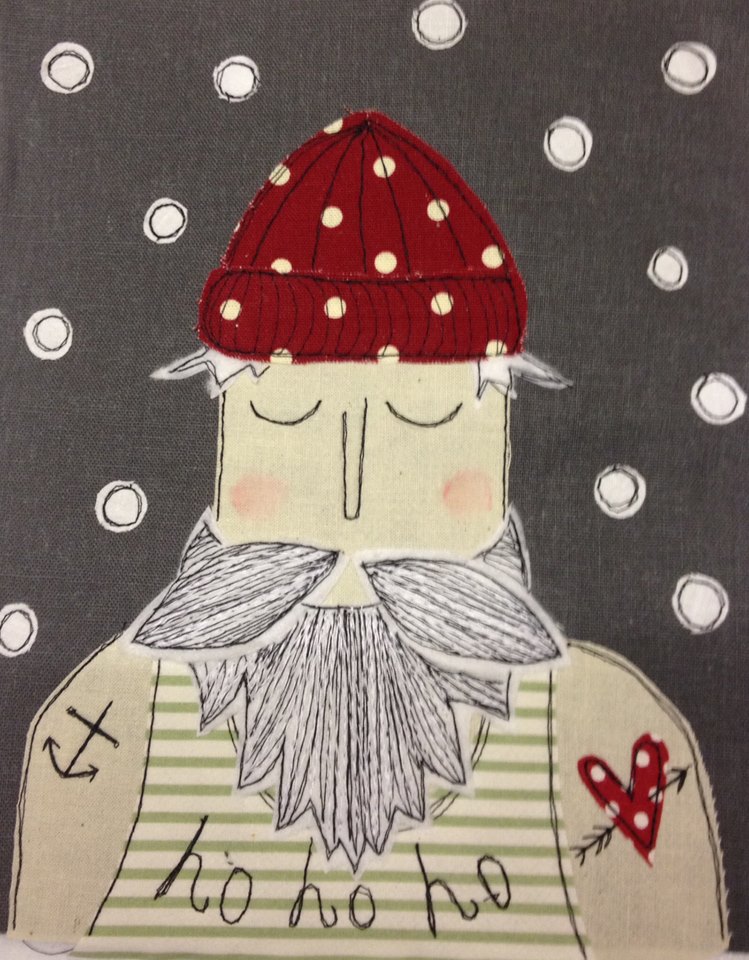
Another form of Mixed Media Art is textile art. Zoe Wright creates brilliant artwork as well as covered note books or brooches from material that has been cut and stitched to create new pictures.  Zoe is based in Krowji, Redruth and is currently exhibiting her work until the 31st March.
zoe wright

Zoe Wright Textiles


If you fancy having a go I check out this tutorial where artist Christy Tomlinson shows you how to have a go yourself.

4. Chalk Paint

Annie Sloan!
Most crafters have heard this name and are fully in the know about the wonderful product that Annie has created.
Last year I attending the Handmade Fair at Hampton Court Palace and the Annie Sloan workshop was the first to sell out and easily the busiest.
Upcycling has been in the forefront of crafts and design for a few years now. I bought a 60s side table about three years ago with the aim to epicycle it. But chalk paint is more than just upcycling.
This great You Tube video shows you all about how to use chalk paint, but if your not feeling very confident then there are a lot of up cycling workshops happening all over the country.
[youtube https://www.youtube.com/watch?v=Dca5ymyrXI4]

5. Design your own fabric

Have you ever been looking for fabric in a certain style for a particular project and just not been able to find what you are looking for? Well why don’t you try designing your own fabric?
Yes, this is probably the coolest and by far the craft trend for 2016 that I have to try out.
Websites such as Printmepretty are offering you the option to upload a jpeg of a photo of design you have created on a graphics package and then they print it on the fabric for you.
Check out Cornish Bird In the Sticks on FB, this local artist as recently made some lamp shades from material she has created.
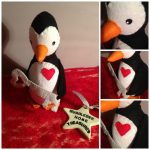
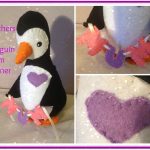
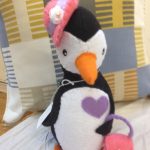
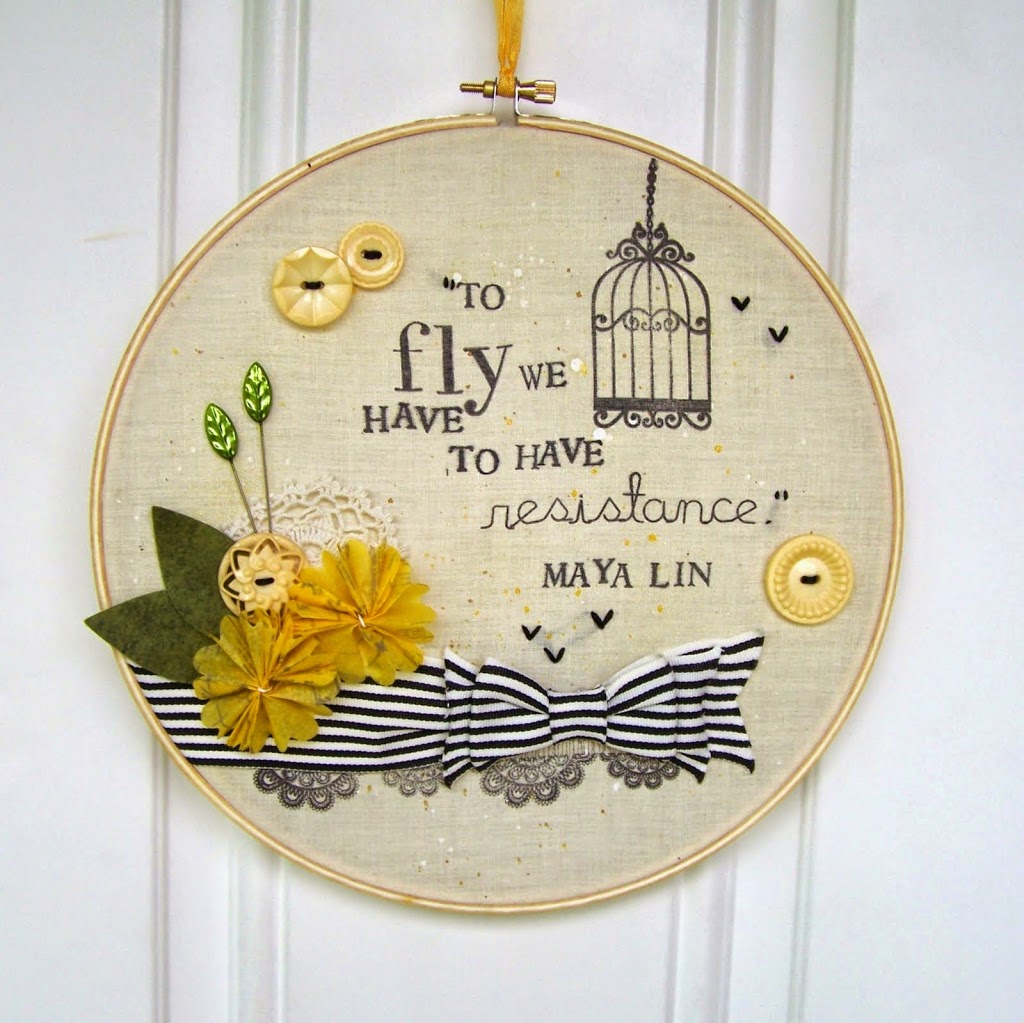
6. Hoop Art

Although not a new craft, this seems to me to be everywhere this year. with 27,581 products currently on sale on Etsy its clearly popular. And I can see why. There are so many things that you can do with hoop art, and they all look fabulous.
Perhaps you just want to create a little piece of embroidery and leave it in the hoop, as this makes the fabric taught and the image look clear and framed.
However think outside the norm with this as hoop art has expanded to incorporate the idea of Mixed Media arts and often you can find artists have used a mix of pain and fabric and embroidery, buttons and other embellishments to create there work. It seems that anything goes, just so long as it fits nicely in the size of your hoop – or multiple hoops if your feeling really extravagant.
TipJunkie show you lots of brilliant designs and if you need some inspiration you can find brilliant tutorials here on U Create Craft.
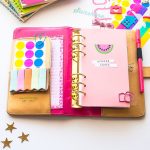
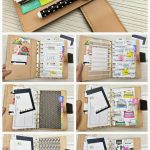
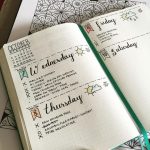
hoop-art-1

7. Planners

I have been following a creator, Claireabellemakes on Instagram for sometime and recently she has been adding images of the planners that she makes. And now it seems that everyone is making there own.
Take your old 1980s filofax and using a little creativity and office supplies you can soon create you own personal funky planner. And there are loads of downloadable prints on Pinterest that you can use to help create it.
Check out these brilliant designs on Pintrest.
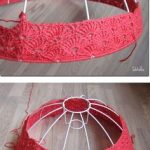
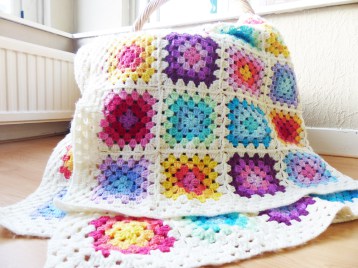
8. Lampshades

Fabric ones, paper ones, crochet ones, there are so many different ways to create your own unique lampshade.
I found some small bedside lampshades in my local charity shop for just 50p each which is a great place to start. I plan to take the current material off the frame and use the frame to crochet my own design over it.
Check out Pinterest for ideas and inspiration and if you want to have a go yourself here is a brilliant tutorial on how to from the Design Sponge Company.
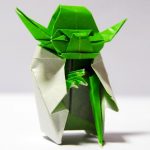
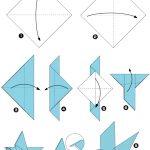
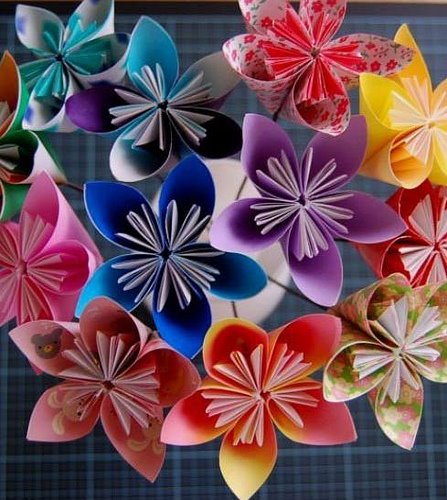
9. Origami

My six year old niece was given some origami for christmas and myself and two other fully grown adults spent a large proportion of new years eve making penguins and frogs. It was brilliantly creative, but you can make so much more than just this.
Not only are there some really great books out there to teach you but you can now get themed origami books where someone has taken the art of paper folding, the design of prints and created patterns for you to make your very own R2-D2.
For more details and downloads go to the Origami Website.
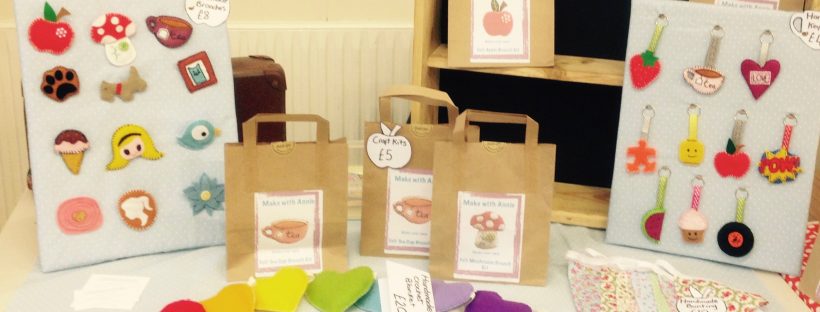


10. Craft Kits

According to many social media sites crafts kits are a hit for this year!
With the BBC working on Get Creative day, trying to get everyone to undertake something crafty, there is no better time than to check out some craft kits yourself.
Is there a craft your interested in but don’t want the expense of getting set up for a new hobby? Then a kit is the way forward.
Wool and the Gang have nailed the craft kit business and produce a number of different kits to make knitted products, where you can choose the colour and if you need the needles etc before you purchase.
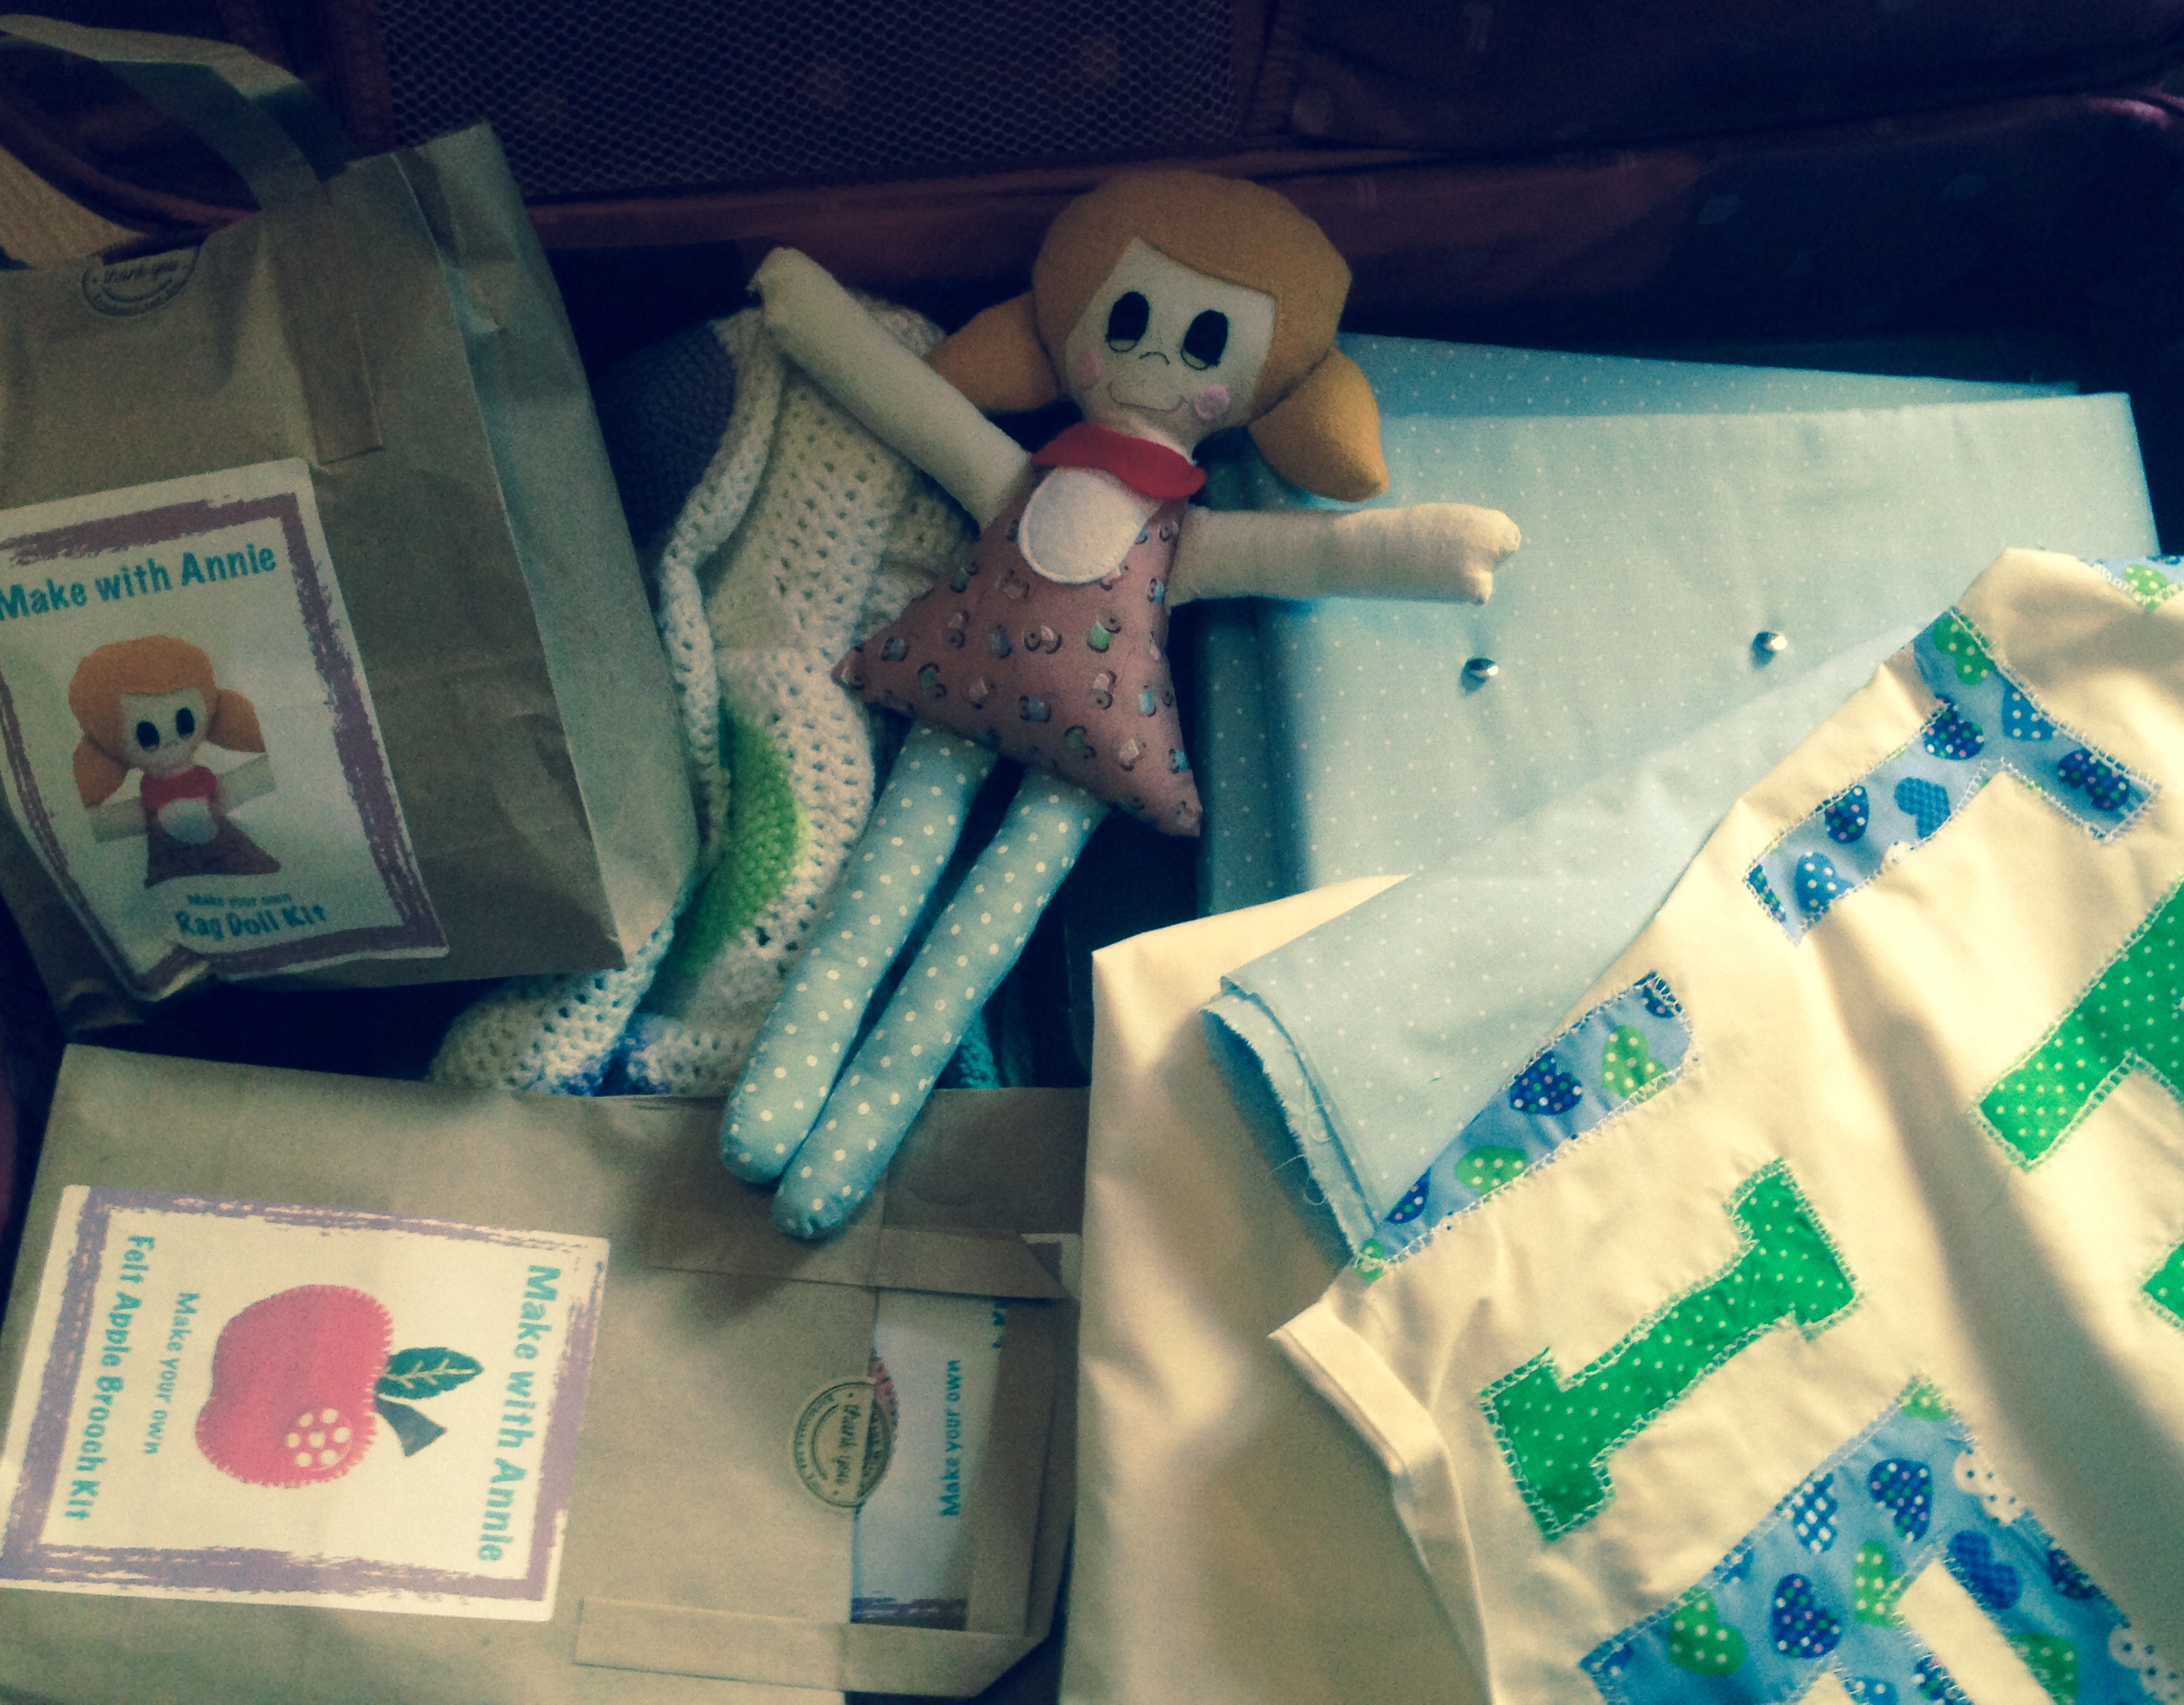
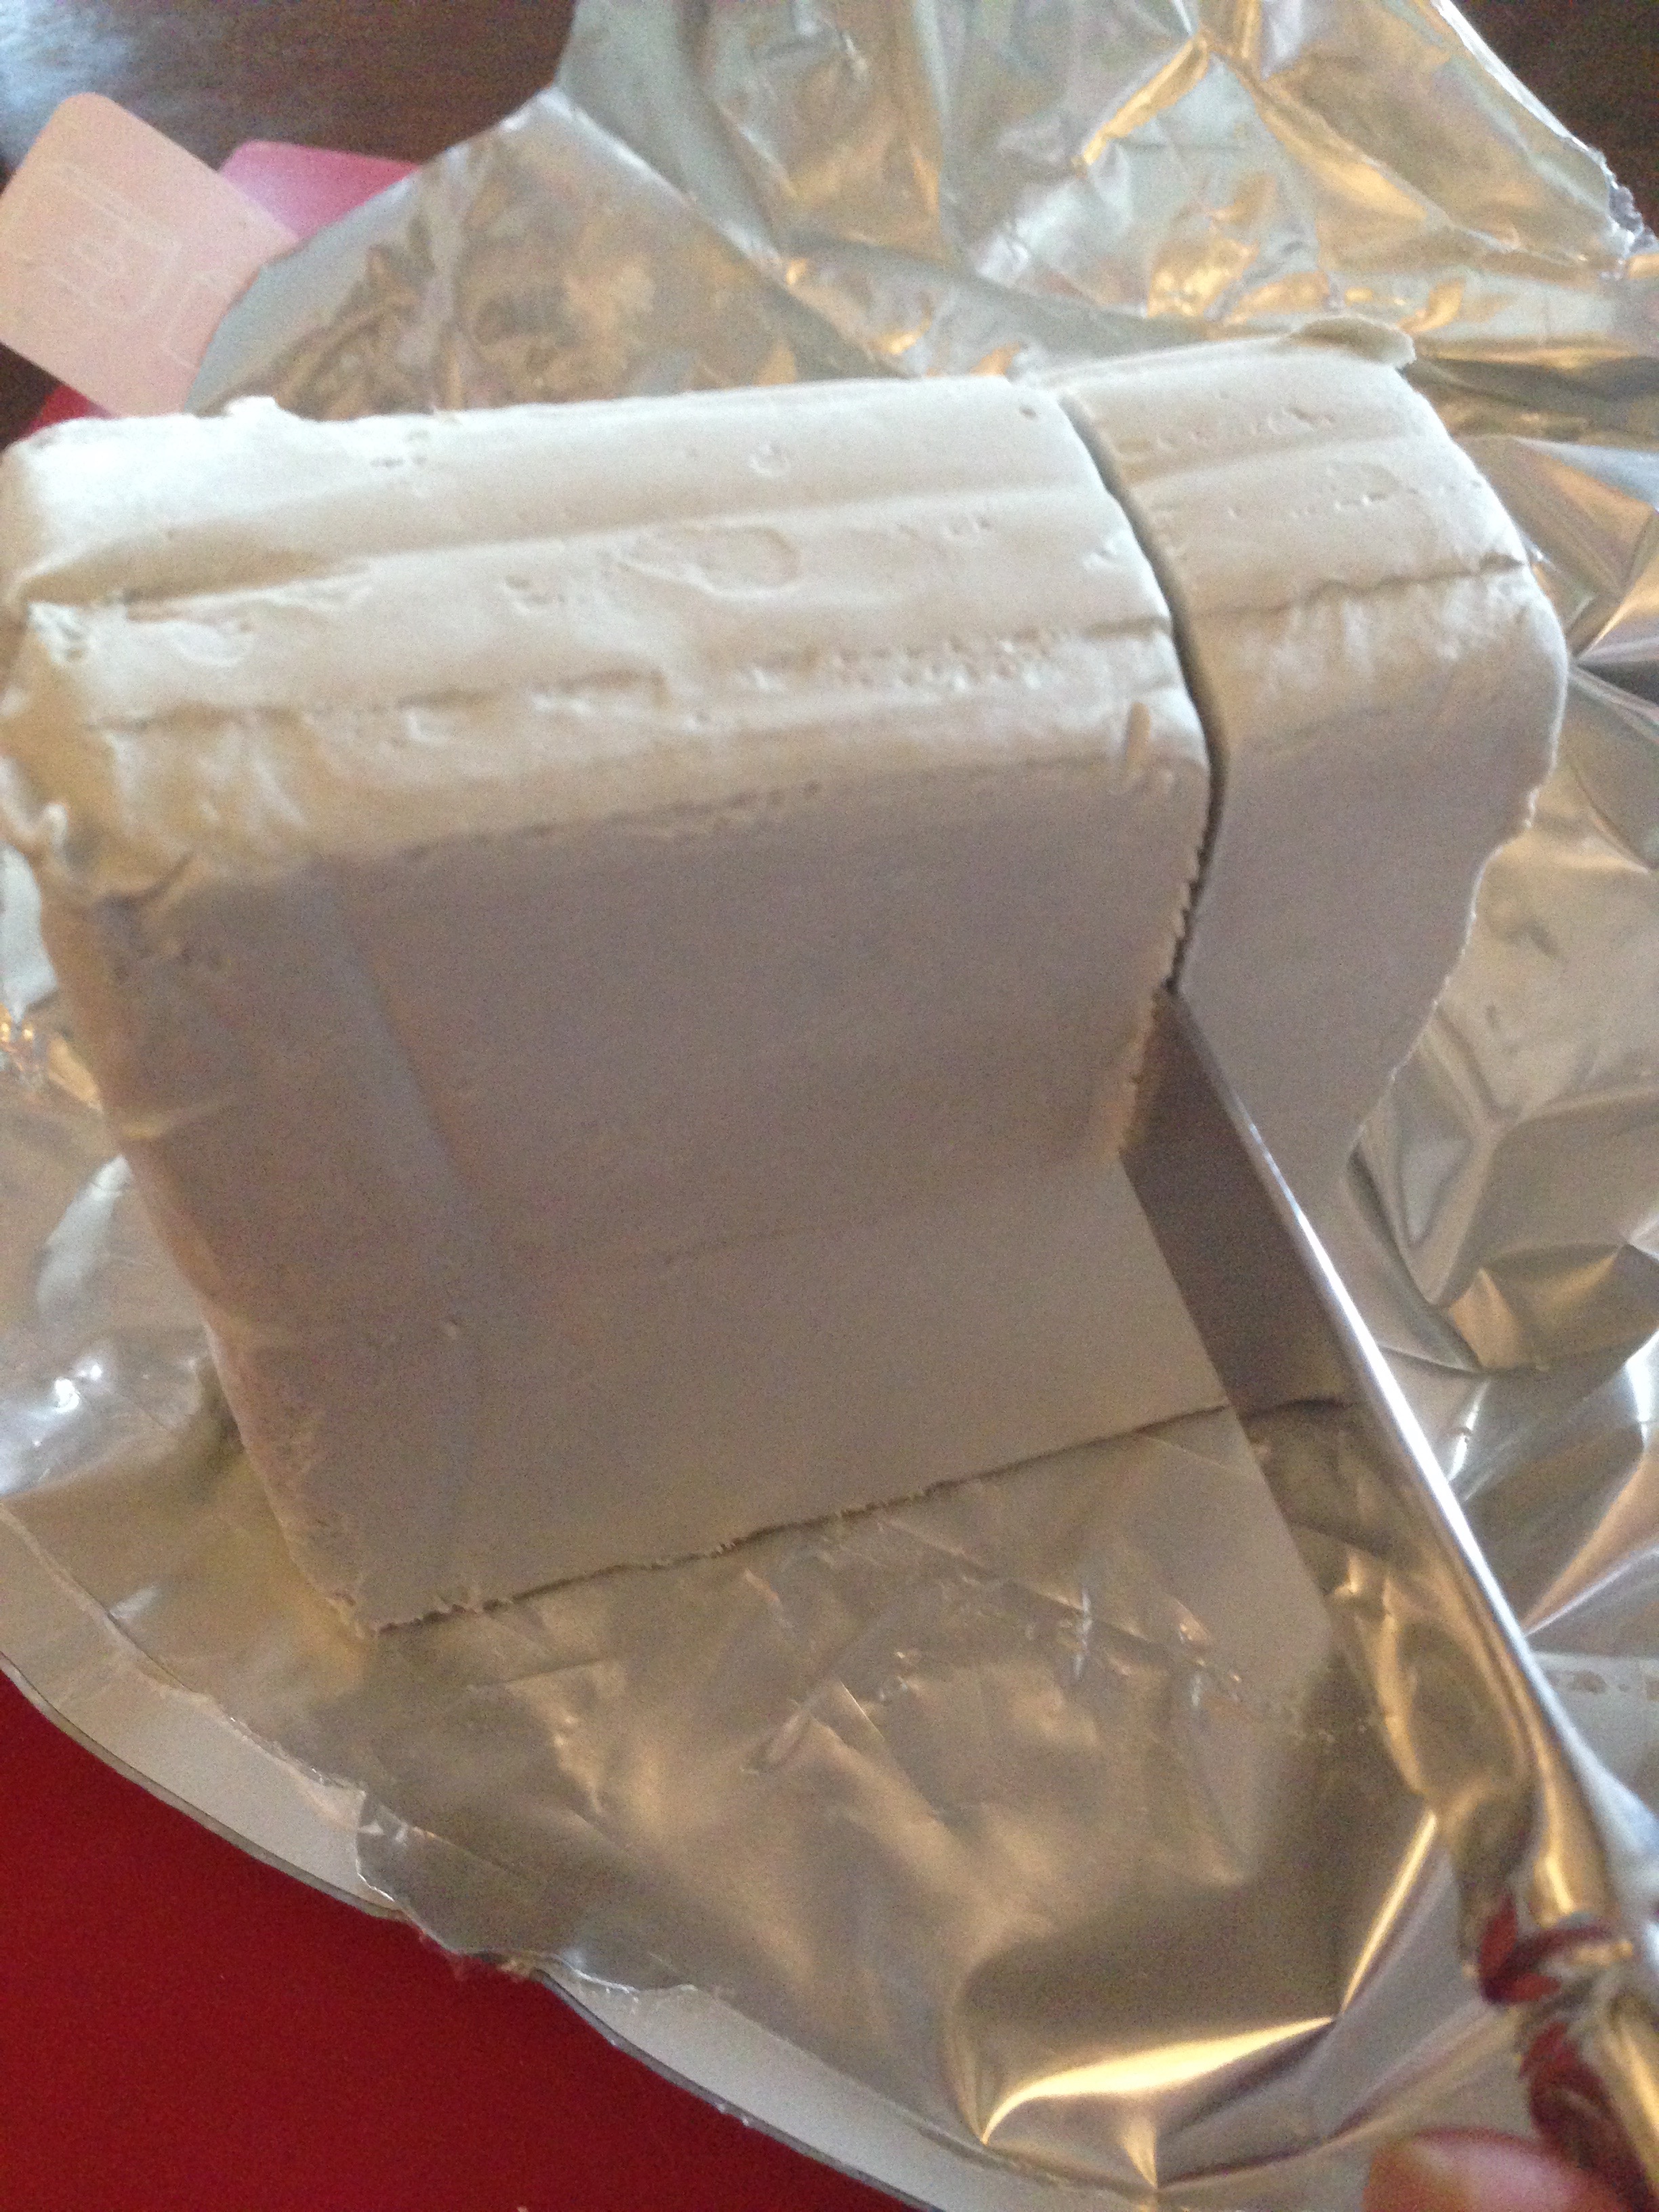
Kirsty Allsopp, a craft queen, has her own range of kits in hobby craft, where for a really reasonable price you can learn all manner of things. Soap making, caligraphy, felting, purse making, rag dolls and so on.
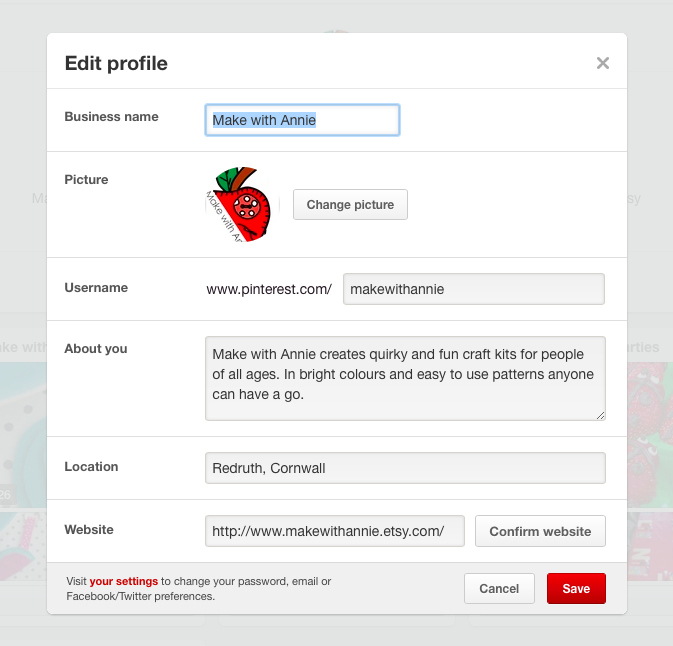
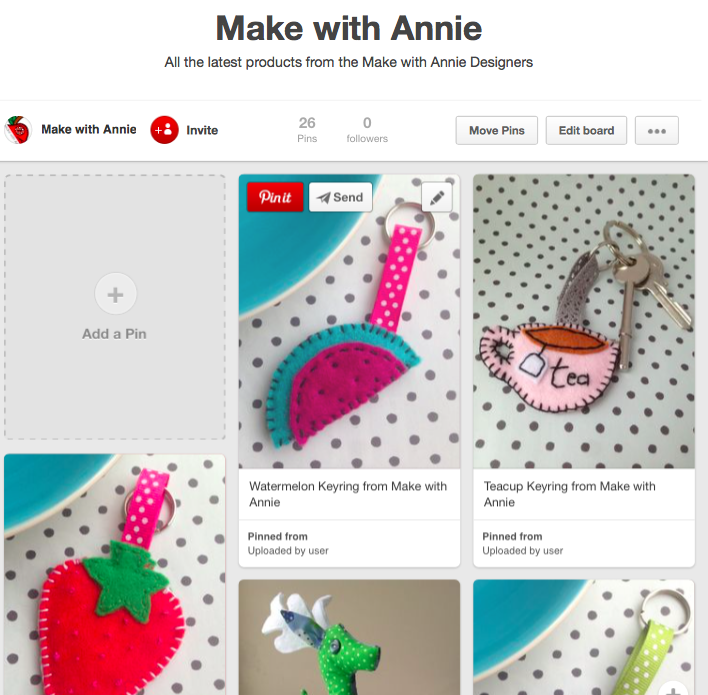
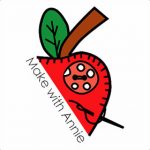
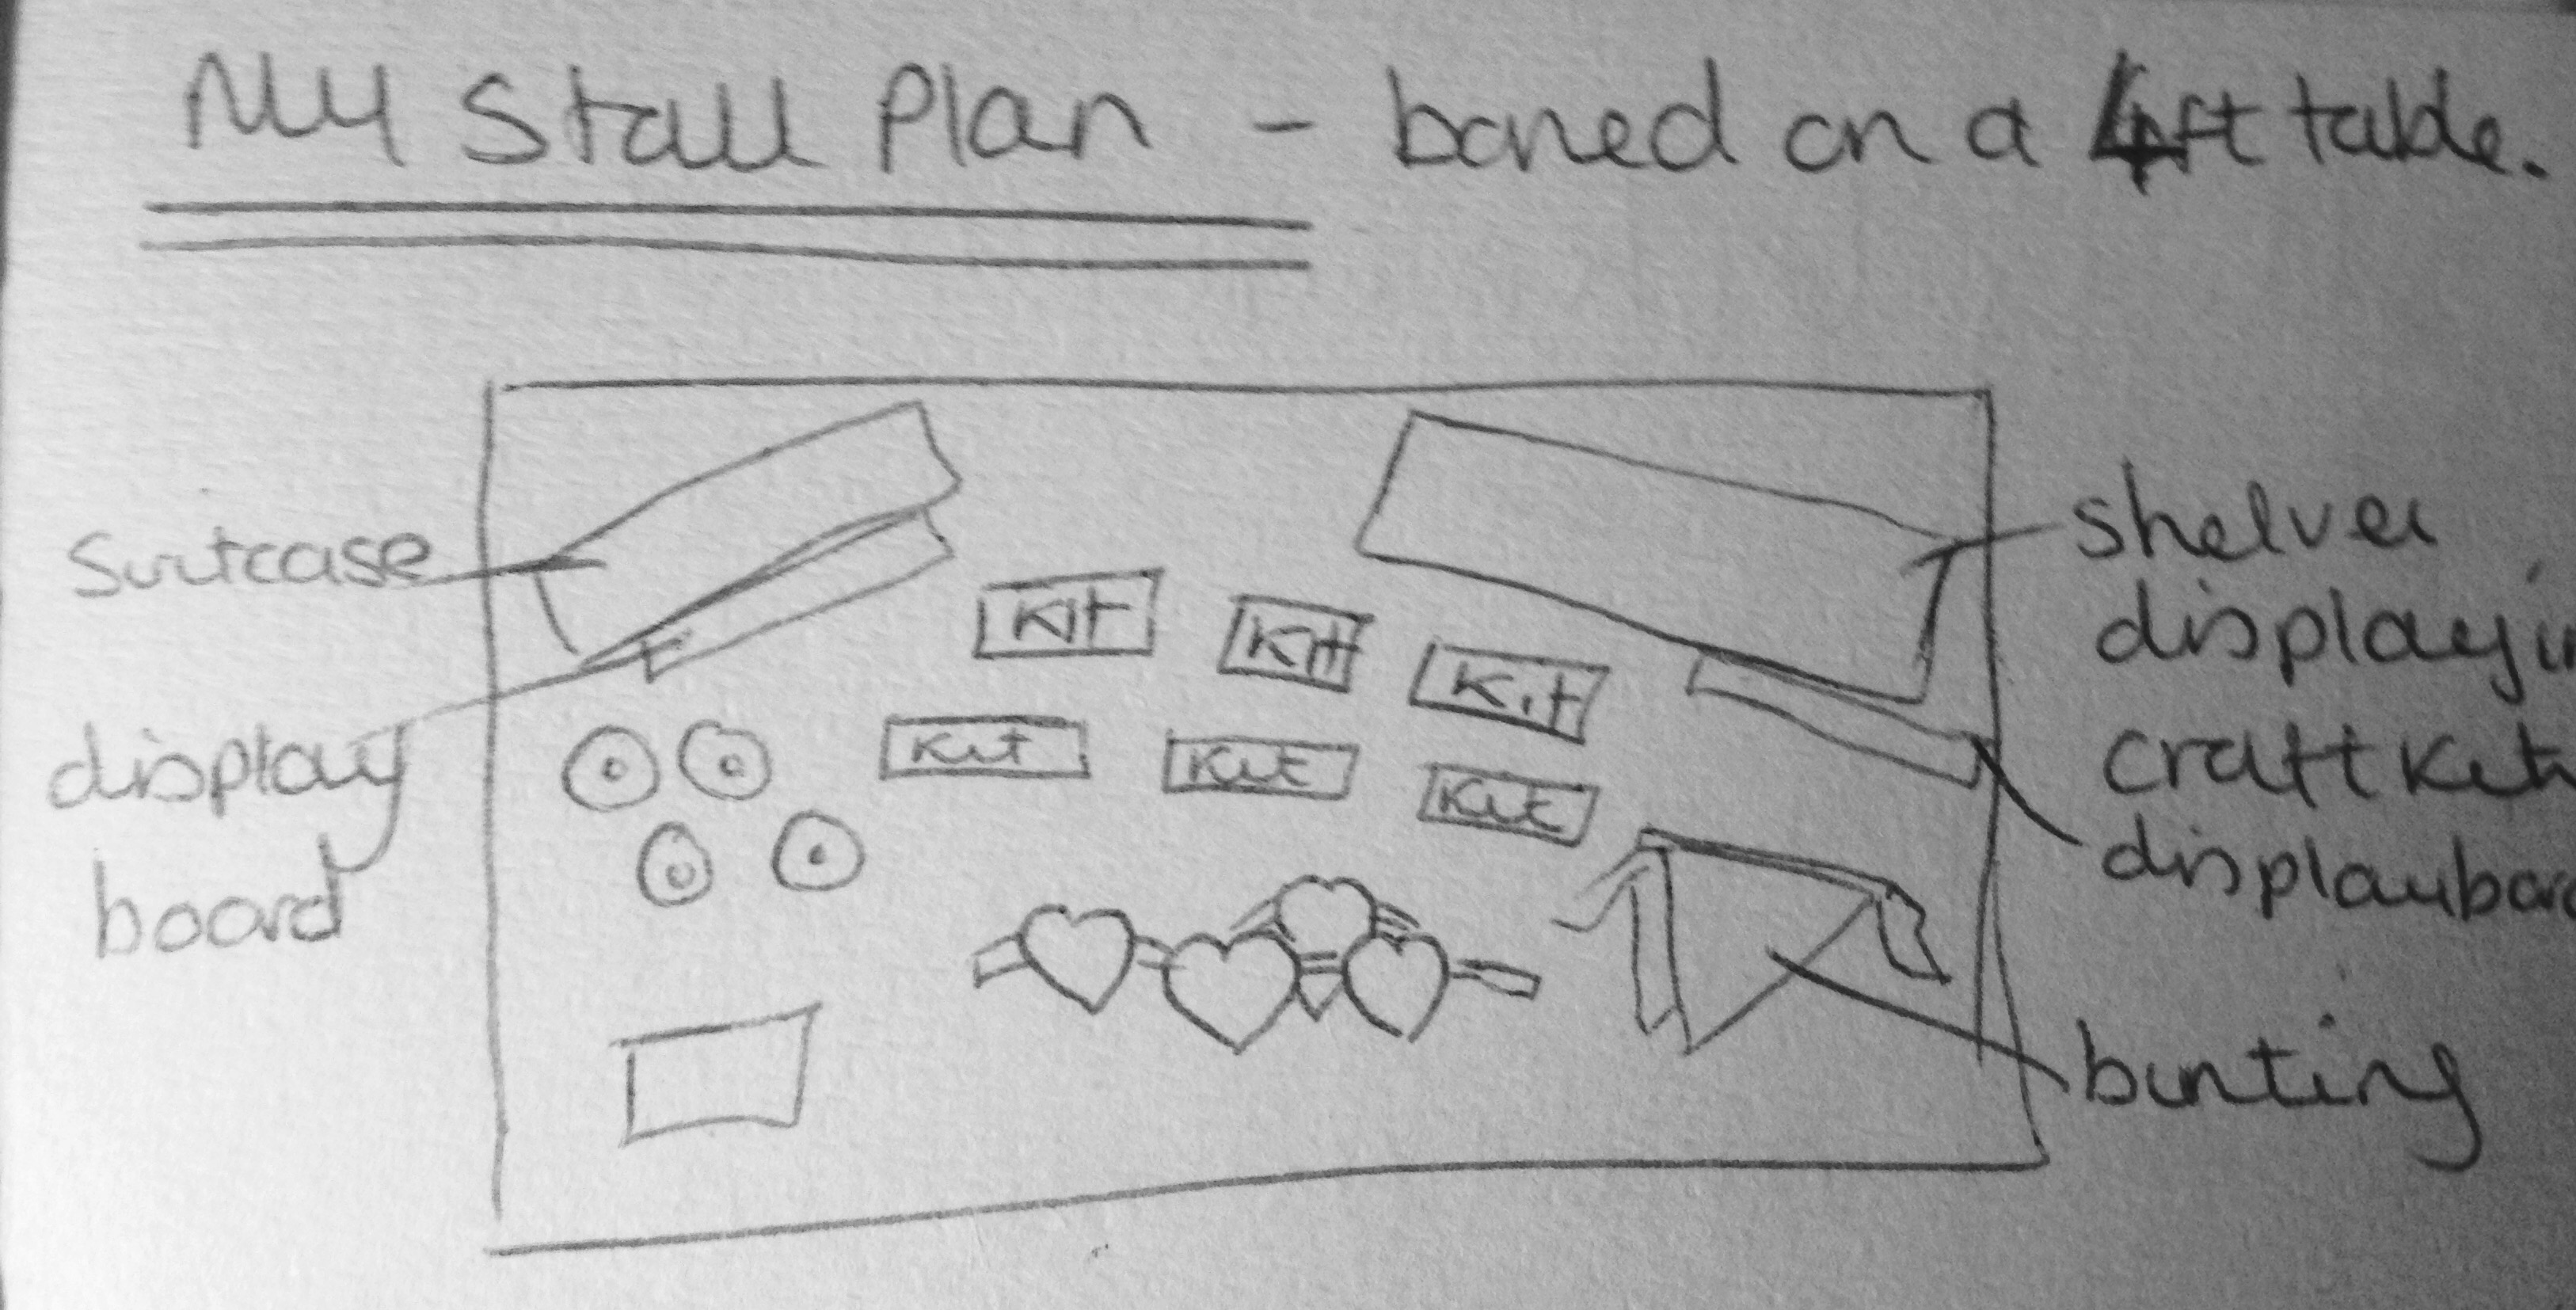
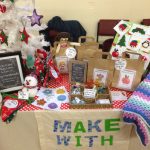
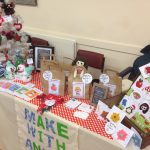
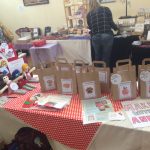
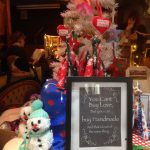
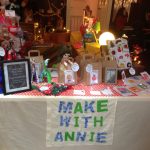
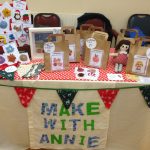
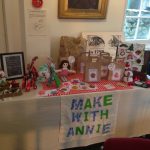
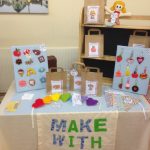
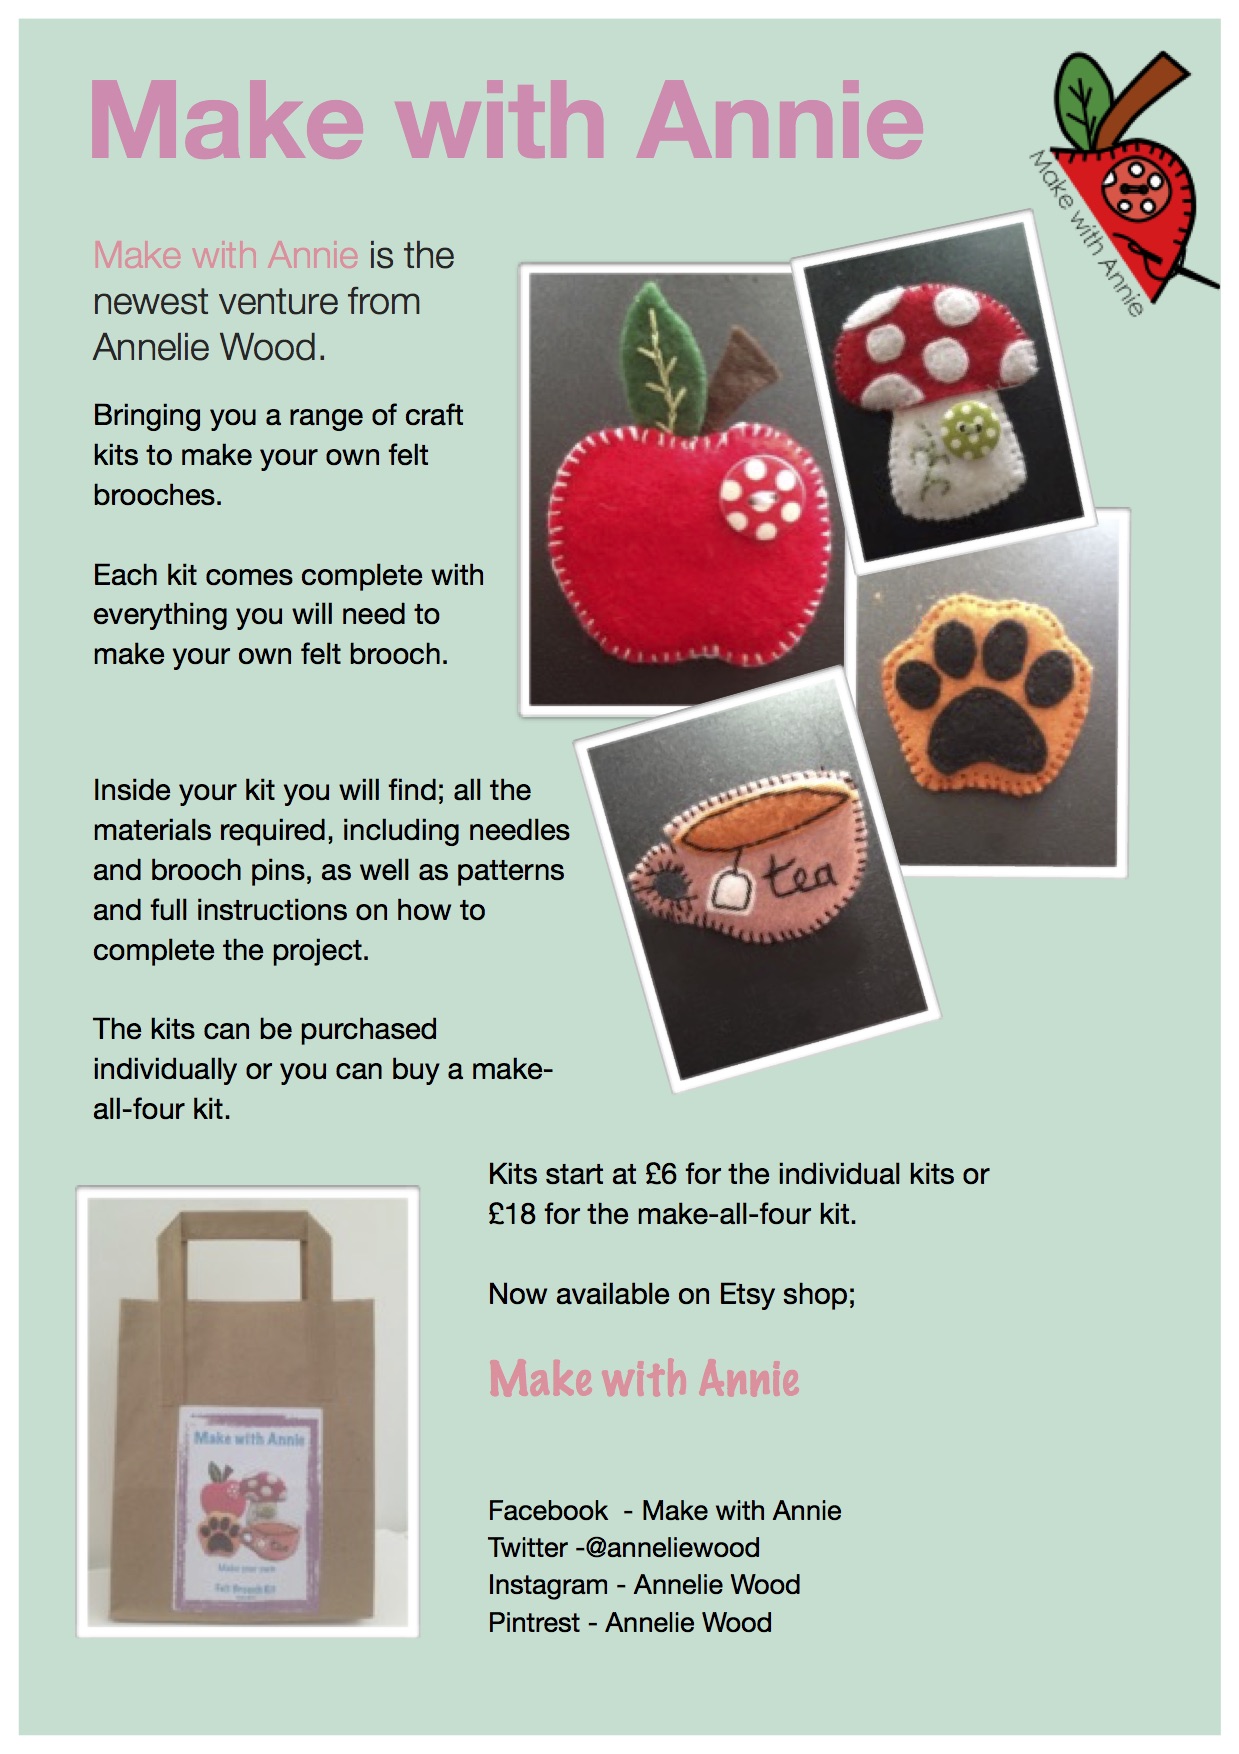
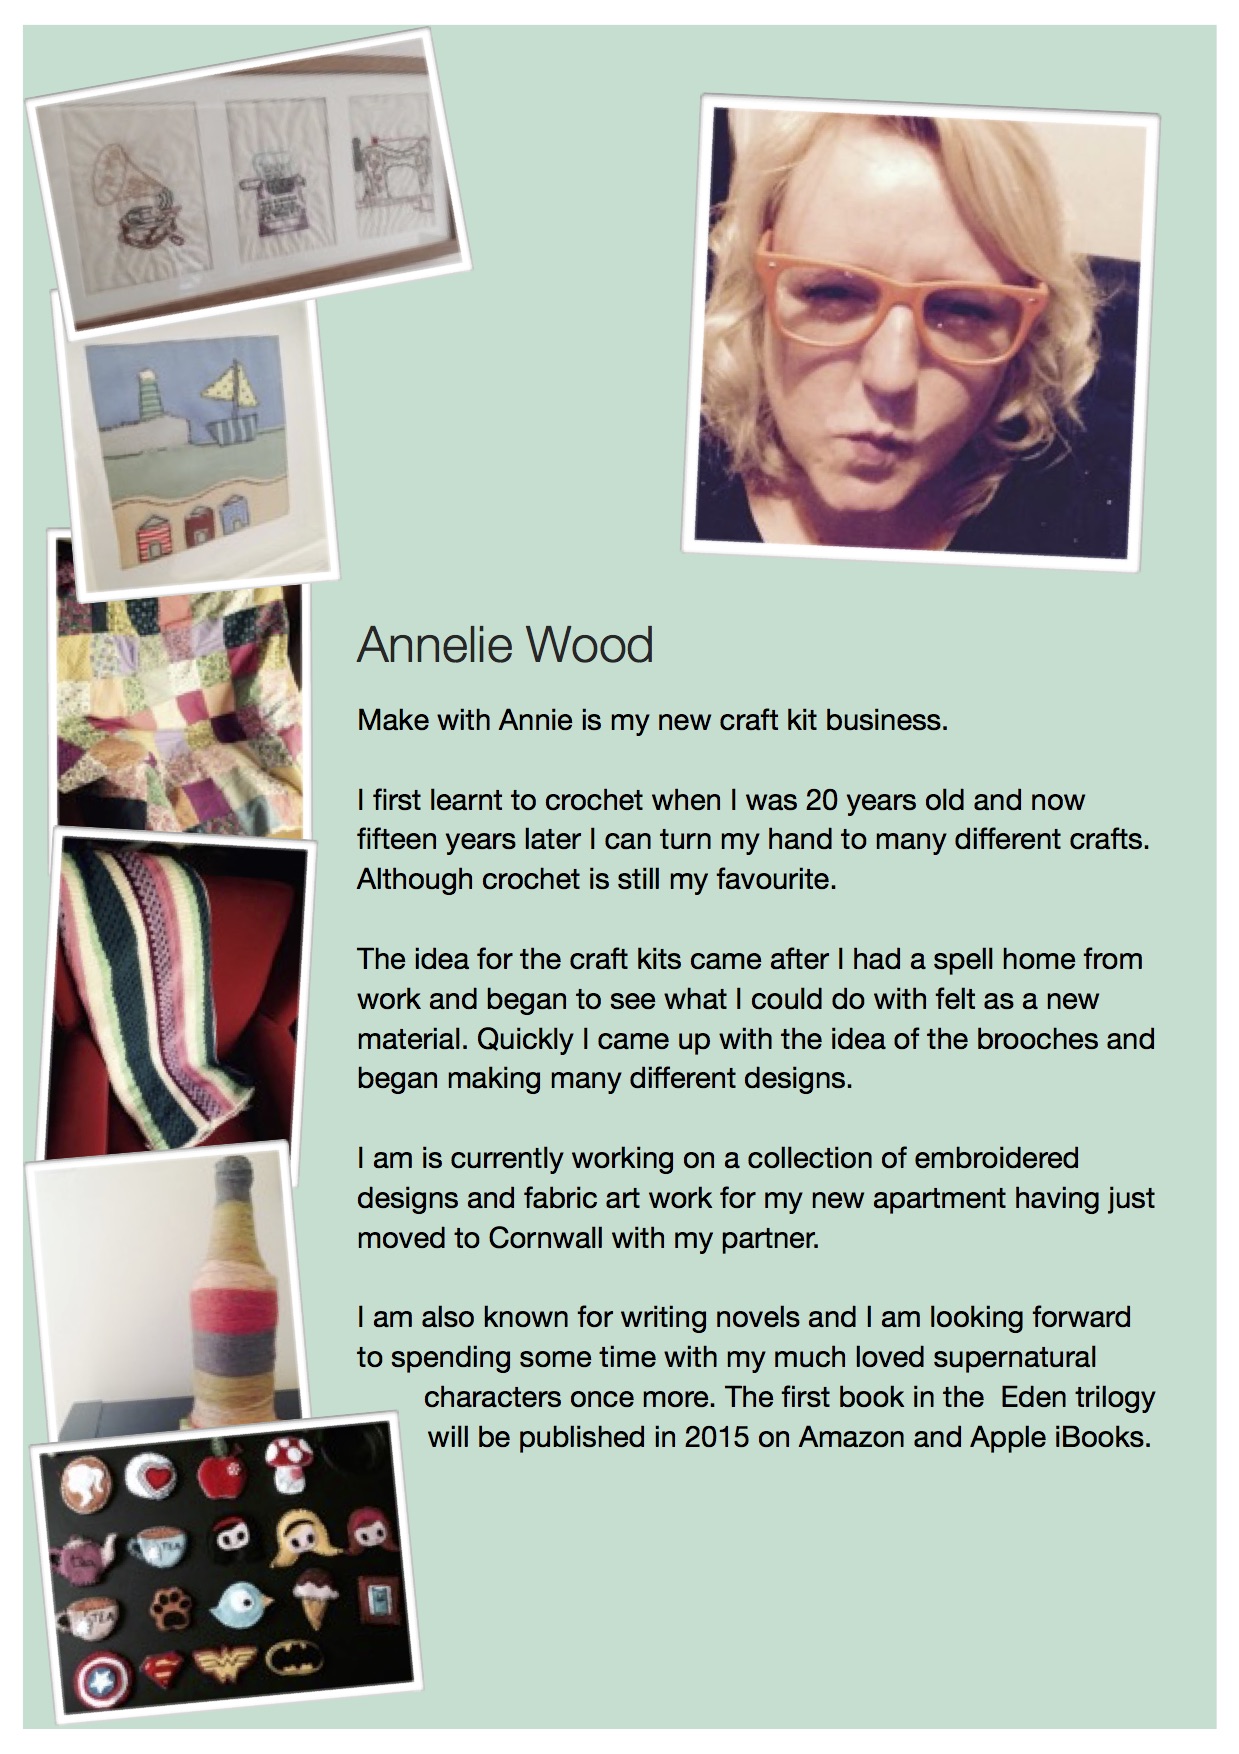
Make with Annie, is my own range of craft kits, where i give you everything you would need to make a quirky and cute felt brooch!


Whatever your currently craft is, or if your completely lacking a craft, then maybe 2016 is the year for you to learn something knew!

Selling Craft Products at Markets

A craft market day always starts early for a crafter. While its dark outside and the rest of your family sleeps, you’re getting ready and packing your wares ready to see what the day will bring.
Each crafter approaches working a craft market differently, but if you’ve never done one before here are my top tips to help you.

Packing your things at home

Its always best to try and pack everything the night before your heading out to a craft market, this might mean just gathering your pieces of jewellery or it might involve a much bigger manovering of products. Either way i would always suggest that you make sure your have everything your need for the following day and get it all in a nice position ready to take out to the car the following morning.
I am lucky enough that most of my craft products fit inside my holiday suitcase, which makes transportation nice and easy, but thats just because my Make with Annie craft kits and brooches are really small items.
FullSizeRender 3
Apart from your products there are other things you need to make sure is all ready;

  • Float – make sure that you have a nice float ready to take with you, full of change. I sell most of my products for round figures (£5, £15, £8) which means that I make sure I have lots of five pound notes and pound coins
  • Table cloth – your display table will always look so much nicer if you cover it with a table cloth. I use an old cream single bed sheet that I picked up from a charity shop and some fabric to cover my table to make it in keeping with the Make with Annie theme I have on my social media and online shop.
  • Decorations – Do you want to draw more attention to your stall with something decorative? Many jewellers have bust to display necklaces, or perhaps you sell headgear and perhaps you could use a polystyrene head to show off your products.
  • Signs – Its advisable to have a sign to show customers who you are, it can be ready made from a printing company or it can be hand made. I made my own sign by cutting out the Make with Annie letters from some fabric and appliquéing it to a piece of cream cotton. Other stall holders use bunting.
  • Pricing – ensuring that your items are clearly priced means the customers can see what your are asking for a product and decide if thats something that can afford before they ask you. Make sure you have clear price labels that are easy to read and see.
  • Display – Your display depends on what products your are selling. Some people like to have shelves to give the stall a sense of height, or a board to show off some art work. Have a think about what your selling and how you want to display it, and we will look at this further later on.
  • Business cards – so important, as sometimes people love what your doing but don’t need or want to buy it that day, but if they have a way to connect to your Facebook or website in the future then this could lead to sales further down the line.
  • Note books – I have two note books with me at all markets. One is used to write down any sales, so that i can keep an eye on stock and finances and the other is for notes, ideas, emails, and commissioned work!
  • Thermos Flask – teas and coffees can add up over a day, so invest in a large thermos and fill it to the brim to save some pennies.

Arriving at the market

I always like to arrive at the market or fair nice and early. Most markets if they start at 10am will open their doors at 8am for traders to get in and start setting up their stall. When your arrive for your first market the host will usual be looking out for any newcomers and be there ready to guide you as to what you are doing and point you in the right direction. If they supply the tables they will often have already decided who as which table, and if your bringing your own they will know where they want you to set up.

Setting out your stall

It’s always advisable to have your stall layout arranged before you get to your first craft fair, but be prepared to have to change it depending on the space you’re given. So have a few adaptable ideas and plans in mind.
When I reached my first market I hadn’t thought about it and I was in a centre position which meant that my stall needed to be accessible from two sides, which was something I have never considered. I can assure you that after that first day I spent a little time coming up with plans.
Below is an example of how I plan out my stall in a notebook that I take with me to the markets.
FullSizeRender 4
I also take photos of every single set up I do, so that I can always reference back to them, as often things change and your thinking oh what did i do that time at so and so.

Get to know the other stall holders

Have a cup of tea before the customers start to arrive and a chat with your neighbours. Have a look at what the stalls around you are selling and network, swap business cards and make friends.
I have only been working craft markets since since October 2015, thats just four months ago, but have made some brilliant friends through this work. And not only that, but its great to have someone to watch your stall when you need to pop for a ‘comfort break’!

Greeting customers

The market opens and the customers start to trickle through the doors (or race through them we all hope) and your stood or sat? Whats the best way to greet them? You need to find your own way and soon your will slip into something that forms your own technique, but be alert. If the market is deadly quiet (raining January days!!) then its nice to have something to do to use the time your their wisely, or to be chatting to your neighbour, but once a customer comes into the building or stands at your stall, greet them. Stop what your doing and smile and say hello, ask them about their day, or the weather, tell them something about the product they are looking at.
I have a friend – Sew Watt – who greets all her customers with a smile and tells them that all their products are made from recycled skateboards! This immediately draws people to take a second look at what it is she had created, and often leads to a sale due to the uniqueness of the product. So think if you have something like this that you can work into your patter.
Some people say you should always be stood, but this can get exhausting, and if like me you have a disability then its not always practical, so don’t worry about that. If you are sat make sure all your attention is on the customer, judge to see if they are a chatter or would rather be left alone and take the conversation where it goes. The other day I had a ten minute chat with a lady who is learning to crochet about techniques, and even though she didn’t buy anything from me that day, she will remember that I was polite and kind and nice to talk to – and she will remember my products!!

Selling your products

Everyone has a different sales patter and its up to you to find your own, and keep trying different things to see what works. Perhaps you have a unique item that you can use like my friend I mentioned above. Or perhaps your a little shyer and would rather just chat with the customer, (this is my preferred method) I like to try and engage the customer in a short conversation, if they are amenable to this.
Here is a concise but handy little do and don’t list of things to remember when it comes to selling:

  • Don’t be pushy – engage the customer with some conversation but don’t start pushing your products on them.
  • Don’t be critical about your products – if a customer says something nice about your product, be gracious and just say ‘oh thank you very much, thats so kind of you to say’, then perhaps tell them more about the product, and not ‘Oh really, thats not my favourite’ or ‘Well I just brought it along and thought someone would buy it’.
  • Smile – no one wants to talk to a grumpy crafter 🙂
  • Don’t gossip about other crafters or customers in front of customers – this looks negative and nasty
  • Dress up – I’m not talking full on fancy dress, but if you sell vintage clothes or homewares then dress in your best vintage outfit.

Time to go home

Take your time when packing your products away, the neater you pack them away the easier it is to get them out again. Sometimes if your working more than once market a weekend or doing a few days in a row, you need your things to stay packed away overnight and wont have time to get everything out and sort through it before your heading off to your next market. So make sure that you take a little extra time to pack your things away carefully and to make sure you haven’t left anything. Its also respectful to clear away any rubbish your have and place it in the bin and to clear away any extra tables or chairs you may have borrowed back to where you found them.

Accounts

If you are a good craft market seller you will go home and immediately enter your outgoings and incomings for the market you have just done in your bookkeeping accounts! This is probably the one bit of advice I wish i had been given when I started, as I had no idea how much I was spending or how much profit I had made until christmas and then was so disappointed that it was not as much as I had thought!
We spend so easily and forget the small amounts, like the bacon butty we had when we first arrived at the market! Or the six cups of tea we bought! These are all eating into our profits!
So get a spreadsheet or a notebook and start making note of this after each market and keep on top of escalating outgoings taking away from your profit.

Useful Links

How to sell at Craft Fairs – create.net
15 Tips to increase your craft show sales – indiefixx.com
How to sell in person – Folksy.com
Happy Crafting!

Clay Bowls – February Craft Along

Welcome to the February Craft Along!
Getting your hands dirty is always fun and this week I am going to show you how to make your very own air dry clay bowls.
Air dry clay can be used for many projects, if you just search on Pinterest you will see thousands of ideas and inspirations for things to make. So once you have had a go at making these lovely bowls have a look at some other ideas and use up your clay to make creative items for your home.
(I’m making coasters next out of my left over clay!)
So here are some things that you are going to need in order to make your very own clay bowls.

  • Air Dry Clay (I prefer to use the white or neutral coloured clays but you can use the terracotta if you prefer)
  • A Rolling Pin
  • Cutting tools (I just use a normal cutlery knife, a butter knife would be brilliant)
  • A Bowl (pick a bowl that you want to use as a mould for your clay one)
  • Cotton fabric

IMG_5401

Step one – Your work area

Wherever you are on undertaking your clay work, ensure that your space is fully protected from the clay. It is easy to clean if you do accidentally get it on your dining table but I would make sure that you have covered it with a cloth.
I use a plastic chopping board, although it does have a tendency to move about during rolling!!

Step Two – Lay out your mould

You can use any size of shape bowl you wish, but I would suggest breakfast bowl or smaller would be best. I use these small little plastic Ice Cream bowls we have, which are a brilliant little size for a first project.


Once you have chosen your bowl size place it in your workspace, upside down and cover it with a piece of cotton. The cotton stops your clay from sticking to your mould during your creation or the drying out process.  – I used some pillow cases I picked up from a charity shop (3 for £1) and just cut them up to the size I needed.
The reason I create the bowls over the top of your mould is that it is much easier to remove, and you can ensure that should you wish to have imprinted design on your clay it will not get damaged by laying it inside the mould.

Step Three – The Clay

IMG_5405
NOTE: Air dry clay starts to dry the second the air hits it, so make sure that you keep handy an air tight container and the wrapping the clay came in, so that you can reseal the clay.
First you need to cut off a small section of the clay. As the clay starts to dry so quickly, it is always best to work with small pieces. Once you have cut off the section you wish, make sure that the rest of your clay is wrapped back up in the wrapper and placed inside an air tight container.
IMG_5406
Roll the clay around in your hands to form a ball and to combine the clay, then start rolling it out. Don’t worry about it being an exact shape at this point. Once you have the clay rolled to about 5mm you can lay over some lace or net curtain fabric or anything else you want, if you want to make an imprint onto the clay. Then continue rolling until the clay is about 2 to 3mm in thickness.
IMG_5407
Now you are going to start laying it over your mould.
I like to tear my pieces of clay up to give more texture to the bowl, your don’t have to do this and can lay it on the mould as a whole piece.


You will probably need to repeat the rolling and laying over the mould process with a few more pieces of clay until your bowl is entirely covered in clay. In order to attach one piece of clay to another I always dab a little water on each section of clay with my finger and then gently press one into the other.
Keep layering your clay over the mould until the whole mould is covered and your are happy with the look.

Step Four – Finishing your Bowl

You need to make sure that the clay is all securely attached to one another, so place a piece of cotton or your lace/net over the bowl and with your hands press down over the edges gently but firmly to ensure its secure.
If, like me, you have so overlap onto the table then your can cut it off or leave it to add to the design of your bowl.
IMG_5420
If you want to cut it off use your cutting tool to gently cut around the top of the bowl as seen in the picture.


Then you can very carefully turn your bowl around and smooth the top edge of the bowl with a little water and your finger just to give it a smoother finish.

Step Five – Leave to dry

This is the long part, you just need to put your bowl, still on its mould,  into a warm space and leave it to dry. Depending on the thickness of your clay it can take a week to fully dry. But the best way to check is to touch it and if it still feels wet or damp then it needs longer. One way to assist with the speed of drying is to take your bowl out of the mould after a day or two, and then turn it over each day to allow the air to get to different areas of the bowl.


Step Six – Decorating

I used Watercolour paints to decorate my bowl, but you can use poster paints or anything you want. The Decoration is entirely up to you.


Then once my paint was dry I just used some children PVA glue to glaze it over the top.
There you have it. Your very own Air Dry Clay Bowl.
 

Inspiration?

Screen Shot 2016-01-31 at 14.31.55
Check out this Pinterest Board I’ve put together to give you some inspiration

Crafting and Your Local Library

In Lincolnshire in 2015 the local council decided to close down many of the smaller local libraries in the county, which has now meant that many people living in rural locations no longer have access to a library.
I haven’t lived in Lincolnshire for a few years now, but I have watched as this case has gone to court twice in an attempt by a group of gallant supporters to save the libraries. Ultimately the local government won and now it is the communities who are suffering.
I now live in Cornwall, and here we are facing the very same issues. So one of the first things I did when we moved here was to join the library, and I get my regular reading books from them.
What I had forgotten about was the vast array of community things that the library undertakes. Not only do I need to go to them for my recycling bins, but I can talk to them about a variety of local council issues, bus passes, council tax payments, information about the local area, these employees are a wealth of local and county wide knowledge and the best bit is that if they don’t know they find out for you.
But one thing I had completely forgotten about, until last Friday, was the huge range of non fiction books that are available from your local library. In our small library in Redruth we have sections on all manner of non fiction topics, but there are no less than five shelves of craft books, from drawing to home interiors and two more just for dress making and sewing.
So last Friday I went and picked up seven books that looked fascinating, ranging from different crochet stitches for my current crochet project to a brilliant book about what to do with things that you might have thought of as junk. And if like me you love browsing through craft magazines and reading about new ways of doing things, and coming up with inspired ideas for your next craft project, having seven craft books to read through was the nicest afternoon, for me.
IMG_0134
Your local library will also enable you to request books that are in other branches. All you need to do is hop online and search for a topic, book title or an author and that brings up a list for you to work from. You then select to request the book and once its arrived in your local branch you get an email to tell you.
Remember if in doubt ask the employees in the library for assistance and they will be more than happy to help.
The figures that were reported in one of the reasons for closing down the local libraries in Lincolnshire was based on the number of actual books that are borrowed from the libraries. Which is low, of course it is, with the invention of the internet you can get all you need there, and their is a decline in people reading for pleasure as our lives get busier and busier.
But how much did you spend on the last book or magazine you bought? For me I spent at least £4.99 on a magazine each month, and before I moved I would buy kindle books for about £2 or £3 a time, and I would hardly think anything of it. At the library, the books are free!! You might have to pay a small fee for reserving a book or if you don’t return your books on time, but its free to borrow books.
So if you have a library local to you, try it out, see what they have. The books might be old fashioned, but they will still have an amazing wealth of ideas inside them. If we support our libraries then maybe we can preserve them for others.
library 1
 

Find your local Library

Marketing Your Product

This week Make with Annie was featured in Prima Magazine. Prima Magazine is a national publication which has a readership of around 263,893 (this is taken from the sales for the first half of 2014). Which means that my product has now reached a quarter of a million people and that is more than I would ever reach through social media at this point in my business.

Prima 2

The Feature is seen on page 139 of the February 2016t issue


As you can imagine I am overjoyed with the feature and even after only a few days I have made four sales and gained hundreds of views, and new follows on my Etsy shop and Facebook page.
You may be wondering how I managed to get my products featured in such a well known magazine, and I am going to show you just how I did it.
IMG_4767

Make with Annie Felt Brooch Craft Kit


Back in September 2015 I started my craft business Make with Annie, creating felt brooch kits for young and old alike to make their own brooches and have fun too. I love crafting and I thought how great would a kit be for others to have a go at making felt brooches. Once I had created my kits, and worked on my packaging I set up my etsy shop and social media pages and then I sat down and created a press release.
It was the first time I had ever attempted such a thing, so I googled it and one of the key things I found on all the different sites was this;

  • Who are you
  • What are you doing
  • Why should they be interested
  • When are you doing it
  • Where can they find more information

These are really basic but you can find lots more on the different sites which I will add at the end of the article.
Once you start thinking about the answers to these questions you are starting to build your press release.
I’m going to answer them on behalf of Buster the Cat, CEO of Meow (you may remember him from an earlier post on his business logo), to show you what kind of information you want to think about putting in.

  • Who: Meow! is a new small craft business making handmade bow ties for cats and dogs
  • What are you doing: We are designing and creating bespoke bow ties for the animals in your life
  • Why should they be interested: Not only do the bowties make your animal look stylish and cool they are also functioning as a collar for you to add their ID tags
  • When are you doing it: Meow! is launching its online store on Saturday 9th January 2016 at 9am
  • Where can they find more information: Links to the website, etsy store, Facebook page, instagram, twitter etc…….

Now you have your outline its time to start making it stand out.
You want to make sure that your press release matches your business and your products, so if your making and selling handbags, make sure that the theme reflects this. If you google Press Release, you will see lots of images of wordy documents, and that is fine. This is what is expected of a press release and if thats your style then go for it. But don’t be afraid to make your press release stand out, be colourful and bright, add lots of pictures of your products and designs and it can be more than one page if you want it to be.
Here is a sample of the press release for Make with Annie and for Meow!;

Press Release

Make with Annie Press Release


Press Release P2

Make with Annie Press Release P2


Meow! Press Release

Meow! Sample Press Release


You can see that I have added extra pictures of craft products I make as well as a picture of myself from my Etsy store and my business logo. I have tried to ensure that I caught the eye of the person opening the attachment.
Buster has created an informative but yet fun looking press release for Mewo! in the style of a newsletter.
Play around with your press release but make sure that it shows the reader who you are as a business.
Once you have your press release and your pleased with it, you need to find as many different publications as you can to send it to. Make sure that the publications are relevant, for example if you make bow ties for cats and dogs you would do well to send it to animal lover magazines, but perhaps not to tool buying magazines. You do need to send it to a lot of different people, I sent mine out to over fifty different publications, bloggers and writers and so far have only been featured in Prima Magazine, because your product might not be what they are looking for, or they might miss your email believing it to be spam, but you just never know what might come from it.
Give it a go! But one thing to remember is that if you do get a little success to ensure that you make the most of it. Since the feature has been published I have thanked the magazine publicly through my Instagram, Facebook and twitter account, I have shared my own posts on social media and tried to use the momentum to carry the feature through to my etsy shop and convert it into a sale. It takes some time to market your product, but if you want to make your business and products a success then you have to put that time in, as nothing happens all by itself
Links to useful resources:

Crochet Blankets: the January Craft-Along

Over the next twelve months we are going to start a crafting journey together and each month will cover a different theme.
To kick off the new year we are starting with Crochet Blankets, the perfect task to not only keep you occupied on dark nights but also keeps you warm while to make them.
I first learned to crochet when I was seventeen years old. My mother taught me a basic granny square pattern and then left me alone with a bag of bits of wool and I made my first granny square crochet blanket. I remember laying out the hundreds of squares on the floor and arranging them in a pattern before i sewed them together. It was the first time I hand crafted anything. And I donated this blanket to Oxfam. Since that first blanket I must have crochet at least thirty more blankets. Some still using the simple granny square technique, others in stripes or large squares, circles and zig zag stripes to name just a few. And of all the blankets I have made I have only kept one (because my boyfriend likes it) I don’t need to have lots of blankets in my house to keep me warm I make them because its relaxing.
Throughout this article I am going to explore some of the crochet techniques I have used in the past and show you some of my favourite crocheters Facebook or Instagram pages, and there are some fabulous people working out there to inspire you.
Before we get started if you are not familiar with crochet this is a great link to help teach yourself the basics.

Granny Squares

granny square large

Granny Square


This is the pattern that most people will learn first, its worked in the round and contains a simple repetition of three trbl and a slst, (thats abbreviation of treble and slip stitch). The pattern can be worked in one colour or you can change colour as many times as you wish and the size of your granny square is totally up to you. For a gage though, if I was making a blanket from squares crochet in 5 rounds I would need at least a 12 x 12 blanket to make it a large size which is 124 squares.
The Blogger Little Tin Bird has a wonderful pattern on her Blog which not only can you use to teach yourself crochet, but she has created a wonderfully bright a sunny granny square blanket.
Once you have master the granny square you can do large granny squares or use different stitches to create different looks for your granny squares. One popular technique is to create block colour by using single trbl stitches, as seen in Attic 24‘s work.
granny square

Single trbl granny square


Once you have made your square you can attach them to one another either by sewing them with a wool darning needle and using an invisible stitch or by crocheting them together with single crochet stitches. Either way works, its just about which look you prefer. The crochet method leaves a raised bump on one side of your blanket, this is the method I use for all my blankets and I think it adds to the charm.

Stripes

straight stripe

Straight stitch row blanket sample


Crochet in rows is even more simple than creating squares, once you know how to create a trbl stitch you can create this blanket. You start by creating many chains on your hook. For a gage if you were using a six 4mm hook and some basic double knit wool you might want to do anywhere between 150 and 200 ch. Each ch will become a stitch and bear in mind when deciding on how wide to create your blanket that the size become slightly wider as you work due to the tension you work with.
Once you have created your chains you then start working your trbl stitches into each of the ch, starting with the third ch from the hook, work along the row of stitches and when you get to your las stitch, make a little ch and turn your work.
Attic 24 has some inspired crochet ideas, and one project she has undertaken on her blog is to create a crochet-along blog, where she has made a striped blanked using the granny square technique in stripes. Her blog and Instagram account it a treasure of yummyness.

Zig Zag/Ripple

Buster

The cat wrapped up in a zig zag blanket


Once you have mastered making blankets in rows rather than squares you can have a look at zig zag patterns.
There are two different way to create a zig zag blanket, but bother are created with rows rather than squares. You can either create the blanket using the straight stitch or the granny stitch. There are patterns for both and both look equally effective.The fabulous The Stitching Mommy has a wonderful pattern on her blog for creating the straight stitch blanket, but if you want to make the granny version, then check out this brilliant and easy to follow you tube video from Bella Coco below.
[youtube https://www.youtube.com/watch?v=8k5evNaAjSE]

Crochet Blanket Inspiration

Some of my favourite places to go to gather inspiration for new projects is other crafters websites or their Instagram accounts. So here is a list and links to a few of my favourite;

  • Lazy Daisy Jones : check out the fabulous Pic and Mix blanket.
  • redagape_styleanddesign: Creator Mandy O’Sullivan has some wonderful creations.
  • Poppyandbliss: Michelle Robinson delights with her Instagram account
  • Crochetgirl99: One of my first crochet crushes on Instagram
  • Attic 24: Not only does she make the most wonderful sunshine blankets but the wreaths are pieces of artwork.
  • Mollie Makes: For more inspiration on what to do with those granny squares.

 
Enjoy making your blankets and share your designs with us on our Facebook page.

Happy New Crafty Year!

It’s 2016 and I am sure that we have all given ourselves things that we would like to achieve in the next 12 months. Here at The Craft Collective we are no different and there are many things afoot, exciting times lie ahead.
But to kick us of I have created a-craft-a-month, where each month we will learn about a different technique and create a new project.
So that readers who want to join in with our craft-along can know in advance what craft we are doing, here is a month by month list of the craft and what equipment you will need to join in.

A Craft a Month: Craft-Along

January – Crochet Blanket

Traditional-Granny-Square-Blanket-Free-Crochet-Pattern

  • Selection of wool, double knit works well
  • Crochet hook – size 3.5 or 4mm

February – Air Dry Clay Bowls

diy-stamped-clay-bowls-new

  • Air Dry Clay
  • Rolling pin
  • Cutting tools (knife)
  • Bowl mould
  • Cotton fabric to roll out clay and mould over

March – Easter Cross Stitch Cards

easter cross stitch

  • Cross stitch fabric
  • Cross stitch needle
  • Cross stitch hoop
  • Embroidery threads

April – Embroidery by hand

IMG_4537

  • Plain cotton fabric
  • Embroidery threads
  • Embroidery needle
  • Embroidery hoop (size can be dependant on the size of your project)

May – Paper Flowers

paper flowers

  • Paper, tissue paper, coloured paper, thin papers, newspaper, magazine paper
  • Wire for stems
  • Scissors
  • Glue

June – Bunting

grey cream bunting

  • Remnants of fabric (old cotton bed covers can work well)
  • Bias binding (At least 2.5m)
  • Pins
  • Scissors and pinking shears
  • Sewing machine

July – Picnic Napkins

picnic

  • Cotton patterned fabric of your choice
  • Ribbon or bias binding
  • Sissors
  • Pins
  • Sewing machine (this project can be done by hand)

August – Fabric Art

IMG_4533

  • Fabric remnants
  • Needle and threads
  • Picture frame

September – Cushion Covers

cushion covers

  • Cotton fabric of your choice
  • Zipper to fit 18″ cushion
  • 18″ cushion insert

October – Reindeer

IMG_0102

  • Fabric of your choice
  • Buttons for eyes
  • Buttons to attach legs
  • Felt for ears or interfacing

November – Crochet Mini Stocking Garland

full_Crochet-Christmas-Miniature-Stockings

  • Wool, double knits works
  • Crochet hook

December – Christmas Felted Fairies

felt fairies

  • Single felting needle
  • Felting wool
  • Felting mat
  • Pipe cleaners

 
So, if we are all set lets begin by talking about crochet blankets. Perfect for cosy winter evenings.